juicing for weight loss recipes pdf

Juicing is a popular method for weight loss, offering a nutrient-rich way to detoxify and boost metabolism. It provides essential vitamins and minerals, supporting overall health and digestion while promoting a slimmer physique. A well-structured juicing plan, often outlined in guides like a juicing for weight loss PDF, helps individuals kickstart their journey with delicious and effective recipes. Incorporating fresh fruits and vegetables into juices can enhance energy levels and reduce cravings, making it easier to maintain a healthy diet. Consistency and the right balance of ingredients are key to achieving sustainable weight loss through juicing.

1.1 What is Juicing and Its Role in Weight Loss

Juicing involves extracting the liquid from fruits, vegetables, and herbs, creating a concentrated source of nutrients. It plays a significant role in weight loss by aiding digestion, reducing hunger, and providing essential vitamins and minerals. Juicing helps detoxify the body, boost metabolism, and increase energy levels, making it easier to maintain a healthy diet. While not a standalone solution, it complements weight loss efforts by offering a low-calorie, nutrient-dense alternative to traditional meals. Many turn to juicing for its convenience and ability to promote a sense of fullness, supporting overall weight management goals. A well-crafted juicing plan, often detailed in a juicing for weight loss PDF guide, can enhance these benefits.

1.2 Benefits of Incorporating Juicing into Your Diet

Incorporating juicing into your diet offers numerous benefits, particularly for weight loss. It boosts metabolism, helping your body burn fat more efficiently, and provides concentrated nutrients that reduce hunger and cravings. Juicing also promotes detoxification, flushing out toxins that can hinder weight loss. By consuming a variety of fruits and vegetables, you ensure a broad intake of vitamins and minerals, preventing deficiencies. Additionally, juices can increase energy levels, making it easier to stay active. A well-crafted juicing plan, like those found in a juicing for weight loss PDF guide, can help you achieve these benefits consistently, supporting your overall weight loss journey.

Popular Juicing Recipes for Weight Loss

Discover refreshing and nutrient-packed recipes designed to support weight loss. From green detox juices to beetroot and citrus-based blends, these recipes accelerate metabolism and fat burning naturally.

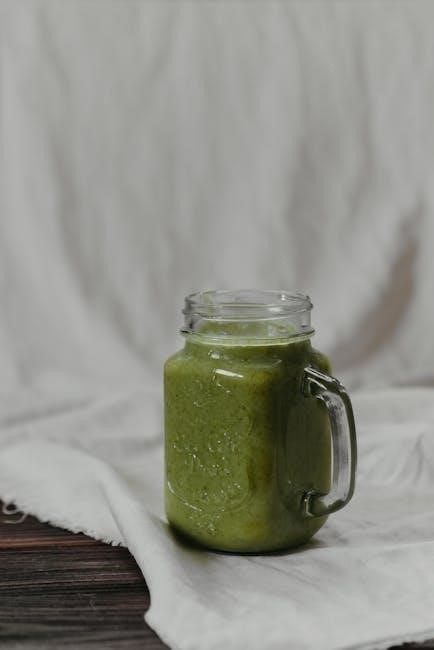
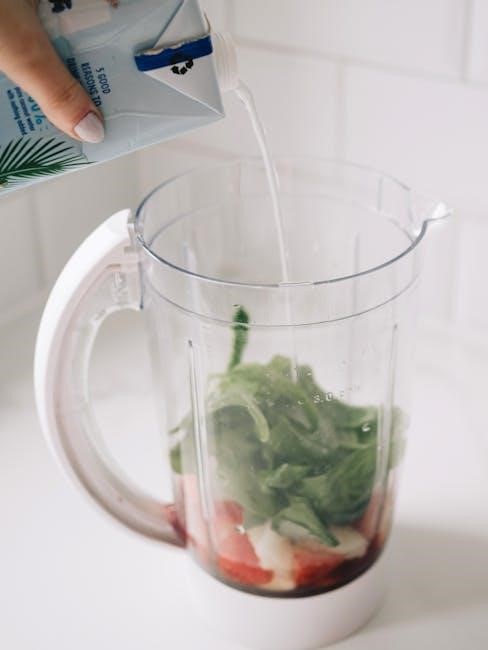
2.1 Green Detox Juice Recipe

This refreshing Green Detox Juice is packed with nutrients to kickstart your weight loss journey. Combine 2 cups spinach, 1 cup kale, 1 cucumber, 1 celery stalk, 1 green apple, 1/2 lemon, and 1-inch ginger. Blend until smooth, then strain for a clearer texture. This recipe boosts metabolism, aids digestion, and detoxifies the body. Spinach and kale provide iron and antioxidants, while cucumber and celery add hydration. The green apple and lemon enhance flavor, and ginger stimulates fat burning. Perfect for a morning boost or afternoon snack, this juice supports your weight loss goals naturally and deliciously. For best results, use fresh, organic ingredients and drink immediately.

2.2 Beetroot and Carrot Juice for Fat Burning

This vibrant Beetroot and Carrot Juice is a powerful fat-burning elixir. Blend 2 medium beetroots, 3 carrots, 1 orange, 1/2 red apple, and 1-inch turmeric root. The beetroots detoxify the liver and boost metabolism, while carrots provide fiber and vitamins that aid in fat breakdown. The orange adds a refreshing zing and enhances nutrient absorption. This juice not only accelerates weight loss but also improves digestion and energy levels; For optimal results, drink it in the morning or before a workout to maximize fat-burning potential. Use fresh, organic ingredients and enjoy immediately for the best taste and nutritional benefits.

2.3 Citrus-Based Juices for Enhanced Metabolism

Citrus-based juices are a refreshing way to kickstart metabolism and support weight loss. Combine 2 oranges, 1 grapefruit, 1 lemon, and a slice of fresh ginger for a zesty blend. Oranges and grapefruits are rich in vitamin C, which boosts metabolism and aids in fat oxidation. Lemon adds a detoxifying effect, while ginger enhances digestion and thermogenesis. This juice not only revitalizes the body but also helps reduce water retention and suppress appetite. For maximum benefit, drink it on an empty stomach in the morning or as a midday pick-me-up. Citrus juices are ideal for those seeking a natural energy and metabolism boost to complement their weight loss journey.

Tips for Effective Juicing

Effective juicing involves using fresh, organic ingredients, staying hydrated, and balancing nutrition. Incorporate leafy greens, fruits, and veggies while avoiding excessive sugar. Consistency and patience yield the best results.

3.1 Choosing the Right Ingredients for Weight Loss

Selecting the right ingredients is crucial for effective weight loss juicing. Focus on nutrient-dense vegetables like kale, spinach, and cucumbers, which are low in calories but rich in fiber and vitamins. Incorporate metabolism-boosting foods such as ginger, lemons, and green apples to enhance fat burning. Avoid overly sweet fruits like bananas and mangoes, opting instead for berries or citrus fruits. Adding a small amount of protein or healthy fats, like chia seeds or avocado, can increase satiety. Herbs like mint and parsley not only add flavor but also aid digestion. Ensure hydration by including water-rich ingredients like celery and cucumbers. Balance is key to creating juices that support weight loss while nourishing your body.

3.2 Best Times to Consume Juices for Maximum Effect

The timing of juice consumption plays a significant role in maximizing weight loss benefits. Start your day with a refreshing juice on an empty stomach to kickstart your metabolism. Drinking juices before workouts can provide energy and enhance performance. Mid-morning and mid-afternoon juices help stabilize blood sugar levels and prevent cravings. Opt for lighter, green-based juices in the evening to avoid overloading your digestive system before bed. Consistency in timing ensures your body efficiently processes nutrients, supporting your weight loss goals. Experiment with different schedules to find what works best for your lifestyle and metabolism, ensuring optimal results from your juicing routine.

3.3 Maintaining Consistency in Your Juicing Routine

Consistency is key to achieving lasting weight loss results through juicing. Aim to incorporate fresh juices into your daily routine, ideally at the same times each day, to develop a sustainable habit. Start with small, manageable goals, like juicing once daily, and gradually increase as your body adapts. Planning your recipes in advance and prepping ingredients can help maintain momentum. Tracking your progress and how your body responds to different juices will also keep you motivated. Remember, juicing is most effective when paired with a balanced diet and regular physical activity, ensuring a holistic approach to weight loss.

Common Mistakes to Avoid

Common mistakes include overconsumption of sugary juices and neglecting proper hydration and nutrition balance. Avoid these errors to maximize the effectiveness of your juicing routine for weight loss.

4.1 Overconsumption of Sugary Juices

Overconsumption of sugary juices is a common mistake that can hinder weight loss efforts. While juicing can be beneficial, relying on juices high in sugar from fruits can lead to excessive calorie intake and insulin spikes. This can slow down metabolism and fat burning, ultimately counteracting weight loss goals. To avoid this, focus on balancing juices with more vegetables than fruits and limit the use of high-sugar ingredients like tropical fruits. Incorporating leafy greens and low-sugar vegetables ensures a healthier juice without sacrificing flavor. Always check the nutritional content of your recipes to maintain a balanced and effective weight loss plan.

4.2 Neglecting Proper Hydration and Nutrition Balance

Neglecting proper hydration and nutrition balance is a common pitfall in juicing for weight loss. While juices can be nutritious, relying solely on them may lead to dehydration and nutrient deficiencies. Many juices lack sufficient fiber, protein, and healthy fats, which are essential for sustained energy and overall health. Additionally, some juices can be high in sugar, which may not satisfy thirst effectively. To avoid this, drink plenty of water alongside your juices and ensure your diet includes a variety of whole foods. Balancing your intake of fruits, vegetables, lean proteins, and whole grains will support a healthier and more sustainable weight loss journey.

The Importance of a Juicing for Weight Loss PDF Guide

A juicing for weight loss PDF guide provides structured recipes, expert tips, and meal plans. It helps users avoid common mistakes, ensuring a balanced and effective weight loss journey.

5.1 Structured Recipes and Plans for Success

A juicing for weight loss PDF guide offers detailed, easy-to-follow recipes and plans. These are crafted by experts to maximize fat burning, improve digestion, and maintain energy levels. Each recipe is balanced to ensure optimal nutrient intake, combining fruits, vegetables, and superfoods. The guide also provides meal prep ideas, helping users stay consistent. With a structured approach, individuals can avoid guesswork and focus on achieving their weight loss goals effectively. The plans are tailored to suit different lifestyles, ensuring that everyone can benefit from the transformative power of juicing.

5.2 Benefits of Following a Proven Guide

Following a proven juicing guide offers numerous benefits, including faster results and reduced guesswork. These guides provide expert-approved recipes tailored for weight loss, ensuring maximum nutrient absorption and fat burning. They help users avoid common mistakes like overconsumption of sugary juices or neglecting hydration. With a structured plan, individuals can maintain consistency, stay motivated, and track their progress. A proven guide also educates on balanced nutrition, helping users adopt healthier habits beyond juicing. By following a trusted guide, individuals can safely and effectively achieve their weight loss goals while enhancing overall well-being.

mcgann manual rocker recliner

The McGann Manual Rocker Recliner combines style and comfort, offering plush cushioning, a smooth reclining mechanism, and a design that blends modern aesthetics with cozy functionality.

Key Features of the McGann Manual Rocker Recliner

The McGann Manual Rocker Recliner boasts plush cushioning, a smooth reclining mechanism, and a durable build. It features pillow-top arms and excellent lumbar support, ensuring ultimate comfort.

2.1. Plush Cushioning and Comfort

The McGann Manual Rocker Recliner is renowned for its sumptuously thick cushioning, designed to provide exceptional comfort. The plush back cushion and pillow-top arms ensure a cozy experience, while the high-quality foam wrapped in low-melt fiber offers long-lasting support. This recliner is perfect for unwinding, with its cushioning maintaining shape and comfort over time. The combination of soft, breathable fabric and supportive padding makes it ideal for extended relaxation. Whether reading, watching TV, or napping, the McGann recliner delivers a luxurious feel, blending style with practical comfort for everyday use.

2.2. Smooth Rocking and Reclining Mechanism

The McGann Manual Rocker Recliner boasts a seamless rocking and reclining mechanism, offering a smooth transition between positions. With a simple manual lever, users can effortlessly shift from a gentle rocking motion to a fully reclined state. The mechanism allows for infinite reclining positions, catering to individual preferences for relaxation. Its gliding motion ensures a quiet and fluid experience, while the sturdy construction provides durability and stability. Designed for everyday use, the recliner’s smooth operation enhances comfort and flexibility, making it perfect for unwinding after a long day or enjoying a peaceful nap.

2.3. Durable Construction and Build Quality

The McGann Manual Rocker Recliner is built with high-quality materials and a robust construction, ensuring long-lasting durability. Its sturdy frame is crafted from solid wood or metal, providing stability and support. The recliner features high-performance faux leather and fabric blends, which are resistant to wear and tear. The cushions are made with low-melt fiber wrapped over high-density foam, offering consistent support and maintaining their shape over time. Customers praise its well-made design, which withstands regular use without compromising comfort. The durable construction ensures that the recliner remains a reliable and cozy addition to any home for years to come, delivering excellent value for money.

Design and Aesthetics

The McGann Manual Rocker Recliner blends modern and traditional styles, offering a sleek, fashion-forward design with clean lines and a casual yet sophisticated appearance for any home decor.

3.1. Modern Meets Comfort: The McGann’s Stylish Design

The McGann Manual Rocker Recliner seamlessly blends modern aesthetics with exceptional comfort, featuring sleek lines and a contemporary silhouette that complements any living space. Its design strikes a perfect balance between style and functionality, ensuring it stands out as a focal point while providing a cozy retreat. The recliner’s fashion-forward approach, including jumbo stitching and a robust frame, adds a touch of sophistication. Whether placed in a minimalist room or a traditionally decorated area, the McGann’s stylish design effortlessly adapts, making it a versatile addition to any home decor. Its appealing look enhances the ambiance while inviting relaxation and comfort.

3.2. Color Options and Upholstery Choices

The McGann Manual Rocker Recliner offers a wide range of color options and upholstery choices to suit various interior styles; Available in neutral tones, rich fabrics, and sleek faux leather finishes, it allows users to customize their recliner to match their home decor. The upholstery options include high-quality faux leather and soft fabric blends, ensuring both durability and aesthetic appeal. Whether you prefer a classic look or a modern vibe, the McGann recliner provides versatility in design. Its diverse color palette ensures it can seamlessly integrate into any room, from traditional to contemporary settings, making it a practical and stylish choice for homeowners seeking personalized comfort and style.

Comfort and Ergonomics

The McGann Manual Rocker Recliner emphasizes ergonomic design, with lumbar support and pillow-top arms, ensuring exceptional comfort and proper spinal alignment for extended relaxation.

4.1. Lumbar Support and Ergonomic Features

The McGann Manual Rocker Recliner excels in ergonomic design, offering exceptional lumbar support that ensures proper spinal alignment and reduces strain during extended use. Its thoughtful construction includes a sturdy backrest with cushioning that cradles the natural curve of the lower back, promoting relaxation and comfort. The recliner’s smooth reclining mechanism allows users to adjust their position effortlessly, further enhancing the ergonomic experience. With a focus on long-lasting support, this chair is designed to accommodate a variety of body types and preferences, making it an ideal choice for those seeking both comfort and health-conscious seating solutions.

4.2. Pillow-Top Arms for Enhanced Comfort

The McGann Manual Rocker Recliner features pillow-top arms designed to elevate comfort, offering a soft and cushioned surface for resting elbows and arms. These arms provide additional support, reducing strain during relaxation. The plush cushioning ensures a cozy experience, complementing the recliner’s overall ergonomic design. Constructed with durable materials, the pillow-top arms maintain their shape over time, delivering consistent comfort. Their padded design aligns with the recliner’s modern aesthetic, blending seamlessly into its stylish appearance. This feature is particularly appreciated for long periods of sitting, making it an excellent choice for unwinding after a busy day. The pillow-top arms enhance the recliner’s appeal, ensuring a luxurious seating experience.

Materials and Durability

Crafted with high-quality faux leather and durable fabric blends, the McGann Manual Rocker Recliner ensures long-lasting comfort and resilience, built to withstand regular use while maintaining its stylish appearance.

5.1. High-Quality Faux Leather and Fabric Blends

The McGann Manual Rocker Recliner features premium faux leather and fabric blends, offering a luxurious feel without compromising on durability. These materials are carefully selected to provide both a soft, comfortable surface and a robust structure that resists wear and tear. The faux leather is designed to mimic the look and texture of genuine leather, while the fabric adds a warm, inviting touch. This combination ensures the recliner remains stylish and comfortable over time, making it a practical choice for everyday use. The blend of materials also allows for easy maintenance, keeping the recliner looking its best for years to come.

5.2. Foam and Fiber Cushioning for Long-Lasting Support

The McGann Manual Rocker Recliner incorporates high-quality foam and fiber cushioning to provide exceptional comfort and long-lasting support. The cushions are crafted with a layer of low-melt fiber wrapped over dense foam, ensuring durability and consistent cushioning over time. This design helps maintain the recliner’s shape and provides reliable support for users. The foam core offers firmness, while the fiber overlay adds a soft, plush feel, creating a balanced seating experience. This combination not only enhances comfort but also extends the lifespan of the cushions, making the McGann recliner a practical and cozy choice for daily use. The materials work together to ensure optimal support and relaxation.

Ease of Assembly and Use

The McGann Manual Rocker Recliner is designed for simplicity, making it easy to assemble and use. Customers often praise its straightforward assembly process, which requires minimal tools and effort. The manual lever operation ensures intuitive control, allowing users to smoothly transition between rocking and reclining positions. Lightweight and easy to maneuver, this recliner is perfect for anyone seeking hassle-free comfort; Its user-friendly design makes it accessible to all, regardless of technical skill or physical strength. With clear instructions and a focus on functionality, the McGann recliner provides a seamless experience from setup to relaxation. Its ease of use enhances the overall comfort and convenience it offers.

Value for Money and Customer Satisfaction

The McGann Manual Rocker Recliner is widely regarded as an excellent value for money, offering high-quality features at an affordable price. Customers consistently express satisfaction with its durability, comfort, and stylish design. Many reviewers highlight the recliner’s ability to deliver premium comfort without the premium cost, making it a budget-friendly choice for those seeking relaxation. Positive feedback often mentions its attractive appearance, ease of assembly, and reliable performance. With its blend of affordability and quality, the McGann recliner is a top choice for consumers looking to enhance their home comfort without overspending. Its reputation for customer satisfaction underscores its position as a standout option in its price range.

Maintenance and Care Tips

To keep the McGann Manual Rocker Recliner in pristine condition, regular maintenance is essential. Start by vacuuming the surface to remove dust and debris. For stained areas, use a mild detergent mixed with water, gently wiping with a soft cloth. Avoid harsh chemicals or abrasive cleaners, as they may damage the faux leather or fabric. Regularly dust the recliner with a dry cloth to prevent dust buildup. For faux leather, consider conditioning it periodically to maintain its suppleness. Avoid placing the recliner in direct sunlight, as it may cause fading. Fluff cushions occasionally to retain their shape. By following these care tips, you can extend the lifespan and preserve the appearance of your McGann rocker recliner.

Comparison with Other Recliners in Its Class

The McGann Manual Rocker Recliner stands out for its exceptional balance of comfort, durability, and style. Compared to other recliners in its class, it offers superior lumbar support and a smoother reclining mechanism. While many competitors focus solely on aesthetics or affordability, the McGann excels in both areas, providing a modern design with a cozy, inviting feel. Its faux leather and fabric blends are often praised for their realism and comfort, outshining some higher-priced models. Additionally, the McGann’s ease of assembly and affordable price point make it a strong contender in the market. Customers consistently rank it higher for value and overall satisfaction compared to similar recliners.

Customization Options for Personalization

The McGann Manual Rocker Recliner offers several customization options to suit individual preferences. Customers can choose from a variety of color options for the upholstery, ensuring the recliner matches their home decor. The recliner is available in both faux leather and fabric blends, allowing users to select the material that best fits their lifestyle and aesthetic. Additionally, some models may offer further personalization, such as stitching details or accent colors, to enhance the recliner’s visual appeal. These customization options make the McGann Manual Rocker Recliner a versatile choice for those seeking a personalized seating solution that aligns with their unique style and needs.

The McGann Manual Rocker Recliner is an excellent choice for those seeking a blend of comfort, style, and durability. Its plush cushioning, smooth reclining mechanism, and modern design make it a standout option for relaxation. With high-quality materials and a focus on ergonomic support, it offers long-lasting comfort and value for money. The recliner’s ease of assembly and customization options further enhance its appeal. Customers consistently praise its appearance, comfort, and overall performance. Whether for unwinding after a long day or adding a stylish touch to your living space, the McGann Manual Rocker Recliner is a practical and satisfying investment for any home.

jockey bra size guide

Discover the Jockey Bra Size Guide‚ designed to help you find the perfect fit for ultimate comfort and support․ With a range of sizes and styles‚ Jockey ensures a customized fit for every body type‚ making it easier to navigate bra sizing and enjoy all-day comfort․

Understanding the Importance of Proper Bra Fit

A proper-fitting bra is essential for comfort‚ confidence‚ and overall well-being․ Ill-fitting bras can lead to discomfort‚ poor posture‚ and even health issues like back pain or skin irritation․ A well-fitting bra provides adequate support‚ reducing strain on shoulders and back muscles while ensuring optimal breast health․ Proper fit also enhances appearance‚ allowing clothes to drape smoothly and creating a more balanced silhouette․ Jockey’s size guide helps individuals determine their ideal bra size‚ ensuring a comfortable and supportive fit tailored to their body․ By prioritizing proper fit‚ women can enjoy better physical and mental well-being‚ making it a crucial aspect of daily life․

Overview of Jockey’s Bra Sizing System

Jockey’s bra sizing system is designed to offer a wide range of sizes to accommodate diverse body types․ The system typically includes band sizes from 32 to 44 inches and cup sizes from A to E‚ ensuring a comprehensive fit for various breast sizes and shapes․ This structured approach allows for accurate measurements and size matching‚ providing both comfort and support․ Jockey’s system also incorporates sister sizing‚ offering flexibility for individuals whose measurements fall between standard sizes․ By combining band and cup measurements‚ Jockey’s sizing system ensures a personalized fit‚ catering to different needs and preferences․ This detailed approach makes it easier for women to find a bra that feels tailor-made for them‚ enhancing their overall wearing experience․

Jockey Standard Bra Size Chart

The Jockey Standard Bra Size Chart offers a detailed guide with band sizes from 32 to 44 and cup sizes from A to E‚ ensuring a precise fit for various body types and preferences․

Band and Cup Size Measurements

Accurate band and cup measurements are crucial for determining your Jockey bra size․ To measure your band size‚ wrap a tape around your ribcage‚ under your bust‚ ensuring it’s snug and level․ Exhale and record the measurement; round up if odd․ For cup size‚ measure around the fullest part of your bust while wearing a non-padded bra․ Subtract the band measurement from this to find your cup size․ Use Jockey’s size chart to match these measurements to your ideal fit‚ ensuring comfort and support․ Regular remeasurements are recommended due to body changes‚ such as weight fluctuations or pregnancy‚ which can alter your size․

How to Use the Jockey Bra Size Chart

To use the Jockey Bra Size Chart‚ start by measuring your underbust (band size) and overbust (bust size)․ Wrap a tape snugly around your ribcage for the band measurement and around the fullest part of your bust for the bust measurement․ Match these measurements to the chart‚ which typically includes band sizes from 32 to 44 and cup sizes from A to E․ The chart correlates your measurements to a specific band and cup combination․ Remember‚ this is a general guide‚ and fit may vary by style․ If your size falls between two options‚ consider trying sister sizes for a better fit․ Regularly update your measurements to ensure optimal comfort and support․

Understanding Sister Sizes in Jockey Bras

Sister sizes in Jockey bras offer flexibility when your usual size doesn’t provide the perfect fit․ They maintain the same cup volume by adjusting the band and cup sizes․ For example‚ if a 34C feels too tight in the band‚ try a 36B‚ which offers a looser band but the same cup volume․ Conversely‚ if the band is too loose‚ opt for a 32D․ This system is especially useful when standard sizes don’t fit perfectly or between styles․ Jockey provides charts that include sister sizes‚ making it easier to experiment․ By adjusting band and cup combinations‚ you can achieve a more comfortable and secure fit without compromising support or coverage․

Jockey Plus-Size Bra Size Chart

Jockey’s Plus-Size Bra Size Chart caters to women needing larger band and cup sizes‚ typically from 38 to 48 bands and D to G cups․ It ensures enhanced support and comfort for fuller figures with features like wider bands and reinforced straps; Measure underbust and overbust to find your size‚ as fit may vary by style․ This chart is a tailored guide to help you find the perfect fit for optimal support and confidence․

How Plus-Size Charts Differ from Standard Charts

Jockey’s plus-size bra charts differ from standard charts by offering larger band sizes‚ typically starting at 38 and extending to 48 or more‚ and cup sizes ranging from D to G or beyond․ These charts are designed to accommodate fuller figures with enhanced support features such as wider bands‚ stronger side panels‚ and reinforced straps․ While standard charts focus on smaller band and cup sizes‚ plus-size charts prioritize comfort and security for larger busts․ They also account for varying body shapes‚ ensuring a more tailored fit․ The extended size range and specialized design elements make plus-size charts a more comprehensive option for women needing extra support and coverage․

Features of Jockey Plus-Size Bras

Jockey plus-size bras are crafted with enhanced support and comfort in mind․ Key features include wider‚ adjustable straps and reinforced side panels for added stability․ They also often incorporate breathable‚ moisture-wicking fabrics to keep you cool throughout the day․ Additionally‚ these bras are designed with a focus on a secure fit‚ ensuring the band stays in place without digging․ Many styles offer full coverage cups to provide maximum support and minimize spillage․ These thoughtful details ensure that Jockey plus-size bras offer both functionality and comfort‚ catering specifically to the needs of fuller figures․ By combining practicality with style‚ Jockey delivers bras that empower confidence and ease of movement for all-day wear․

Factors Affecting Bra Fit

Body changes‚ such as weight fluctuations and hormonal shifts‚ can alter bra fit․ Additionally‚ different bra styles and activities impact how a bra fits and performs‚ requiring adjustments for optimal comfort and support․

Body Changes and Their Impact on Bra Size

Body changes significantly influence bra size and fit․ Weight fluctuations‚ pregnancy‚ and hormonal shifts during menstruation or menopause can cause breast size variations․ Muscle gain from exercise may also affect chest measurements‚ altering both band and cup sizes․ Regularly monitoring these changes ensures proper support and comfort․ Professional fittings are recommended during significant body transitions‚ such as pregnancy or weight loss/gain‚ to adjust bra sizes accurately․ Jockey’s flexible sizing options accommodate these changes‚ offering a range of styles to maintain optimal fit and comfort throughout life’s variations․

How Different Bra Styles Affect Fit

Different bra styles significantly impact fit and comfort․ Sports bras offer snug compression‚ ideal for active lifestyles‚ while T-shirt bras provide a seamless look under clothing․ Bralettes‚ often wire-free‚ allow for a relaxed fit‚ perfect for casual wear․ Full-coverage bras maximize support and modesty‚ whereas balconette bras create a lifted silhouette․ Plunge bras accommodate low-cut tops with their deep neckline․ Each style’s design‚ materials‚ and features influence how it fits‚ catering to specific needs․ For instance‚ sports bras prioritize support during motion‚ while full-coverage bras ensure security for fuller busts․ Understanding these differences helps in selecting a bra that aligns with your lifestyle and preferences for optimal comfort and support․

Measuring for Your Jockey Bra Size

Accurate measurements are key to finding your ideal Jockey bra size․ Measure your underbust snugly and your overbust at the fullest point for a perfect fit․

Tools and Tips for Accurate Measurements

Accurate measurements are essential for finding your perfect Jockey bra size․ Use a flexible dressmaker’s tape measure for reliability․ Wear a non-padded bra for the most precise results․ Measure your underbust by wrapping the tape snugly around your ribcage‚ directly under your bust‚ ensuring it’s level and not too tight․ For your overbust‚ measure around the fullest part of your breasts‚ keeping the tape parallel to the floor․ Stand straight with arms relaxed for accurate readings․ If your underbust measurement is odd‚ round up to the nearest even number․ These steps ensure a comfortable and supportive fit‚ helping you choose the right Jockey bra size effortlessly․

Step-by-Step Guide to Measuring Your Band and Cup Size

Measure your band size by wrapping a tape measure snugly around your ribcage‚ directly under your bust․ Ensure the tape is level and not too tight․ Exhale and note the measurement․ If it’s an odd number‚ round up to the nearest even number․ For your cup size‚ measure around the fullest part of your bust while wearing a non-padded bra․ Keep the tape parallel to the floor and your arms relaxed․ Subtract your band size from this measurement to determine your cup size․ Use Jockey’s size chart to match these measurements to your perfect fit‚ ensuring optimal comfort and support with every Jockey bra style․

Troubleshooting Common Fit Issues

Identify and resolve fit problems with Jockey bras․ Check if the band is snug‚ cups cover fully‚ and straps adjust properly․ Ensure optimal comfort and support always․

Identifying and Solving Band Fit Problems

Ensuring a proper band fit is essential for comfort and support․ The band should sit snugly around your ribcage without digging in or riding up․ If the band feels too tight‚ it can cause discomfort and restrict breathing․ On the other hand‚ a band that is too loose may lead to inadequate support and a lack of stability․ To address band fit issues‚ start by fastening the bra on the loosest hook․ You should be able to slide two fingers comfortably under the band․ If it’s too tight‚ consider a larger band size․ If it’s too loose‚ opt for a smaller size․ Additionally‚ ensure the band lies flat and level‚ both at the front and back․ If the band rides up‚ it may indicate the need for a different style or size․ Regularly checking the band fit ensures optimal support and prevents discomfort throughout the day․ By adjusting the band size or style‚ you can achieve a secure and comfortable fit tailored to your needs․

Ensuring Proper Cup Fit and Coverage

Achieving proper cup fit is crucial for both comfort and support․ The cups should fully encapsulate your breasts without any spillage or gapping․ Ensure your breasts are centered within the cups‚ and the underwire (if present) sits comfortably against your ribcage‚ following the natural crease of your breast․ If the cups gape‚ it may indicate a need for a smaller cup size․ Conversely‚ if the cups feel too tight or cause overflow‚ consider a larger size․ Adjust the straps to ensure the cups lie smoothly against your skin․ Proper cup fit ensures optimal support‚ prevents discomfort‚ and maintains a flattering appearance․ Regularly check the fit to accommodate any body changes and ensure continued comfort and confidence․

manual garage door parts diagram

This comprehensive guide provides an in-depth look at the components of a manual garage door system, helping users understand, maintain, and repair their garage doors effectively.

Overview of Manual Garage Door Systems

A manual garage door system operates without automation, relying on springs, cables, and pulleys to facilitate opening and closing. These systems are popular in regions with frequent power outages or for those preferring simplicity. They consist of a sturdy frame, sectional panels, and a counterbalance mechanism to ease manual operation. Understanding the interplay of components like torsion springs, hinges, and rollers is essential for smooth functionality. Regular maintenance is crucial to ensure safety and longevity. This overview provides a foundation for identifying and addressing common issues, enabling homeowners to troubleshoot and repair their manual garage doors effectively. It emphasizes the importance of a well-maintained system for reliable performance.

Importance of Understanding Garage Door Components

Understanding garage door components is vital for maintaining functionality, safety, and longevity. Knowing how each part interacts ensures proper operation and helps identify potential issues early. Familiarity with springs, cables, and hinges allows homeowners to address problems before they escalate, preventing accidents and costly repairs. A clear understanding also aids in selecting the right replacement parts and performing DIY fixes confidently. This knowledge empowers users to troubleshoot effectively, ensuring their garage door operates smoothly and securely. Regular inspections and timely interventions can extend the lifespan of the system, making it a crucial aspect of home maintenance. Awareness of components is key to overall system efficiency and safety.

Key Components of a Manual Garage Door

A manual garage door system includes essential parts like springs, cables, rollers, tracks, hinges, door panels, handles, locks, and the manual operator mechanism for smooth operation.

Springs: Torsion and Extension Springs

Torsion springs are mounted horizontally above the garage door and play a crucial role in counterbalancing the door’s weight, enabling smooth opening and closing. They are tightly wound and store significant energy, making them dangerous if they break. Extension springs, on the other hand, are located on either side of the door and stretch to lift the door. Both types are essential for the proper functioning of manual garage doors. Understanding their roles and differences is vital for maintenance and repairs. A parts diagram helps identify these springs, ensuring users can recognize and address issues promptly. Proper maintenance is key to extending their lifespan and ensuring safe operation.

Cables and Pulleys

Cables and pulleys are critical components of a manual garage door system, working in tandem with springs to lift and lower the door smoothly. The cables are securely attached to the bottom of the door and looped through pulleys, which redirect the force applied by the springs. Over time, cables can fray or snap due to wear and tear, while pulleys may become misaligned or corroded; A parts diagram is essential for identifying these components accurately. Regular inspection of cables and pulleys ensures safe and efficient door operation, preventing potential accidents caused by sudden malfunctions. Proper alignment and lubrication of pulleys can extend the lifespan of the entire system and maintain its functionality.

Rollers and Tracks

Rollers and tracks are essential components of a manual garage door system, enabling smooth and quiet operation. The rollers, attached to the door’s edges, glide along the tracks mounted on the wall and ceiling. Proper alignment of these parts is crucial for the door to function without jamming. Over time, rollers may wear out, and tracks can become dented or misaligned, causing the door to operate unevenly. A parts diagram helps identify these components for easy inspection and replacement. Regular lubrication of rollers and cleaning of tracks can prevent friction and extend their lifespan. Ensuring the tracks are securely fastened and free from debris is vital for smooth door movement and safety.

Hinges and Brackets

Hinges and brackets play a key role in the structural integrity and smooth operation of a manual garage door. Hinges connect the door panels, allowing them to flex as the door opens and closes. Brackets, such as track hangers and end bearing plates, secure the door’s hardware to the wall and ceiling. Properly installed hinges and brackets ensure the door moves smoothly and remains stable. Over time, hinges can loosen, and brackets may corrode or become misaligned. A parts diagram helps identify these components for inspection and replacement. Regular tightening of screws and lubrication of hinges can prevent wear and tear, ensuring the door operates safely and efficiently.

Door Panels and Sectional Construction

Door panels are the visible sections that make up the garage door, typically constructed from materials like steel, wood, or aluminum. These panels are connected through hinges, forming a sectional design that allows the door to move along the track system. Each panel is reinforced for strength and may feature insulation for energy efficiency. The sectional construction ensures that individual panels can be replaced if damaged, reducing repair costs. A parts diagram helps identify each panel and its position, making it easier to inspect and replace them. Proper alignment and secure connections between panels are crucial for smooth operation and durability. Regular maintenance ensures the panels remain secure and functional.

Handles and Locks

Handles and locks are essential components for operating and securing a manual garage door. Handles, typically located on the exterior or interior of the door, provide a grip for opening and closing. They come in various styles, such as latch handles or lift handles, and are often made of durable materials like metal or plastic. Locks, on the other hand, ensure the door remains closed and secure. Common types include manual locks, sliding bolt locks, or padlocks. These components are vital for both functionality and security. A parts diagram helps identify handle and lock mechanisms, making it easier to repair or replace them when necessary. Proper installation and maintenance ensure smooth operation and long-lasting performance.

The Manual Operator Mechanism

The manual operator mechanism is the system that enables the garage door to be opened and closed without an automatic opener. It typically consists of a handle or latch connected to a series of gears and levers that translate manual force into motion. This mechanism is linked to the door’s spring system, allowing the door to be lifted or lowered smoothly. The mechanism often includes a locking bar or sliding bolt to secure the door when closed. Proper alignment and lubrication of these components are crucial for effortless operation. A parts diagram helps identify and maintain each part of the manual operator mechanism, ensuring it functions reliably over time; Regular inspection and maintenance are key to preventing wear and tear.

Common Problems Identified Using a Parts Diagram

Using a parts diagram helps identify common issues such as worn parts, misalignment, or damage, enabling targeted repairs and preventing major breakdowns effectively.

Broken or Worn-Out Springs

Broken or worn-out springs are among the most common issues in manual garage door systems. Torsion springs, located above the door, and extension springs, found on the sides, play a critical role in counterbalancing the door’s weight. Over time, these springs can corrode, stretch, or snap due to heavy use or environmental factors. A broken spring can cause the door to open unevenly or refuse to open at all. Identifying worn-out springs early is essential, as they can lead to further damage or safety hazards. Regular inspection and lubrication can help extend their lifespan, but replacement is often necessary when damage is severe.

Frayed or Snapped Cables

Frayed or snapped cables are another common issue in manual garage door systems. These cables are essential for lifting the door, as they connect the springs to the bottom brackets. Over time, cables can become frayed due to wear and tear or corrode from environmental factors. Snapped cables can cause the door to droop or become unbalanced, making it difficult to open or close. Identifying frayed cables early can prevent complete breakage. Regular lubrication and inspection of cable condition are key to maintaining their functionality. Replacing damaged cables promptly is crucial to ensure smooth operation and safety, as snapped cables can lead to further system damage or accidents.

Misaligned or Damaged Rollers

Misaligned or damaged rollers are a frequent issue in manual garage door systems. Rollers, which are attached to the door and move along the track, play a crucial role in the smooth operation of the door. When rollers become misaligned, they can cause the door to catch or stick, making it difficult to open or close. Damaged rollers may also result in noisy operation or uneven movement. Regular inspection of the rollers and tracks is essential to identify signs of wear or misalignment. Lubricating the rollers and realigning them can often resolve the issue. If damaged beyond repair, replacing the rollers is necessary to ensure proper door functionality and safety.

Loose or Corroded Hinges

Loose or corroded hinges are common issues that can affect the stability and smooth operation of a manual garage door. Hinges connect the door panels and allow them to fold and move along the track. Over time, hinges can become loose due to repeated use, causing the door to sag or misalign. Corrosion, often caused by moisture or humidity, can weaken the hinges, leading to breakage. Regular inspection and tightening of hinge screws can prevent loosening. Applying rust-resistant coatings or replacing corroded hinges ensures long-term durability. Addressing hinge problems early prevents further damage to other components, ensuring the door operates safely and efficiently.

Dented or Warped Door Panels

Dented or warped door panels are common issues that can affect the structural integrity and appearance of a manual garage door. These problems often result from accidental impacts, extreme weather conditions, or prolonged wear and tear. Dents can create uneven surfaces, while warping may cause the panels to misalign with the track or hinges. This misalignment can lead to difficulty in opening or closing the door smoothly. If left unaddressed, warped panels may also put additional strain on other components, such as hinges and cables. Using a parts diagram can help identify damaged panels, allowing for timely repairs or replacements to restore proper functionality and aesthetics. Regular inspections are essential to prevent minor dents from becoming major issues.

Maintenance and Troubleshooting

Regular inspections and lubrication of moving parts ensure smooth operation. Troubleshooting involves identifying worn or damaged components using a parts diagram for timely repairs and replacements.

Regular Inspection of Garage Door Parts

Regular inspection is crucial for maintaining the functionality and longevity of manual garage door systems. Start by examining the springs, cables, and pulleys for signs of wear or damage. Check the rollers and tracks for proper alignment and lubrication. Inspect hinges and brackets for tightness and corrosion. Look for dents or warping in door panels and ensure handles and locks are secure. Referencing a parts diagram helps in identifying each component and its condition. This proactive approach prevents minor issues from escalating into costly repairs and ensures safe, smooth operation of the garage door.

DIY Troubleshooting Using the Diagram

A manual garage door parts diagram serves as a roadmap for DIY troubleshooting, allowing homeowners to identify and address issues efficiently. By referencing the diagram, users can pinpoint components like springs, cables, or rollers that may be causing malfunctions. This visual guide helps diagnose common problems, such as broken springs or frayed cables, and provides clarity on how parts interact. With the diagram, individuals can systematically inspect and test components, ensuring repairs are done correctly and safely. Regular use of the diagram not only resolves current issues but also helps prevent future breakdowns, empowering users to maintain their garage door effectively.

Using the Manual Garage Door Parts Diagram for Repairs

The diagram provides a clear visual guide for identifying and replacing damaged parts, ensuring accurate repairs and extending the door’s lifespan with proper component replacement.

Step-by-Step Guide to Identifying and Replacing Parts

Start by consulting the parts diagram to locate the problematic component. Cross-reference the diagram with the symptoms to pinpoint the issue accurately. Gather the necessary tools and replacement parts. If the door is automatic, disconnect it from power for safety. Remove the faulty part by following the diagram’s disassembly guide, taking care not to damage surrounding components. Install the new part, ensuring it is securely fastened. Reassemble the door step-by-step, referring to the diagram for proper alignment. Test the door’s operation to confirm the repair. Dispose of the old part responsibly and keep a record of the replacement for future reference.

Understanding and maintaining a manual garage door system is essential for ensuring its longevity and functionality. By using a detailed parts diagram, homeowners can identify and address issues before they escalate. Regular inspections and proper repairs prevent accidents and costly replacements. Familiarizing yourself with the components and their roles empowers you to handle minor fixes confidently. This guide has provided a comprehensive overview, from identifying problems to step-by-step solutions. Remember, consistent maintenance is key to a smooth-operating garage door. Keep your manual and diagram handy for future reference, ensuring your garage door remains reliable, safe, and efficient for years to come.

printable service dog certificate pdf

Printable service dog certificates offer a convenient solution for verifying a dog’s status, ensuring ADA compliance and public access. Available in PDF format, these certificates provide professional, customizable templates designed for easy downloading and printing at home. They typically include essential details such as the dog’s name, owner information, and issuance date, serving as official documentation for service animals.

Overview of Service Dog Certification

Service dog certification is essential for verifying a dog’s legitimacy as a trained service animal. Printable certificates in PDF format provide a convenient way to obtain official documentation. They typically include the dog’s name, owner details, and issuance date, serving as proof of training and compliance. These certificates are widely recognized and facilitate public access for individuals with disabilities, ensuring their rights under laws like the ADA are upheld effectively.

Benefits of Using Printable Certificates

Printable service dog certificates offer numerous advantages, including instant accessibility and cost-effectiveness. They eliminate the need for lengthy processes, allowing owners to download and print them immediately. Available in PDF format, these certificates are easily customizable, ensuring they meet individual needs. They also provide a professional appearance, which adds credibility. Additionally, printable certificates streamline the verification process, making it easier for service dog owners to demonstrate compliance in various settings, enhancing convenience and efficiency overall.

Legal Requirements for Service Dog Certificates

Service dog certificates must comply with ADA standards, ensuring proper documentation and verification. They validate a dog’s training and purpose, supporting public access rights legally and effectively.

Understanding ADA Compliance

ADA compliance ensures service dogs are legally recognized, focusing on their training for specific tasks. While certifications aren’t mandatory, printable PDF certificates provide clear documentation, helping owners demonstrate compliance. These certificates typically include the dog’s name, owner details, and issuance date, aligning with ADA standards for public access and accommodations. They serve as a reliable way to validate a service dog’s status without requiring extensive paperwork.

Key Information Required on the Certificate

A printable service dog certificate must include essential details such as the dog’s name, owner’s name, certificate number, and issuance date. Additionally, it should specify the dog’s role as a service animal and may include the issuing organization’s information. These elements ensure the certificate’s legitimacy and help in verifying the dog’s status in public settings. The streamlined PDF format allows for easy customization and professional presentation of these required details.

Design and Template Options

Professional service dog certificate templates are available in clean, modern designs. These PDF templates are easily downloadable and customizable, offering a polished look for official documentation.

Professional Service Dog Certificate Templates

Professional service dog certificate templates are designed to meet high standards, ensuring authenticity and clarity. These templates typically include fields for the dog’s name, owner details, and issuance date, making them both functional and official. They often feature a clean, modern design with organizational logos, enhancing their credibility. Available in PDF format, these templates are easily customizable and printable, providing a streamlined process for those who need official documentation for their service animals.

Customizable Fields for Personalization

Printable service dog certificate PDFs often include customizable fields to personalize the document. These fields may include the dog’s name, owner’s name, certificate number, and issuance date. Some templates also allow for the addition of a photo or organizational logo, enhancing authenticity. Customizable fields ensure the certificate meets individual needs while maintaining a professional appearance. This feature is particularly useful for organizations and individuals requiring specific details to validate a service dog’s status effectively.

Obtaining a Printable Service Dog Certificate

Acquiring a printable service dog certificate is straightforward, with instant downloads available in formats like PDF. Customize fields, add photos, and print professionally designed templates effortlessly at home.

Steps to Download and Print

To obtain a printable service dog certificate, visit a reputable website offering PDF templates. Select the desired design, fill in customizable fields with your dog’s details, and download the file. Ensure your printer is set to high quality and use standard paper for professional results. Print both the front and back if required, then laminate for durability. This process ensures quick, efficient, and official certification for your service dog.

Verification and Authentication Processes

Printable service dog certificates often include unique serial numbers and issuance dates for verification. Organizations may cross-reference these details with their databases to confirm authenticity. Some providers offer online validation tools, allowing businesses or individuals to verify a certificate’s legitimacy. Ensure the certificate is issued by a reputable organization to maintain credibility and compliance with legal standards;

Popular Providers of Service Dog Certificates

Reputable organizations specialize in providing professional, customizable service dog certificate templates in PDF format, offering both free and paid options for easy download and printing.

Reputable Organizations Offering PDF Certificates

Several trusted organizations provide professional, downloadable PDF service dog certificates, ensuring authenticity and compliance. These certificates are customizable, featuring official designs and essential details like owner and dog information. Reputable providers offer both free and paid options, catering to different needs. Their templates are legally recognized, making them suitable for public access and verification purposes. These organizations prioritize accessibility and convenience, allowing users to print high-quality certificates instantly.

Free vs. Paid Options for Download

Free printable service dog certificates are widely available online, offering basic designs suitable for immediate use. Paid options, however, provide enhanced features like professional templates, customizable fields, and official authentication. While free versions meet essential needs, paid certificates often include additional benefits such as legal verification, making them a worthwhile investment for those requiring official documentation. Both options cater to different user preferences and requirements, ensuring accessibility for all.

Advantages of PDF Format

The PDF format offers universal compatibility, ensuring certificates can be opened on any device. It maintains consistent formatting, making it ideal for professional and legal documentation needs.

Convenience and Accessibility

Printable service dog certificates in PDF format offer unparalleled convenience, allowing instant downloads and easy access from any device. This eliminates the need for mailing or in-person pickup, saving time and effort. The universal compatibility of PDFs ensures they can be opened and printed on any computer, smartphone, or tablet. Customizable templates further enhance accessibility, enabling users to personalize certificates according to specific needs, making the process streamlined and hassle-free.

Streamlined Printing and Sharing

Printable service dog certificates in PDF format simplify the printing process, allowing users to produce professional documents at home. The format ensures consistent quality across all devices, eliminating formatting issues. Additionally, PDFs are easily shareable via email or cloud storage, making it convenient to provide proof of certification to landlords, airlines, or businesses. This seamless sharing ensures quick verification, reducing delays and enhancing accessibility for service dog owners.

Registration and Documentation

Registration and proper documentation are crucial for verifying a service dog’s legitimacy. Printable certificates streamline the process, ensuring all necessary details are included for validation and public access.

Importance of Proper Registration

Proper registration of a service dog is crucial for verifying its legitimacy and ensuring compliance with legal requirements. Printable certificates serve as official proof of a dog’s status, helping owners avoid legal complications. They typically include essential details like the dog’s name, owner’s name, and certificate number, ensuring authenticity. Properly registered service dogs gain seamless access to public spaces, housing, and transportation, making registration an indispensable step for service animal owners.

Additional Documentation for Public Access

Beyond a printable service dog certificate, additional documentation may be required for public access. This includes a service animal ID card, vaccination records, and handler identification. Some establishments may request proof of training or a doctor’s note. Having these documents readily available ensures smooth access to public spaces, transportation, and accommodations, minimizing potential confrontations and verifying the dog’s legitimacy as a trained service animal.

Common Misconceptions

Many believe service dog certification is mandatory, but the ADA only requires proof of training, not official certification. Others confuse therapy and service dogs, misunderstanding their roles.

Clarifying Myths About Service Dog Certification

A common misconception is that service dogs must have official certification. The ADA does not require certification; proof of training suffices. Many confuse therapy dogs with service dogs, as therapy dogs are not protected under the same laws. Printable service dog certificates help validate a dog’s status but are not a legal substitute for proper training verification. Understanding these distinctions is crucial for accurate public awareness and compliance.

Understanding the Difference Between Therapy and Service Dogs

Service dogs are trained to perform specific tasks for individuals with disabilities, protected under the ADA. Therapy dogs provide emotional support but are not legally recognized as service animals. While service dogs require no certification, their training must align with their owner’s needs. Therapy dogs, though beneficial, lack the same public access rights. Clarifying this distinction helps ensure proper understanding and respect for service animals’ roles and legal protections.

Printable service dog certificates provide a practical, efficient way to verify a dog’s status, ensuring compliance and accessibility. They are a valuable resource for service dog owners, offering convenience, professionalism, and legal assurance in various settings.

Final Thoughts on Printable Service Dog Certificates

Printable service dog certificates have become a popular and practical solution for individuals requiring official documentation. They offer convenience, professional design, and cost-effectiveness, making them accessible to many. However, it’s crucial to ensure their authenticity by obtaining them from reputable sources. Misuse of these certificates can lead to legal issues, so verifying their legitimacy is essential. By choosing reliable providers, users can confidently utilize these documents for public access and other necessary purposes.

Encouragement to Use Reliable Sources

Using reliable sources for printable service dog certificates is essential to ensure authenticity and avoid legal complications. Reputable organizations provide properly formatted, ADA-compliant documents that are widely accepted. Avoiding fake or unverified certificates helps maintain trust and integrity in the system. Always opt for well-known providers to guarantee your certificate is legitimate and recognized in public spaces. This step ensures your service dog’s documentation is valid and respected wherever you go.

what is a valve guide

A valve guide is a cylindrical component that guides valve stems, ensuring proper alignment and reducing wear in internal combustion engines, crucial for optimal performance and longevity.

1.1 Definition of a Valve Guide

A valve guide is a cylindrical component in an internal combustion engine that serves as a bushing for the valve stem, ensuring proper alignment and movement. Typically made from materials like bronze or iron, it is press-fit into the engine block or cylinder head, providing a smooth surface for the valve stem to reciprocate. The valve guide plays a critical role in maintaining the engine’s efficiency by preventing excessive wear on the valve stem and ensuring precise operation. Over time, wear on the valve guide can lead to issues such as oil consumption and reduced engine performance, emphasizing its importance in overall engine functionality and longevity.

1.2 Importance of Valve Guides in Engines

Valve guides play a crucial role in ensuring engine performance, efficiency, and longevity. They minimize wear on valve stems and engine blocks, prevent oil leakage, and maintain proper valve operation. By guiding the valves accurately, they reduce mechanical stress and heat buildup, which can lead to premature wear. This ensures consistent engine performance and fuel efficiency. Additionally, valve guides help prevent contamination of engine oil by preventing debris from entering the valve area. Their proper function is essential for maintaining optimal engine health, reducing emissions, and preventing costly repairs. Over time, worn guides can lead to poor engine performance, making regular inspection and maintenance critical for sustained reliability.

Functions of a Valve Guide

Valve guides ensure proper valve stem alignment, reduce wear, and provide a smooth surface for valve operation, maintaining engine efficiency and preventing damage to critical components.

2.1 Providing a Liner Between Engine Block and Valve Stems

Valve guides serve as a critical interface, creating a smooth, wear-resistant path for valve stems to move within the engine block. By acting as a liner, they prevent direct contact between the valve stem and the engine block, which could lead to excessive wear and potential engine damage. The guide ensures proper alignment and reduces friction, allowing the valve to operate smoothly; This function is essential for maintaining engine efficiency and preventing premature wear on both the valve and engine block. Properly installed guides also help maintain consistent valve operation, which is vital for optimal engine performance and longevity. Regular inspection and maintenance are recommended to ensure the guides remain in good condition.

2.2 Maintaining Valve Orientation and Alignment

Valve guides play a critical role in maintaining the proper orientation and alignment of valve stems within the engine. By providing a precise, consistent path for the valves to move in, they prevent wobbling or misalignment, which could lead to excessive wear on engine components. Proper alignment ensures that the valves seat correctly, maintaining compression and efficient combustion. Misaligned valves can result in reduced performance, increased fuel consumption, and potential engine damage. The guide’s stability ensures smooth operation, even at high engine speeds, making it essential for durability and optimal engine function. Regular inspection and maintenance of valve guides are vital to uphold this critical alignment and overall engine health.

Structure and Design of Valve Guides

Valve guides are cylindrical components made from durable materials like bronze or cast iron, designed to ensure precise fitment and withstand engine heat and stress effectively.

3.1 Materials Used for Valve Guides

Valve guides are typically made from durable materials like bronze, cast iron, or specialized alloys. Bronze is preferred for racing engines due to its excellent wear resistance and heat dissipation properties. Cast iron is commonly used in standard applications because it offers strength and cost-effectiveness. Some manufacturers also use advanced materials, such as chrome-plated steel, for enhanced durability. The choice of material depends on the engine’s intended use, with high-performance engines often requiring more robust options. Proper material selection ensures optimal performance, longevity, and minimal maintenance.

3.2 Manufacturing Process of Valve Guides

The manufacturing process of valve guides involves precise machining to ensure durability and performance. Guides are typically made from materials like bronze or cast iron, which are cast into cylindrical shapes. The raw materials are first cast using methods like sand casting or investment casting. Once cast, the guides undergo machining processes such as turning, drilling, and reaming to achieve the exact dimensions. Heat treatment may be applied to enhance strength and wear resistance. Finally, the guides are ground and honed to achieve a smooth surface finish, ensuring proper fitment and minimal friction. Quality control checks are performed to guarantee precision and reliability.

Types of Valve Guides

Valve guides are categorized into bronze, iron, and specialized racing types, each offering unique durability, strength, and performance tailored to specific engine requirements and operating conditions.

4.1 Bronze Valve Guides

Bronze valve guides are a popular choice for high-performance engines, particularly in racing applications. Made from durable bronze alloys, they offer excellent wear resistance and heat dissipation. Bronze guides are preferred in racing due to their ability to withstand high temperatures and maintain proper valve stem alignment. They provide a balance of strength and lubricity, reducing friction and ensuring smooth engine operation. Their durability makes them a cost-effective option for engines subjected to extreme conditions. Bronze valve guides are often recommended for applications where reliability and performance are critical, as they minimize the risk of premature wear and failure. This makes them ideal for racing engines and other high-stress environments.

4.2 Iron Valve Guides

Iron valve guides are a popular choice due to their durability and cost-effectiveness. They are commonly used in road engines and offer excellent resistance to wear and tear. Unlike bronze guides, iron guides are harder and more rigid, making them suitable for high-stress applications. However, they can be heavier and may not dissipate heat as efficiently as bronze. Iron guides are often preferred for their strength and affordability, making them a practical option for everyday vehicles. They are also easier to machine and install, which reduces production costs. While they may not be ideal for racing engines, iron valve guides remain a reliable choice for standard engine operations, providing long-term performance and reliability. Their simplicity and effectiveness make them a staple in many modern engines.

4.3 Specialized Valve Guides for Racing Engines

Specialized valve guides for racing engines are designed to withstand extreme conditions, such as high RPMs and intense heat. These guides are typically made from high-performance materials like bronze or advanced alloys, offering superior durability and resistance to wear. Unlike standard guides, racing-specific ones often feature precision machining and coatings to reduce friction and improve thermal stability. They are engineered to maintain precise valve alignment under stress, ensuring optimal engine performance. Racing valve guides also minimize oil consumption and prevent premature wear, which is critical in competitive environments. Their design reflects the need for reliability and peak efficiency, making them a vital component in high-performance engines.

Installation and Machining of Valve Guides

Installation involves precise machining to ensure accurate alignment and fitment, requiring skilled expertise to maintain engine performance and durability, with proper tools and techniques essential for success.

5.1 Machining Processes for Valve Guide Installation

Machining processes for valve guide installation involve precise techniques to ensure proper fitment and alignment. The process typically starts with inspecting the engine block to identify worn or damaged guides. A piloted reamer is often used to enlarge the guide bore to the correct diameter, ensuring accuracy. Once the bore is prepared, the new valve guide is pressed or installed using specialized tools. The guide must be perfectly aligned to prevent valve stem wear. Finally, the area is inspected to ensure proper seating and alignment. Using high-quality materials, like Meehanite, ensures durability. Proper machining is critical for optimal engine performance and longevity.

5.2 Tips for Selecting the Right Machine Shop

When selecting a machine shop for valve guide installation, prioritize experience with similar engine types and valve guide machining. Ask for references or examples of their previous work to ensure quality. Check for certifications or affiliations with professional organizations, which indicate adherence to industry standards. Observing the shop’s cleanliness and organization can also reflect their attention to detail. Clear communication about the process, materials, and timelines is crucial. Additionally, inquire about their approach to precision measurements and tooling to ensure accuracy. A reputable shop will provide transparent pricing and warranties, giving you confidence in their workmanship and reliability.

Maintenance and Inspection of Valve Guides

Regular inspection helps identify wear, such as excessive stem movement or scoring, ensuring timely replacements to prevent engine damage or performance loss.

Inspect valve guides for wear, and replace them when clearance exceeds manufacturer limits. Proper maintenance ensures optimal engine performance and longevity.

6.1 Signs of Worn-Out Valve Guides

Worn-out valve guides often exhibit noticeable symptoms that affect engine performance. Common signs include decreased power output, reduced fuel efficiency, and increased oil consumption due to leakage. Additionally, excessive smoke from the exhaust, particularly blue smoke, indicates oil is entering the combustion chamber. Noisy valve trains, such as clattering or tapping sounds, may also occur. Over time, worn guides can lead to misaligned valves, causing poor engine operation. If left unchecked, these issues can escalate, requiring costly repairs. Regular inspections are crucial to identify and address worn valve guides early, ensuring optimal engine functionality and preventing further damage.

6.2 Regular Inspection and Replacement Recommendations

Regular inspection of valve guides is essential to prevent engine damage. Signs of wear, such as excessive oil consumption or stem damage, indicate the need for replacement. Inspect every 50,000 to 100,000 miles. Replace guides if clearance exceeds manufacturer limits or if stems show significant wear. Use precision tools to measure guide bore wear. Always consult a professional for accurate assessments and to ensure proper installation. Neglecting inspections can lead to costly repairs, such as head replacement. Proper maintenance ensures optimal engine performance and longevity, preventing premature wear on related components. Regular checks are a cost-effective way to avoid major engine issues.

Common Issues Related to Valve Guides

Worn valve guides can cause oil consumption, increased emissions, and poor engine performance. Misalignment may lead to valve train damage and inefficient combustion processes over time.

7.1 Effects of Improperly Aligned Valve Guides

Improperly aligned valve guides can lead to excessive wear on valve stems and engine block surfaces, reducing engine efficiency. Misalignment disrupts the valve train’s operation, causing poor combustion and reduced performance. Over time, this can result in increased oil consumption due to worn seals and guides. Additionally, improper alignment may cause uneven stress distribution, leading to premature wear of related components. In severe cases, it can cause valves to bind or seize, potentially damaging the engine. Regular inspection and proper alignment are crucial to prevent these issues and ensure smooth engine operation. Addressing alignment problems early can save costly repairs and maintain optimal engine functionality.

7.2 Consequences of Using Low-Quality Materials

Using low-quality materials for valve guides can lead to premature wear, increased engine noise, and reduced performance. These materials may fail to withstand high temperatures and stresses, causing the guides to degrade faster. This can result in oil leakage, reduced fuel efficiency, and potential engine damage. Additionally, low-quality materials may not provide proper alignment for valve stems, leading to misalignment issues and further wear on engine components. In racing engines, where performance is critical, using substandard materials can significantly impact power output and reliability. Regular inspections and replacing worn or damaged guides with high-quality materials are essential to maintain engine health and longevity.

declaration of independence activity pdf

The Declaration of Independence is a foundational document in American history, shaping the nation’s identity․ Educational activities, such as close reading and vocabulary exercises, help students engage deeply with its principles and significance, fostering understanding of its enduring impact on modern society․

Historical Background

The Declaration of Independence, adopted on July 4, 1776, marked a pivotal moment in American history․ It was the formal declaration of the thirteen American colonies’ independence from Great Britain, shaped by growing tensions over taxation, representation, and colonial expansion․ The document, drafted by Thomas Jefferson, outlined the colonies’ grievances and asserted their right to self-governance․ Its adoption by the Continental Congress not only established the United States as a sovereign nation but also laid the groundwork for democratic principles globally․ The Declaration’s historical significance lies in its eloquent articulation of liberty and equality, influencing movements for independence worldwide․ Educational activities, such as analyzing its historical context and drafting, help students appreciate its enduring legacy and relevance in shaping modern governance․

Key Concepts

The Declaration of Independence outlines fundamental principles like liberty, equality, and self-governance, shaping American democracy and inspiring educational activities to explore its enduring significance and values․

3․1 Key Vocabulary

Understanding key vocabulary is essential for grasping the Declaration of Independence’s significance․ Terms like “liberty,” “equality,” and “self-governance” are central to its message․ “Unalienable rights,” such as “life, liberty, and the pursuit of happiness,” are fundamental concepts emphasized in the document․ The phrase “consent of the governed” highlights the idea that governments derive their power from the people․ These terms are crucial for analyzing the Declaration’s historical context and its role in shaping American democracy․ Educational activities often focus on defining and applying these vocabulary words to deepen students’ comprehension․ By mastering this vocabulary, learners can better explore the document’s principles and their relevance to modern society․ These concepts remain vital for understanding the Declaration’s enduring impact on political thought and governance․

3․2 Purposes of Government

The Declaration of Independence outlines that governments are established to protect the unalienable rights of individuals, including life, liberty, and the pursuit of happiness․ It emphasizes that governments derive their authority from the consent of the governed, signifying that power originates from the people rather than a monarch․ The document asserts that when a government fails to uphold these principles, the people have the right to alter or abolish it and create a new system that better serves their needs․ This foundational idea underscores the importance of accountability and the role of government in maintaining the common good and ensuring the safety and well-being of its citizens․ These principles have shaped modern democratic governance and remain central to discussions about the role of government today․

Structure of the Document

The Declaration of Independence is structured to clearly convey its purpose and significance․ It begins with a preamble that outlines the fundamental principles of equality and the right to alter or abolish oppressive governments․ This is followed by a list of grievances against King George III, detailing the colonists’ dissatisfaction with British rule․ A formal declaration of independence is then stated, asserting the colonies’ sovereignty and the formation of the United States of America․ The document concludes with signatures from its signatories, symbolizing their commitment to the cause․ This structured format ensures clarity and emphasizes the document’s historical and legal importance, making it a cornerstone of American democracy and a model for similar declarations worldwide․ The arrangement of content reflects a logical progression from principles to action, reinforcing its enduring influence․

Educational Resources

Educational resources, including lesson plans and activity sheets, provide engaging ways to study the Declaration of Independence․ These tools offer structured learning experiences for students of all levels․

5․1 Lesson Plans

Lesson plans on the Declaration of Independence offer structured activities to explore its historical significance and key concepts․ These plans often include close reading exercises, vocabulary building, and critical thinking tasks․ Students analyze the document’s preamble, identify the purposes of government, and reflect on its modern relevance․ Some lessons incorporate rewriting the Declaration in modern language or comparing it with other historical texts․ These activities promote deeper understanding and engagement with the document’s principles․ Educators can tailor these plans to suit different learning levels, ensuring all students grasp the foundational ideas of American democracy․ By integrating primary sources and interactive exercises, lesson plans make the Declaration accessible and meaningful for today’s learners․

5․2 Worksheets and Activities

Worksheets and activities on the Declaration of Independence provide interactive ways for students to engage with the document․ These resources include vocabulary exercises, document analysis, and reflective writing prompts․ Activities such as matching key terms, identifying main ideas, and creating concept maps help reinforce understanding․ Graphic organizers guide students in breaking down complex sections, while interactive tasks encourage collaboration․ Many worksheets align with educational standards, ensuring they meet curriculum requirements․ Additionally, activities like timelines, cause-and-effect charts, and persuasive writing prompts foster critical thinking․ These tools cater to diverse learning styles, making the Declaration accessible and engaging for all students․ Interactive elements like crossword puzzles and word searches also make learning fun and memorable․ Assessments, such as quizzes and reflection questions, help educators gauge student comprehension and progress effectively․ These resources are designed to enhance understanding and appreciation of the Declaration’s historical and modern significance․

Activities

Engaging activities like close reading, rewriting the Declaration, and comparative analysis encourage students to explore historical principles and their modern relevance through critical thinking and creative expression․

6․1 Close Reading

A close reading activity involves a detailed analysis of the Declaration of Independence, where students examine specific passages and annotate the text․ This method encourages critical thinking and a deeper understanding of the document’s historical context and significance․ Guiding questions are often provided to help students focus on key themes, such as the colonists’ motivations for seeking independence and the structure of the document․ By carefully reading and interpreting the text, students can identify important phrases, analyze the logical flow of arguments, and explore the underlying principles that shaped the Declaration․ This activity not only enhances comprehension but also fosters historical empathy and the ability to connect past ideas to present-day values․ Close reading is a fundamental skill that prepares students for higher-level analysis and discussion of complex texts․

6․2 Rewriting the Declaration

Rewriting the Declaration of Independence is an engaging activity that challenges students to reinterpret the document’s core ideas in their own words․ This exercise helps students grasp the original text’s meaning by simplifying complex language while preserving its historical significance․ By rephrasing key sections, such as the preamble or the list of grievances, students gain a deeper understanding of the colonists’ motivations and the document’s structure․ This activity also encourages creativity and critical thinking, as students must maintain the original intent while making the language accessible to a modern audience․ Rewriting the Declaration fosters a connection between past and present, allowing students to see the relevance of its principles in contemporary contexts․ This method is particularly effective for making the document more relatable and fostering a personal connection to its historical importance․

6․3 Comparative Analysis

A comparative analysis activity involves examining the Declaration of Independence alongside other historical or modern documents to identify similarities and differences․ Students can compare it with documents like the Magna Carta, the French Declaration of the Rights of Man, or even modern declarations of independence․ This activity enhances critical thinking by prompting students to analyze how different societies have expressed similar ideas about liberty and governance․ By identifying common themes, such as the emphasis on individual rights or the limitations of governmental power, students gain a broader understanding of the universal principles that shaped the Declaration․ This exercise also encourages students to reflect on how historical ideas influence contemporary political thought, making the Declaration more relevant to their lives․ Through comparison, students develop a deeper appreciation for the document’s unique contributions while recognizing shared human aspirations across time and cultures․

Modern Relevance

The Declaration of Independence remains a cornerstone of modern political thought, influencing ideas of democracy and human rights worldwide․ Its principles, such as the belief that “all men are created equal” and the idea that governments derive their power from the consent of the governed, continue to shape contemporary discussions on freedom, justice, and equality․ Educational activities, such as those outlined in the Declaration of Independence activity PDF, encourage students to explore how these 18th-century ideals apply to today’s challenges․ By engaging with the document, students can reflect on its relevance to current issues, such as individual rights, governmental accountability, and social justice․ This connection helps bridge the gap between historical events and modern society, demonstrating the enduring legacy of the Declaration in shaping global ideals of liberty and self-governance․

The Declaration of Independence activity PDF offers a comprehensive toolkit for exploring this foundational document’s historical and contemporary significance․ Through close reading, vocabulary exercises, and creative rewriting, students gain a deeper understanding of its principles․ By analyzing the purposes of government and the rights of individuals, learners develop critical thinking skills and civic awareness․ These activities not only enhance historical knowledge but also encourage reflection on how the Declaration’s ideals apply to modern challenges․ Ultimately, the document’s enduring relevance lies in its ability to inspire discussions on freedom, equality, and justice, ensuring its legacy continues to shape future generations․ The activities provided in the PDF serve as a valuable resource for educators, fostering engagement and meaningful learning experiences․

polaris code list pdf

The Polaris Code List PDF is a comprehensive guide for diagnosing and troubleshooting issues in Polaris vehicles․ It provides detailed explanations of diagnostic codes, helping users identify and resolve problems efficiently․ This resource is essential for vehicle owners and technicians seeking to maintain optimal performance and address faults promptly․

Overview of Polaris Diagnostic Codes

Polaris diagnostic codes are standardized identifiers used to pinpoint specific issues within Polaris vehicles, such as the RZR models․ These codes, like 84, 190, and 520226, represent particular faults in systems like the Throttle Position Sensor or wiring․ The codes are categorized to help technicians and owners quickly identify malfunctions, whether they are related to sensors, circuits, or other components․ By referencing the Polaris Code List PDF, users can decode these numbers to understand the root cause of a problem, such as a damaged sensor or faulty wiring․ This system ensures efficient troubleshooting and maintenance, keeping Polaris vehicles running smoothly․ The PDF organizes codes alphabetically or numerically, making it easy to navigate and apply solutions effectively․

Importance of Understanding Polaris Trouble Codes

Understanding Polaris trouble codes is crucial for maintaining vehicle health and performance․ These codes provide insights into system malfunctions, enabling timely repairs․ By decoding issues like throttle position sensor faults or wiring problems, owners and technicians can prevent minor problems from escalating․ This knowledge enhances safety, reduces repair costs, and ensures optimal vehicle operation․ Regularly referencing the Polaris Code List PDF helps users address issues promptly, minimizing downtime and extending the lifespan of their vehicles․ Informed maintenance also aligns with Polaris’ commitment to quality and reliability, ensuring vehicles remain in peak condition for years to come․

How to Access the Polaris Code List PDF

Visit the official Polaris website, navigate to the Owner Support section, and download the PDF directly․ This resource provides detailed diagnostic codes for troubleshooting purposes․

Downloading the PDF from Official Polaris Sources

To access the Polaris Code List PDF, visit the official Polaris website and navigate to the Owner Support section․ Here, you can find a dedicated portal for diagnostic resources․ Click on the Diagnostic Display Code Definitions link to download the PDF directly․ Ensure you select the correct model and year for your vehicle to get accurate codes․ The PDF is free and available for all Polaris models, including RZR and other off-road vehicles․ Always download from Polaris’s official site to avoid counterfeit or outdated documents․ This ensures you receive reliable and up-to-date information for troubleshooting and maintenance․ The PDF includes detailed code explanations, troubleshooting guides, and wiring diagrams, making it an essential tool for owners and technicians alike․

Navigating the Polaris Diagnostic Display Code Definitions

Navigating the Polaris Diagnostic Display Code Definitions is straightforward once you understand the structure․ The PDF is organized alphabetically and by code categories, such as Throttle Position Sensor and Circuit Faults․ Each code is accompanied by a brief description, possible causes, and recommended actions․ For example, codes like 0-105-3 indicate specific issues with sensors or wiring․ The document also includes troubleshooting steps and references to wiring diagrams, helping users pinpoint faults quickly․ By familiarizing yourself with the layout and using the search function, you can efficiently find and interpret codes, ensuring accurate diagnostics and repairs for your Polaris vehicle․ This guide is indispensable for both novice and experienced users seeking to maintain their vehicles’ performance and longevity․

Common Polaris Diagnostic Codes and Their Meanings

Common Polaris diagnostic codes include 0-105-3 (throttle position sensor issues) and 84 (manifold absolute pressure sensor faults)․ These codes indicate wiring or sensor malfunctions, guiding repairs effectively․

Interpreting Codes for Polaris RZR Models

Interpreting diagnostic codes for Polaris RZR models is crucial for maintaining performance and safety․ Codes like 0-105-3 and 84 are common, indicating issues with the throttle position sensor or manifold absolute pressure sensor․ These codes help identify wiring faults or sensor malfunctions, guiding technicians to precise repairs․ The Polaris Code List PDF provides detailed explanations, enabling owners to understand and address problems effectively․ For RZR models, these codes often relate to engine performance and electronic control systems․ By referencing the PDF, users can pinpoint issues quickly, ensuring their vehicle operates at optimal levels․ This resource is indispensable for both DIY enthusiasts and professional mechanics, empowering them to resolve faults efficiently and maintain their RZR’s reliability and functionality․ Regular code checks are recommended to prevent minor issues from escalating․

Understanding Throttle Position Sensor and Circuit Faults

The Throttle Position Sensor (TPS) is a critical component in Polaris vehicles, monitoring throttle movement to ensure proper engine performance․ Faults in the TPS or its circuit can trigger diagnostic codes such as 0-105-3, indicating voltage levels above 4․61 volts․ These issues often stem from damaged wiring, a faulty TPS, or a malfunctioning ECU․ The Polaris Code List PDF provides detailed explanations of such codes, enabling users to diagnose and address problems effectively․ Regular checks of the TPS and its circuit are essential to prevent performance degradation․ By referencing the PDF, owners and technicians can identify and resolve these faults promptly, ensuring the vehicle operates smoothly and efficiently․ Understanding these codes is vital for maintaining optimal engine function and overall vehicle reliability․

Troubleshooting with Polaris Diagnostic Codes

The Polaris Code List PDF aids in troubleshooting by providing clear definitions of diagnostic codes, enabling users to pinpoint issues like wiring faults or sensor malfunctions efficiently․

Using Diagnostic Codes to Identify Faults in Wiring and Sensors

The Polaris Code List PDF is invaluable for diagnosing faults in wiring and sensors․ Specific codes, such as those related to the Throttle Position Sensor (e․g․, code 84), indicate wiring issues or sensor malfunctions․ By referencing the PDF, users can identify if a code points to a damaged wire, a faulty sensor, or a circuit malfunction․ For instance, codes like 190 or 520226 often highlight problems with sensor signals or wiring connections․ This resource helps technicians and owners trace and repair issues efficiently, ensuring vehicles operate smoothly․ Understanding these codes prevents minor problems from escalating into major repairs, making the Polaris Code List PDF an essential tool for maintaining vehicle health․

How Leaders at Polaris Use Diagnostic Codes for Quality Assurance

Leaders at Polaris leverage diagnostic codes to ensure high-quality standards across their vehicle lineup․ By analyzing recurring codes, they identify common issues in wiring and sensors, enabling proactive solutions․ For example, codes like 84 or 190, which indicate sensor or wiring faults, help leaders trace patterns and improve manufacturing processes․ This data-driven approach ensures that vehicles meet Polaris’ high expectations for performance and reliability․ Additionally, leaders use these codes to train technicians and enhance customer satisfaction․ By prioritizing quality assurance through diagnostic codes, Polaris maintains its reputation for producing durable and innovative vehicles, setting a benchmark for the industry․

Frequently Asked Questions About Polaris Code List PDF

The FAQ section addresses common queries about the Polaris Code List PDF, including code interpretations, troubleshooting steps, and where to download the updated list․

Applying Diagnostic Codes to Different Polaris Vehicle Models

Diagnostic codes from the Polaris Code List PDF are versatile and can be applied across various vehicle models, including RZR, Ranger, and Sportsman․ Each model may have specific codes related to its system, such as engine, transmission, or sensors․ By referencing the PDF, users can identify model-specific issues, ensuring accurate troubleshooting․ For instance, codes like 84, 190, and 520226 are commonly associated with RZR models, often indicating throttle position sensor or wiring faults․ This universal approach streamlines diagnostics, allowing owners and technicians to address problems efficiently, regardless of the Polaris vehicle they are working with․

Best Practices for Referencing the Polaris Code List

When referencing the Polaris Code List PDF, ensure accuracy by downloading it from official Polaris sources․ Regularly update your PDF to access the latest codes and corrections․ Cross-reference codes with your vehicle’s specific model to avoid misdiagnosis․ Use the PDF alongside your vehicle’s owner’s manual for a comprehensive understanding․ Familiarize yourself with the code list’s structure, such as code categories and explanations, to navigate it efficiently․ Prioritize official Polaris resources to maintain reliability and stay informed about updates․ By following these practices, you can effectively diagnose and resolve issues, ensuring your Polaris vehicle operates at its best․ This approach helps prevent errors and enhances overall troubleshooting efficiency․

The Polaris Code List PDF is an essential resource for maintaining and troubleshooting vehicles․ It ensures accurate diagnostics and efficient problem-solving, making it invaluable for users to reference regularly․

Final Thoughts on Utilizing Polaris Diagnostic Codes Effectively

Effectively using Polaris diagnostic codes ensures precise troubleshooting and maintenance of your vehicle․ By referencing the Polaris Code List PDF, users can quickly identify and address issues, reducing downtime and enhancing performance․ Regularly consulting this guide helps technicians and owners alike maintain their vehicles in optimal condition․ The detailed explanations of codes, such as those related to throttle position sensors or wiring faults, provide clarity and direction for repairs․ This resource is invaluable for ensuring long-term reliability and safety․ Always prioritize referencing the official Polaris Code List PDF for accurate and efficient diagnostics․

kindle fire tablet user manual

Discover the Amazon Kindle Fire Tablet, a versatile device designed for entertainment, productivity, and reading. With its stunning HD display and powerful quad-core processor, it offers seamless performance. The tablet integrates Alexa for voice commands, providing a user-friendly experience. Perfect for streaming, reading, and accessing apps, it’s an ideal choice for both work and leisure. Explore its features and capabilities in this guide.

1.1 Overview of Kindle Fire Tablet Models

Amazon offers a range of Kindle Fire Tablet models, each tailored to different user needs. The Fire 7, Fire HD 8, and Fire HD 10 are the most popular options, varying in size, resolution, and performance. The Fire 7 is compact and budget-friendly, while the Fire HD 10 offers a larger, high-definition display for immersive entertainment. Storage options range from 16GB to 64GB, with some models supporting expandable storage via microSD. Processors vary, with the Fire HD models featuring faster quad-core processors for smoother multitasking. Each model supports Wi-Fi, Bluetooth, and access to Amazon’s app store, ensuring versatility for both work and play.

1.2 Key Features and Benefits

The Kindle Fire Tablet is packed with features that enhance user experience. Its vibrant HD display ensures crisp visuals for movies, books, and apps. Alexa integration allows hands-free voice commands, making navigation effortless. The tablet supports dual-band Wi-Fi for fast connectivity and Bluetooth for wireless audio. Storage options are flexible, with internal memory and expandable microSD support. Battery life is optimized for extended use, perfect for long trips. Parents will appreciate the robust parental controls, ensuring safe usage for children. With access to Amazon’s Appstore, users can download a wide range of apps, from productivity tools to entertainment. These features make the Kindle Fire Tablet a versatile and user-friendly device.

Setting Up Your Kindle Fire Tablet

Setting up your Kindle Fire Tablet is straightforward. Start by unboxing, then power it on and follow on-screen instructions to register your device and configure basic settings.

2.1 Unboxing and Physical Overview

Unboxing your Kindle Fire Tablet reveals a sleek, lightweight device. Inside, you’ll find the tablet, a USB cable for charging, and a quick-start guide. The Fire HD models feature a vibrant 7-inch or 8-inch HD display, with a durable design and comfortable grip. The power button is located at the top right, alongside volume controls and a headphone jack. The microSD card slot allows for expandable storage. Weighing just under 12 ounces, it’s easy to hold and carry. The rear camera and front-facing camera enable video calls and photography. The overall design emphasizes portability and ease of use.

2.2 Initial Setup and Registration

Begin by powering on your Kindle Fire Tablet and following the on-screen instructions. Select your preferred language and connect to a Wi-Fi network. Next, sign in with your Amazon account or create a new one. Registration is essential to access Amazon services and content. If you’re setting up for a child, consider enabling Amazon FreeTime or setting up parental controls. The setup wizard will guide you through these steps. Once completed, your device is ready to use, with access to the Amazon Appstore, books, and other features. Ensure your Wi-Fi connection is stable for a smooth setup experience.

2.3 Connecting to Wi-Fi and Bluetooth

To connect your Kindle Fire Tablet to Wi-Fi, go to Settings > Wireless & Bluetooth; Select a network from the list, enter the password, and tap Connect. For Bluetooth, ensure your device is in pairing mode, then select it from the available devices list. The tablet supports dual-band Wi-Fi for faster connectivity. If issues arise, restart your router or device. Ensure your Bluetooth device is compatible and fully charged. These connections enable seamless internet access, file transfers, and device pairing, enhancing your overall user experience.

Navigating the User Interface

Explore the intuitive interface of your Kindle Fire Tablet. The Home Screen features your content library, recommendations, and quick access to apps. Navigate using swipe gestures, the navigation bar, or the Quick Access panel. Customize your experience by organizing apps and bookmarks, ensuring easy access to your favorite features and content.

3.1 Home Screen Layout and Navigation

The Kindle Fire Tablet’s Home Screen is designed for easy navigation. It features a status bar at the top, showing Wi-Fi, time, and battery details. Below, you’ll find shortcuts to frequently used apps and content. The Carousel displays recently accessed items, while the Shelf organizes your books, apps, and documents. Swipe left or right to navigate through screens, and use the Navigation Bar at the bottom for quick access to Home, Back, and Recent Apps. Customize your layout by rearranging items or creating folders for better organization. This layout ensures a seamless and intuitive user experience.

3.2 Customizing the Home Screen

Customize your Kindle Fire Tablet’s Home Screen to suit your preferences. Rearrange items by pressing and dragging apps or content. Create folders by dropping one item onto another, helping to organize your apps and documents. Add widgets for quick access to features like weather or calendar. Remove items from the Carousel by long-pressing and selecting “Remove from Carousel.” Adjust settings like screen orientation and wallpaper by accessing the Display options in the Settings menu. These personalization options ensure your device is tailored to your needs, enhancing usability and efficiency for a more enjoyable experience.

3.3 Using Gestures and Quick Access Features

Mastering gestures and quick access features enhances your Kindle Fire Tablet experience. Swipe left or right to navigate between screens, while swiping down from the top reveals the Quick Settings panel. Pinch-to-zoom is ideal for enlarging text or images. Double-tapping the screen wakes it up, saving time. Access frequently used apps by swiping up from the dock; Enable Split View to multitask efficiently by dragging an app to the side. Customize the Navigation Bar to include your most-used shortcuts. These gestures and features streamline navigation, making your tablet use intuitive and efficient, ensuring you get the most out of your device.

Managing Content on Your Kindle Fire

Easily manage your content by downloading and organizing books, apps, and files. Use the Docs tab to access personal documents and OverDrive for ebooks. Sync your content across devices for seamless access. Organize apps into folders and manage storage settings to optimize performance. Quickly access your favorite content with customizable shortcuts and categories. This section helps you streamline your digital library and apps, ensuring everything is at your fingertips.

4.1 Downloading and Managing Books

Downloading and managing books on your Kindle Fire Tablet is straightforward. Access the Amazon Store directly from your device to purchase or download free books. Additionally, you can use OverDrive to borrow eBooks from libraries. The tablet supports various formats, including AZW, PDF, TXT, and more. Once downloaded, books appear in your library, where you can organize them into collections or categories for easy access. Use the Docs tab to view personal documents and synced books. You can also download books for offline reading and manage storage by removing unused content. This feature ensures your reading experience remains seamless and organized.

4.2 Installing and Organizing Apps

Installing apps on your Kindle Fire Tablet is simple via the Amazon Appstore. Browse categories, search for specific apps, and download them directly. Once installed, apps appear on your home screen or in the Apps Library. Organize apps by creating folders or moving them to different screens. You can also sort apps alphabetically or by recent use. To free up space, uninstall unused apps or remove downloaded content. The tablet supports multitasking, allowing you to switch between apps seamlessly. Regularly updating apps ensures optimal performance. Use these features to keep your apps organized and your device running smoothly for a better user experience.

4.3 Accessing and Managing Files

Your Kindle Fire Tablet stores files in the Docs section, accessible from the home screen. Here, you can view and manage personal documents, including PDFs, Word files, and more. To transfer files, use the USB cable or cloud services like Amazon Drive. Organize files into folders for easier access. You can also delete or share files directly from the device. For external storage, use a microSD card or connect to a computer. Regularly cleaning up unused files helps optimize storage space. Use these tools to efficiently manage your files and keep your tablet clutter-free for a seamless experience.

Advanced Features and Settings

Explore advanced features like Alexa, parental controls, and enhanced security to customize your experience and optimize performance on your Kindle Fire Tablet.

5.1 Using Alexa on Your Kindle Fire

Alexa integration on your Kindle Fire enhances your experience with voice commands. Enable hands-free mode or use the wake word to access music, apps, and information seamlessly. Control smart home devices, set reminders, or ask for news updates directly from your tablet. Navigate settings to customize Alexa preferences, such as managing voice recordings for privacy. This feature transforms your tablet into a smart assistant, making it versatile and user-friendly. Explore Alexa’s capabilities to streamline tasks and enjoy a more intuitive interaction with your Kindle Fire.

5.2 Parental Controls and Security Settings

Secure your Kindle Fire Tablet with robust parental controls and security features. Set up individual profiles to restrict access to mature content, apps, and purchasing. Enable Device Dashboard to monitor usage and block specific features. Use passcodes or fingerprint recognition for added protection. Remotely lock the device or erase data for enhanced security. Parental controls ensure a safe environment for children, while encryption safeguards your personal data. Customize settings to fit your needs, ensuring privacy and peace of mind while using your tablet.

5.3 Troubleshooting Common Issues

Troubleshoot common issues on your Kindle Fire Tablet to ensure smooth operation. Restart the device to resolve freezing or slow performance. Charge the battery fully if it’s not holding power. For connectivity problems, reset Wi-Fi or check Bluetooth settings. Clear app caches or uninstall updates if apps malfunction. Restore factory settings as a last resort, ensuring data backup first. Visit Amazon’s support page for detailed guides and downloadable manuals. Regularly update software to fix bugs and improve functionality. These steps help maintain your tablet’s efficiency and extend its lifespan, keeping it running optimally for years to come.

Maintenance and Support

Regularly update your Kindle Fire Tablet’s software for optimal performance. Back up important data to avoid loss during resets. Access user manuals and support resources online for troubleshooting and guidance. Ensure device longevity by following maintenance tips and seeking help when needed.

6.1 Updating Software and Firmware

Regular software updates ensure your Kindle Fire Tablet runs smoothly and securely. To update, go to Settings, select Device Options, and choose System Updates. If an update is available, download and install it. Ensure your device is connected to Wi-Fi and has sufficient battery life. Updating enhances performance, adds new features, and fixes bugs. After installation, restart your tablet to complete the process. Always prioritize updates to maintain optimal functionality and security. For detailed steps, refer to the user manual or visit Amazon’s support page for guidance.

6.2 Backing Up and Restoring Data

Backing up your Kindle Fire Tablet ensures your content and settings are safe. Connect to Wi-Fi, go to Settings, select Device Options, and choose Backup & Restore. Enable Backup to automatically save data like books, apps, and preferences to Amazon’s cloud. For manual backups, sync your device by swiping down on the home screen and tapping Sync. To restore, factory reset your tablet and sign in with your Amazon account during setup. Your data will be retrieved from the cloud. For files, use Amazon Drive or transfer via USB to your computer for safe storage.

6.3 Accessing User Manuals and Support Resources

To access user manuals and support resources for your Kindle Fire Tablet, visit Amazon’s official support page. On-device user guides are available by navigating to Settings and selecting Help & Support; You can also download PDF versions of the manual from Amazon’s website. Additionally, explore troubleshooting guides, tutorials, and FAQs tailored to your device. For personalized assistance, contact Amazon customer support directly. Ensure you refer to official sources for accurate and up-to-date information to maximize your tablet’s functionality and resolve any issues efficiently.

10 day green smoothie cleanse book pdf

The 10-Day Green Smoothie Cleanse, created by JJ Smith, is a transformative program designed to detoxify the body, boost energy, and promote weight loss through nutrient-rich green smoothies.

What Is the 10-Day Green Smoothie Cleanse?

The 10-Day Green Smoothie Cleanse is a detox program designed to help participants lose weight, increase energy, and improve overall health. It involves consuming green smoothies made with leafy greens, fruits, and water for 10 days. The program emphasizes detoxification, mental clarity, and resetting the body’s systems. It is outlined in JJ Smith’s book, which provides recipes, shopping lists, and guidance for success.

Overview of the Program and Its Benefits

The 10-Day Green Smoothie Cleanse is a structured program designed to promote rapid weight loss, enhanced energy, and improved mental clarity. It focuses on consuming nutrient-dense green smoothies packed with leafy greens and fruits, which aid in detoxification and resetting the body’s systems. The program is supported by JJ Smith’s book, which offers a detailed shopping list, daily recipes, and practical tips for a successful cleanse, ensuring participants achieve optimal results and long-term health benefits.

The Author and the Book

JJ Smith, a renowned nutrition expert, authored the 10-Day Green Smoothie Cleanse, a New York Times bestseller. The book provides a 192-page guide to detox and weight loss.

Who Is JJ Smith?

JJ Smith is a prominent nutritionist and author, known for her expertise in weight loss and detoxification. She has written several bestsellers, including the 10-Day Green Smoothie Cleanse, which has gained widespread recognition for its effective and sustainable approach to health. Her work emphasizes the importance of nutrient-dense foods and their impact on overall well-being.

Key Features of the Book

The book provides a detailed 10-day plan with daily recipes, shopping lists, and preparation tips. It includes over a hundred smoothie recipes, high-protein snack options, and methods to avoid common detox symptoms. The guide emphasizes a gentle transition into the cleanse and offers strategies for maintaining a healthy lifestyle post-cleanse, making it a comprehensive resource for achieving optimal health and wellness.

Benefits of the 10-Day Green Smoothie Cleanse

The cleanse promotes weight loss, boosts energy, enhances mental clarity, and improves overall health by detoxifying the body and nourishing it with essential nutrients.

Weight Loss and Improved Energy Levels

The 10-Day Green Smoothie Cleanse accelerates weight loss by reducing calorie intake while nourishing the body with nutrient-dense ingredients. Users often report significant pound shedding within days. The program also boosts energy levels by flooding the body with vitamins, minerals, and antioxidants from green leafy vegetables and fruits, eliminating fatigue and enhancing vitality naturally.

Mental Clarity and Overall Health Improvement

Beyond physical benefits, the cleanse enhances mental clarity by eliminating toxins that cloud the mind. Participants often experience sharper focus and reduced brain fog. The program also improves overall health by supporting digestion, reducing inflammation, and strengthening the immune system, leaving users feeling revitalized and more vibrant in both body and mind.

Preparation for the Cleanse

Preparation involves understanding detox importance, gradual transition, and essential shopping. The first three days ease the body into the cleanse, ensuring a smooth and effective start.

Understanding the Importance of Detox

Detoxifying the body is crucial for removing harmful substances and resetting metabolism. The cleanse helps eliminate toxins, improve digestion, and reduce bloating. Regular detox supports long-term health, boosting energy and mental clarity. This process prepares the body to absorb nutrients effectively, making it essential for the cleanse’s success. Understanding detox benefits ensures a smoother transition and better overall results during the 10-day program.

Transitioning to the Cleanse: First Three Days

The first three days of the cleanse are vital for preparing your body. Start by gradually reducing unhealthy foods and incorporating green smoothies. This gentle transition helps minimize cravings and detox symptoms. Focus on hydrating and adjusting your palate to the new diet. Planning meals and snacks ahead ensures a smooth start, setting you up for success in the days ahead.

Shopping List and Grocery Guide

Your cleanse requires fresh leafy greens, fruits, and water. Buy ingredients for 5 days at a time to ensure freshness. Plan ahead to avoid waste.

Essential Ingredients for the Cleanse

The cleanse relies on fresh leafy greens like kale, spinach, and spring mix, paired with fruits such as apples, berries, and bananas. Water or coconut water is used as the base to create a smooth, juice-like consistency. These ingredients provide essential vitamins, minerals, and antioxidants to support detoxification and energy. Freshness is key, so plan to shop for ingredients every 5 days to maintain quality and nutrition.

Shopping Tips: Buy Fresh and Plan Ahead

Plan your shopping list to ensure freshness throughout the cleanse. Buy fresh leafy greens and fruits every 5 days to avoid spoilage. Consider bulk purchases for non-perishables like apples and bananas. Check expiration dates and opt for seasonal produce to maximize quality and reduce costs. This strategic approach ensures you’re always prepared with the right ingredients for your daily smoothies.

Daily Recipes and Smoothie Instructions

The book provides a 10-day structured plan with step-by-step recipes, blending leafy greens and fruits to support detox and weight loss. Each day’s smoothie is carefully crafted for optimal results.

Step-by-Step Guide to Making Green Smoothies

Start by blending leafy greens and water until smooth. Add fruits and blend until desired consistency. Incorporate optional ingredients like protein powder or seeds. Pour and serve immediately for maximum nutrition and freshness. This method ensures easy digestion and optimal nutrient absorption, making the cleanse effective and enjoyable.

Recipes for Each Day of the Cleanse

The book provides diverse and delicious recipes for each day, ensuring variety and nutrient balance. From leafy greens to vibrant fruits, each smoothie is crafted to maximize health benefits. Optional enhancements like protein powder or seeds can be added for extra nutrition. With clear instructions and tips, the recipes make the cleanse enjoyable and sustainable, helping you achieve your weight loss and energy goals.

Tips for Success During the Cleanse

Stay committed by planning meals, tracking progress, and minimizing distractions. Incorporate high-protein snacks to curb hunger and maintain energy levels throughout the cleanse journey.

Staying Committed and Avoiding Common Mistakes

Staying committed requires planning and preparation. Avoid common mistakes like skipping meals or overloading on sugars. Start with smaller portions and gradually adjust. Plan your shopping and prep ingredients to save time. Stay hydrated and listen to your body to avoid detox symptoms. Keep track of your progress and remind yourself of your goals to stay motivated throughout the cleanse journey.

Incorporating High-Protein Snacks

Incorporating high-protein snacks into your cleanse helps maintain energy levels and reduces hunger. JJ Smith recommends nuts, seeds, and hard-boiled eggs as portable options. Greek yogurt and protein-based smoothies are also great choices. These snacks provide essential nutrients and keep you satiated without breaking the cleanse. They support your detox journey by fueling your body naturally and preventing cravings for unhealthy alternatives.

Common Challenges and Solutions

Common challenges include cravings and detox symptoms. Staying hydrated, incorporating approved snacks, and mental commitment strategies help overcome these obstacles during the cleanse journey.

Overcoming Cravings and Detox Symptoms

Cravings and detox symptoms like headaches or fatigue are common. Staying hydrated with water or herbal teas can alleviate discomfort. Incorporating high-protein snacks, such as almonds or chia seeds, helps curb cravings. Mental strategies like focusing on benefits and tracking progress also support adherence. Listening to your body and adjusting as needed ensures a smoother cleanse experience.

Modifications for Different Dietary Needs

The cleanse can be tailored to various dietary needs. For vegans, plant-based proteins like chia seeds or hemp protein are ideal substitutes. Those with nut allergies can opt for sunflower or pumpkin seeds. Additionally, fruit options can be adjusted for low-sugar preferences, and gluten-free alternatives ensure inclusivity. These modifications allow individuals to customize the cleanse while maintaining its effectiveness and alignment with their health goals.

Life After the Cleanse

After completing the cleanse, gradually reintroduce solid foods, starting with light meals or salads. Continue incorporating green smoothies and balanced nutrition for sustained health benefits.

Transitioning Back to Solid Foods

After the cleanse, reintroduce solid foods gradually to avoid digestive discomfort. Start with soft, easily digestible options like steamed vegetables, lean proteins, and whole grains. Incorporate fresh salads and continue blending green smoothies to maintain nutrient intake. Listen to your body and pace the transition to ensure a smooth adjustment. This approach supports long-term health and sustained energy levels.

Maintaining a Healthy Lifestyle Post-Cleanse

Post-cleanse, focus on sustaining healthy habits like regular green smoothie consumption, balanced meals, and hydration. Incorporate whole foods, lean proteins, and fiber-rich options to maintain energy and digestion. Exercise regularly and manage stress to support overall well-being. Adopt a mindful eating approach and avoid processed foods to ensure long-term health benefits and a continued commitment to wellness.

The 10-Day Green Smoothie Cleanse is a transformative program offering detox benefits, weight loss, and improved health. It provides a sustainable path to long-term wellness.

Final Thoughts on the 10-Day Green Smoothie Cleanse

The 10-Day Green Smoothie Cleanse is a powerful program that offers a fresh start for health and wellness. By focusing on nutrient-dense smoothies, it helps reset habits, boost energy, and promote weight loss. The cleanse is not just a diet but a holistic approach to improving overall health. With its structured plan and delicious recipes, it empowers individuals to embrace a healthier lifestyle beyond the 10 days.

Encouragement for Long-Term Health Goals

Completing the 10-Day Green Smoothie Cleanse is just the beginning of your health journey. The habits and mindset formed during this program can lead to lasting changes. Incorporate green smoothies into your daily routine and focus on sustainable, long-term wellness. Remember, small, consistent efforts can lead to significant improvements in your overall health and vitality over time.