motorcycle battery size guide

This guide helps motorcyclists choose the right battery size, ensuring optimal performance and reliability․ Learn how to select the best battery for your bike’s specific needs and requirements․

Why Battery Size Matters for Your Motorcycle

The right battery size ensures your motorcycle starts reliably and powers accessories efficiently․ A battery with insufficient capacity may fail to crank the engine, especially in cold conditions․ Modern motorcycles typically require a 12-volt battery, and selecting the correct size prevents electrical system strain․ Incorrect sizing can lead to poor performance or even damage to your bike’s electrical components․ Understanding your motorcycle’s voltage and capacity needs is essential for optimal functionality and longevity․ Always match the battery size to your bike’s specifications for consistent reliability․

Understanding Motorcycle Battery Basics

A motorcycle battery is the power source for starting the engine and powering electrical systems․ Modern bikes typically use a 12-volt battery, with options including lead-acid, AGM, gel, and lithium types․ Key specifications like Cold Cranking Amps (CCA) and Ampere-Hour (Ah) ratings determine the battery’s performance and suitability for your motorcycle․

Voltage Requirements for Modern Motorcycles

Modern motorcycles typically operate on a 12-volt electrical system, making it essential to use a compatible battery․ The 12-volt standard ensures proper engine starting and powers electrical components․ Using a battery with the wrong voltage can lead to system malfunctions or damage․ Always match your motorcycle’s voltage requirements to maintain reliability and performance․ Consulting your bike’s manual is crucial for confirming specifications and ensuring compatibility with your vehicle’s electrical setup․

Differences Between Lead-Acid, AGM, Gel, and Lithium Batteries

Lead-acid batteries are traditional, cost-effective, and widely used but require regular maintenance․ AGM batteries are sealed, spill-proof, and offer superior performance in extreme temperatures․ Gel batteries are also sealed and ideal for deep cycling but may be more expensive․ Lithium batteries are lightweight with high energy density but come at a higher cost․ Each type has its pros and cons, making them suitable for different motorcycle needs and preferences․

Key Factors in Determining the Right Battery Size

Motorcycle type, cold cranking amps, ampere-hour ratings, and climate are crucial for selecting the right battery size, ensuring reliable starting and optimal performance for your bike․

How Motorcycle Type Affects Battery Size (Cruiser, Sport, Touring)

Different motorcycle types require specific battery sizes due to varying power demands․ Cruisers often need higher cold cranking amps for reliable starts, while sport bikes may prioritize lightweight lithium options․ Touring motorcycles, with additional accessories like lights and GPS, require batteries with higher reserve capacity to handle the extra load․ Understanding your bike’s usage helps in selecting the right battery size for optimal performance and longevity․

Importance of Cold Cranking Amps (CCA) and Ampere-Hour (Ah) Ratings

Cold Cranking Amps (CCA) measures a battery’s ability to start your motorcycle in cold temperatures, ensuring reliable starts even in harsh conditions․ Ampere-Hour (Ah) indicates the battery’s capacity to supply power over time․ Higher CCA is crucial for colder climates, while higher Ah supports bikes with additional accessories․ Balancing these ratings ensures your motorcycle starts effortlessly and maintains electrical performance, making them essential factors in selecting the right battery for your specific needs and riding environment․

Considering Maintenance Requirements and Climate Impact

Maintenance requirements vary across battery types, with flooded batteries needing regular water checks, while AGM and lithium batteries are maintenance-free․ Climate also plays a role, as extreme temperatures can affect performance․ Cold climates demand higher CCA for reliable starts, while hot climates may reduce battery lifespan․ Riders should choose batteries suited to their climate zone and consider maintenance needs to ensure optimal performance and longevity․ Proper care and climate adaptation are crucial for consistent reliability and extended battery life․

Battery Terminology Explained

Understanding key terms like voltage, CCA, Ah, and RC is essential for selecting the right battery․ These terms define performance, capacity, and reliability, ensuring optimal bike functionality and longevity․

Understanding Reserve Capacity (RC) and Its Importance

Reserve Capacity (RC) measures a battery’s ability to supply power when the alternator fails․ It indicates how many minutes the battery can deliver 25 amps before voltage drops below 10․2V․ Higher RC ensures reliable starting and accessory power during alternator failure, crucial for modern motorcycles with high electrical demands․ This metric is vital for riders seeking consistent performance and durability, especially in demanding conditions or with additional electrical components․

What You Need to Know About Battery Voltage and State of Charge

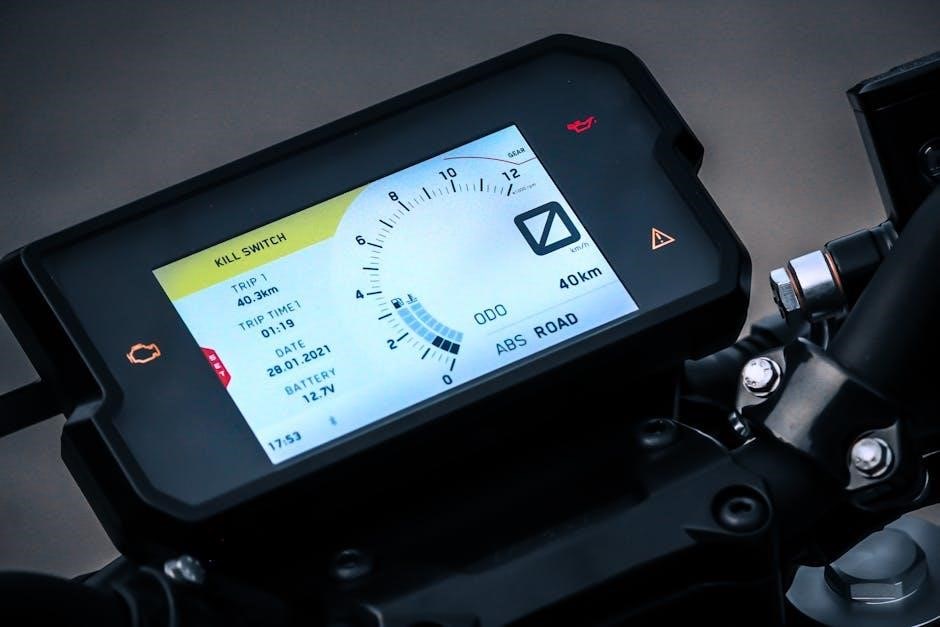
Battery voltage reflects the electrical potential, typically 12V for modern motorcycles․ State of charge indicates how much energy remains, with a fully charged battery around 12․6V․ Monitoring voltage helps diagnose issues, as low readings (below 12V) signal discharge or system malfunctions․ Maintaining proper voltage ensures reliable starting and prevents damage to electrical components․ Always use a multimeter to measure voltage accurately and check the state of charge to keep your motorcycle running smoothly and efficiently․

How to Choose the Right Battery for Your Motorcycle

Selecting the right battery involves considering voltage, capacity, and type․ Ensure compatibility with your motorcycle’s electrical system for reliable performance and longevity of the battery․

Measuring Your Existing Battery for Size and Fitment

To ensure proper fitment, measure your motorcycle battery’s length, width, and height․ Turn off the bike, locate the battery, and use a ruler or calipers for accurate dimensions․ Check the terminal placement and orientation to match your bike’s electrical system․ Compare these measurements with the new battery’s specifications for a perfect fit․ Always refer to your motorcycle’s manual for recommended size and type․ Proper fitment ensures reliable performance and avoids electrical issues․ Consider higher CCA for added reliability in cold conditions․

  • Measure length, width, and height accurately․
  • Check terminal placement and orientation․
  • Refer to your motorcycle’s manual for specifications․

Referencing Your Motorcycle’s Manual for Specifications

Your motorcycle’s manual provides essential battery specifications, such as voltage, cold cranking amps (CCA), and ampere-hour (Ah) ratings․ These details ensure compatibility and optimal performance․ Always verify the recommended battery type, whether lead-acid, AGM, or lithium, as specified․ Ignoring these guidelines may lead to poor performance or electrical system issues․ Use the manual to cross-reference with the battery manufacturer’s specifications for a seamless fit and reliable operation․

  • Check voltage, CCA, and Ah ratings in the manual․
  • Verify the recommended battery type (lead-acid, AGM, or lithium)․
  • Ensure compatibility to avoid performance issues․

Popular Battery Types for Motorcycles

Motorcycles use lead-acid, AGM, gel, and lithium batteries․ Each type offers unique advantages, such as maintenance-free operation or high energy density, catering to different riding needs and preferences․

Flooded Batteries: Pros, Cons, and Maintenance Tips

Flooded batteries are cost-effective and widely used in motorcycles․ They require regular maintenance, such as checking electrolyte levels and charging․ However, they can leak acid and have shorter lifespans compared to AGM or lithium batteries․ Proper care involves avoiding overcharging and ensuring terminals are clean․ While they are reliable for standard use, they may not be ideal for high-performance or extreme weather conditions due to their lower energy density and maintenance demands․

AGM Batteries: Why They Are a Popular Choice for Modern Bikes

AGM (Absorbent Glass Mat) batteries are favored for modern motorcycles due to their superior performance and reliability․ They offer higher cold cranking amps, better vibration resistance, and a longer lifespan․ AGM batteries are maintenance-free, making them ideal for high-performance and touring bikes․ Their sealed design prevents acid spills, enhancing safety․ Additionally, they charge efficiently and provide consistent power, making them a preferred choice for riders seeking durability and low upkeep in demanding conditions․

Gel Batteries: Their Advantages and Limitations

Gel batteries are a popular choice for motorcycles due to their spill-proof design and resistance to vibrations․ They offer deep cycle capability, making them suitable for bikes with high accessory loads․ However, they are more expensive than traditional flooded batteries and require a specific charger to prevent damage․ Gel batteries also charge slower and are sensitive to overcharging, which can reduce their lifespan․ Despite these limitations, they provide reliable performance and are ideal for riders seeking a maintenance-free option with consistent power delivery․

Lithium-Iron Phosphate (LiFePO4) Batteries: The Future of Motorcycle Batteries

Lithium-Iron Phosphate (LiFePO4) batteries are revolutionizing motorcycle power systems with their lightweight and high energy density․ They offer faster charging, longer lifespan, and greater reliability compared to traditional lead-acid batteries․ LiFePO4 batteries are also environmentally friendly and require minimal maintenance․ Their compact size makes them ideal for modern bikes, and they provide consistent power delivery even in extreme temperatures․ Despite higher initial costs, their durability and performance make them a top choice for riders seeking cutting-edge technology and efficiency in their motorcycles․

Installation and Safety Tips

Ensure proper installation and safety when handling motorcycle batteries․ Always wear protective gear, disconnect the negative terminal first, and follow manufacturer guidelines to avoid accidents or damage․

Step-by-Step Guide to Replacing Your Motorcycle Battery

Replacing your motorcycle battery involves several key steps․ First, locate the battery, typically under the seat or near the engine․ Disconnect the negative terminal to prevent electrical shocks․ Remove the battery hold-down clamp and take out the old battery․ Insert the new battery, ensuring it fits securely․ Reconnect the terminals, starting with the positive one․ Tighten all connections and test the electrical system to ensure everything functions properly․ Always follow safety guidelines to avoid damage or injury․

Safety Precautions When Handling and Installing a New Battery

When handling and installing a new motorcycle battery, safety is paramount․ Always disconnect the negative terminal first to prevent electrical shocks․ Wear protective gloves and goggles to avoid acid spills or sparks․ Ensure the area is well-ventilated and free from open flames․ Connect the positive terminal first to avoid short circuits․ Secure the battery firmly to prevent movement during riding․ Improper handling can lead to explosions or electrical system damage, so follow all precautions carefully․

Maintenance and Troubleshooting

Regular battery maintenance ensures longevity and reliability․ Test voltage with a multimeter, inspect terminals for corrosion, and charge as needed․ Address issues promptly to avoid breakdowns․

How to Test Your Motorcycle Battery’s Health

To test your motorcycle battery’s health, start with a voltage test using a multimeter․ A healthy battery should read around 12․6 volts when fully charged․ Turn on the headlights and measure the voltage again; it should drop slightly but remain above 12 volts․ If it falls below, the battery may be weak․ Additionally, check for corrosion on terminals and ensure all connections are secure․ A maintenance charger can help assess the battery’s state and prevent sulfation․ Regular testing ensures reliable performance and prevents unexpected failures․

Common Issues and How to Troubleshoot Them

Common motorcycle battery issues include low voltage, corrosion, and poor connections․ If the battery drains quickly, check the charging system and electrical components for faults․ Corrosion on terminals can be cleaned with a wire brush and baking soda․ Loose connections should be tightened․ If the battery fails to hold charge, test its health with a multimeter․ Regular maintenance, such as using a maintenance charger, can prevent sulfation and extend battery life․ Addressing these issues promptly ensures reliable starting and optimal performance․

Selecting the right battery ensures optimal performance and reliability․ Consider type, capacity, and maintenance needs․ Proper care extends life and keeps your bike running smoothly always;

Final Thoughts on Selecting the Perfect Battery for Your Bike

Selecting the ideal motorcycle battery involves understanding your bike’s needs and usage․ Consider factors like voltage, CCA, and Ah ratings to ensure reliability․ AGM and lithium batteries offer superior performance, while flooded types require more maintenance․ Always refer to your manual for specifications and opt for high-quality options․ Proper installation and regular testing will extend battery life and keep your motorcycle running smoothly․ Make an informed decision to enhance performance and avoid unexpected issues․

https://erp.bhayangkarapos.com/ultimate-guide-to-choosing-an-erp-program/

ERP selection is a critical process for businesses seeking to streamline operations and enhance efficiency․ It involves aligning technology with organizational goals, ensuring scalability, and evaluating vendor support․ A well-planned ERP strategy helps organizations avoid costly mistakes and maximizes long-term benefits․ Begin by understanding your business needs and creating a checklist to guide the selection process․

1․1 Understanding the Importance of ERP Systems

ERP systems are crucial for modern businesses, enabling seamless integration of operations, finance, and customer relations․ They improve efficiency by automating tasks, reducing manual errors, and enhancing collaboration․ A robust ERP system provides real-time data, enabling informed decision-making and better resource allocation․ It also supports scalability, adapting to business growth and evolving needs․ By streamlining processes, ERP systems help organizations achieve their strategic goals, making them indispensable for long-term success and competitiveness in today’s fast-paced market environment․

1․2 Why Choosing the Right ERP System Matters

Choosing the right ERP system is vital for optimizing business performance and achieving long-term success․ A well-suited ERP system aligns with your organization’s goals, enhances efficiency, and supports scalability․ Conversely, a poor fit can lead to inefficiencies, wasted resources, and missed opportunities․ The right ERP system fosters innovation, improves decision-making, and future-proofs your business․ It ensures seamless integration of processes, reduces costs, and elevates customer satisfaction․ Ultimately, selecting the right ERP system is a cornerstone of driving sustainable growth and maintaining a competitive edge in today’s dynamic market landscape․

Key Considerations for ERP Selection

When selecting an ERP, prioritize scalability, integration, and cost-effectiveness․ Ensure the system aligns with your business needs and offers reliable vendor support for long-term success․

2․1 Aligning ERP with Business Requirements

Aligning ERP with business requirements is essential for optimizing operations․ Start by identifying key business objectives and processes․ Evaluate how the ERP system can support these goals, ensuring it addresses both current and future needs․ Involve stakeholders to gather input on functionality and workflows․ Consider industry-specific features and scalability to accommodate growth․ A well-aligned ERP system ensures seamless integration with existing processes, enhancing efficiency and decision-making․ This step is critical for maximizing the system’s value and achieving long-term success․

2․2 Evaluating Industry-Specific Needs

Evaluating industry-specific needs ensures the ERP system meets unique business demands․ Identify key requirements for your sector, such as manufacturing, retail, or healthcare․ Assess how the ERP handles industry-specific workflows, compliance, and regulations․ Consider features like supply chain management for manufacturing or point-of-sale integration for retail․ Tailored solutions enhance efficiency and adaptability․ Engage industry experts to validate the ERP’s suitability for your specific environment, ensuring it aligns with operational and strategic goals․ This step ensures the system is a perfect fit for your business landscape․

2․3 Assessing Scalability and Flexibility

Assessing scalability ensures the ERP system can grow with your business, adapting to increased demands without performance issues․ Flexibility is equally crucial, allowing customization and integration with emerging technologies․ A scalable ERP supports future expansion, while flexibility ensures it adapts to evolving business needs․ Evaluate how the system handles user growth, data volume, and new functionalities․ Prioritize solutions that offer modular designs and cloud-based options for seamless scalability․ This ensures long-term viability and alignment with your organization’s growth trajectory․

Core ERP Selection Criteria

Core ERP selection criteria focus on functionality, cost, and vendor credibility to ensure the system aligns with business needs and provides long-term value․

3․1 Functionality and Features

Evaluating ERP functionality involves assessing core features like inventory management, finance, and HR tools․ Ensure the system offers industry-specific capabilities and aligns with your business processes․ Consider advanced features such as AI, automation, and data analytics to drive efficiency․ Scalability is key—choose a system that grows with your organization․ Prioritize ease of use and integration with existing tools․ Customization options and mobile accessibility are also critical for modern workflows․ Aligning functionality with business needs ensures maximum ROI and user adoption․

3․2 Cost and Total Cost of Ownership (TCO)

Evaluating ERP costs involves considering both upfront expenses and long-term investments․ Calculate the total cost of ownership, including licensing, implementation, training, and ongoing support․ Compare pricing models, such as subscription-based vs․ perpetual licenses, to align with your budget․ Hidden fees, like customization or data migration, can inflate costs․ Assess ROI by weighing initial investments against expected efficiency gains․ Ensure the ERP’s pricing structure supports scalability and avoids costly surprises․ Transparent vendor pricing is essential for making an informed decision․

  • Licensing and subscription fees
  • Implementation and customization costs
  • Training and ongoing support expenses
  • Hidden charges for data migration or integrations

3․3 Vendor Credibility and Support

Evaluating vendor credibility ensures long-term reliability and trust․ Research the vendor’s reputation, financial stability, and market presence․ Check customer testimonials and case studies to gauge satisfaction․ Assess their support services, including availability, response times, and expertise․ Ensure the vendor offers comprehensive training and resources․ A credible vendor provides consistent updates and adapts to industry changes․ Strong support is crucial for resolving issues and maximizing system performance․ Choose a vendor with a proven track record and commitment to customer success․

  • Research vendor reputation and market presence
  • Evaluate support services and response times
  • Review customer testimonials and case studies
  • Ensure access to training and resources

Evaluating ERP Vendors

Evaluating ERP vendors involves assessing their credibility, industry expertise, and track record․ Ensure they align with your business needs and offer reliable support for long-term success․

4․1 Researching Vendor Reputation

Researching vendor reputation is crucial in ERP selection․ Look for vendors with a proven track record, positive customer reviews, and a strong market presence․ Check how long they’ve been in business and their experience in your industry; Evaluate customer satisfaction through case studies and testimonials․ A reputable vendor ensures reliability, support, and long-term partnership․ Avoid vendors with a history of failed implementations or poor post-sale service․ This step helps narrow down trusted providers aligned with your business needs․

4․2 Checking Customer Reviews and References

Checking customer reviews and references is essential to assess a vendor’s reliability․ Look for unbiased feedback on third-party platforms and ask for references from similar businesses․ Contact existing customers to understand their experiences, challenges, and satisfaction levels․ Pay attention to feedback patterns, such as ease of implementation, user experience, and post-sale support․ This step helps verify the vendor’s claims and ensures their ERP system aligns with your organization’s needs and expectations․ Positive reviews and references build confidence in your selection decision․

4․3 Understanding Vendor Support and Services

Evaluating vendor support and services is crucial for long-term success․ Ensure the vendor offers comprehensive support, including training, maintenance, and troubleshooting․ Check for 24/7 availability and response times․ Inquire about their service-level agreements (SLAs) and post-implementation assistance․ A reliable vendor provides regular updates and customization options․ Their support team should be knowledgeable and experienced․ Strong vendor support ensures smooth ERP operation and addresses potential issues promptly, minimizing downtime and enhancing overall productivity․ This step is vital for a seamless ERP experience․

Technical and Functional Evaluation

Evaluate deployment models, user experience, and data analytics capabilities․ Assess integration compatibility, security, and mobile access․ Ensure the ERP aligns with your technical infrastructure and future needs․

5․1 Assessing Deployment Models (Cloud vs․ On-Premise)

Choosing between cloud-based and on-premise ERP systems is crucial․ Cloud ERP offers flexibility, scalability, and lower upfront costs, with remote accessibility and automatic updates․ On-premise solutions provide full control over data and infrastructure, suitable for businesses with strict security requirements․ Consider factors like IT resources, budget, and long-term scalability when deciding․ Evaluate vendor support for both models to ensure alignment with your organizational needs and goals․

5․2 Evaluating User Experience and Interface

Evaluating the user experience and interface is essential for ensuring usability and productivity․ A modern ERP system should offer an intuitive and user-friendly interface that aligns with your workforce’s needs․ Consider customization options, accessibility features, and mobile optimization to enhance flexibility․ Additionally, assess the system’s navigation, dashboard design, and reporting tools to ensure they meet your team’s requirements․ A seamless user experience can significantly impact adoption rates and overall satisfaction with the ERP solution․

5․3 Data and Analytics Capabilities

Data and analytics capabilities are crucial for leveraging insights to drive business decisions․ Ensure the ERP system provides robust reporting tools, real-time data visualization, and advanced analytics․ Look for integration with business intelligence tools to enhance forecasting and performance tracking․ Scalability is key, as your analytics needs may grow with your business․ A strong analytics framework empowers organizations to make informed decisions, optimize processes, and stay competitive․ Prioritize systems that align with your data-driven goals and offer actionable insights․

Additional Features to Consider

Consider language and currency support for global operations, automation capabilities to streamline workflows, and integration with existing systems․ Ensure the ERP supports your operational efficiency and scalability needs․

6․1 Language and Currency Requirements

Language and currency requirements are essential for global businesses․ Ensure the ERP supports multiple languages to cater to diverse teams and customers․ Additionally, verify it handles various currencies for seamless international transactions․ This feature is crucial for maintaining consistency and compliance across different regions․ Proper support ensures accurate financial reporting and enhances operations in multinational environments․ Consider these factors to avoid operational inefficiencies and ensure smooth global business management․ Addressing these needs upfront prevents future complications and supports business expansion․

6․2 Automation and Workflow Capabilities

Automation and workflow capabilities are vital for streamlining business processes․ Look for an ERP system that offers robust task automation, reducing manual efforts and minimizing errors․ Ensure it supports customizable workflows to align with your business operations․ Scalable automation features allow the system to grow with your organization, enhancing efficiency and productivity․ Real-time data processing and integrated tools further optimize workflows, ensuring seamless operations across departments․ Prioritize systems with flexible automation options to meet your unique business needs and improve overall performance․

6․3 Integration with Existing Systems

Seamless integration with existing systems is crucial for minimizing disruptions․ Ensure the ERP supports compatibility with current software and offers robust APIs for data exchange․ Evaluate its ability to migrate data accurately and integrate with legacy systems․ Strong vendor support for integration is essential․ Consider platforms with pre-built connectors for common applications․ Testing integration capabilities with your IT team ensures a smooth transition and maintains business continuity․

Final Steps in ERP Selection

Finalizing ERP selection involves creating a detailed checklist, comparing solutions, and making an informed decision․ Ensure alignment with business goals, assess vendor support, and plan implementation strategies carefully․

7․1 Creating an ERP Selection Checklist

A comprehensive ERP selection checklist is essential to streamline the decision-making process․ It should include core functionalities, scalability, vendor reputation, and user experience․ List business requirements, deployment preferences, and integration needs․ Evaluate total cost of ownership and support services․ Prioritize features based on organizational goals․ Ensure the checklist aligns with long-term objectives and addresses potential risks․ A well-structured checklist helps organizations make informed decisions, avoiding costly mistakes and ensuring the chosen ERP system meets current and future needs effectively․

7․2 Comparing ERP Solutions

Comparing ERP solutions involves evaluating features, scalability, and costs․ Align solutions with business requirements, focusing on functionality and user experience․ Assess vendor credibility and support services․ Consider deployment models, integration capabilities, and industry-specific tools․ Use a checklist to score systems based on priorities․ Evaluate total cost of ownership, including licensing, implementation, and maintenance․ Conduct demos and trials to gauge usability․ Gather feedback from stakeholders to ensure alignment with organizational goals․ This step ensures a clear view of which solution best fits your needs․

7․3 Making the Final Decision

Making the final decision involves a thorough review of all evaluated ERP solutions․ Compare vendors based on scalability, functionality, and alignment with business goals․ Use the selection checklist to validate findings and ensure transparency․ Consider long-term costs, user feedback, and vendor credibility․ Present the recommendation to stakeholders, addressing any concerns․ Once consensus is achieved, finalize the decision and prepare for implementation․ This step marks the transition from selection to deployment, setting the stage for operational transformation and growth․

wow cable guide detroit

Welcome to the WOW Cable Guide Detroit, your ultimate resource for navigating the extensive channel lineup and programming options available from WOW! in Detroit, Michigan. Whether you’re a long-time resident or new to the area, this guide is designed to help you make the most of your TV viewing experience. With over 200 channels across basic cable, digital/HD cable, and premium packages, WOW! offers something for everyone, from sports and news to entertainment, movies, and family-friendly content.

WOW! TV provides a user-friendly interface with features like an interactive TV Guide, allowing you to browse live channels in three convenient formats: the Standard TV Guide, which is accessible from the WOW! TV home menu. This guide makes it easy to find your favorite shows, set reminders, and plan your viewing schedule. Additionally, WOW! TV offers customizable channel lineups, enabling you to tailor your experience to your preferences.

Residents of Detroit can enjoy a diverse range of channels, including popular networks like CBS, FOX, NBC, ABC, PBS, ESPN, CNN, and FOX Sports Detroit. The lineup also includes specialty channels such as Jewelry TV, MeTV, and Music Choice, ensuring there’s always something to watch. Whether you’re a sports fan, a movie buff, or a lover of classic TV shows, WOW! Cable Guide Detroit has you covered.

Use this guide to explore the full potential of your WOW! TV subscription, discover new channels, and enhance your entertainment experience in Detroit. With its robust channel lineup and innovative features, WOW! TV is the perfect choice for anyone looking to elevate their home viewing experience.

Channel Lineups

WOW! Cable in Detroit offers an extensive range of channel lineups to cater to the diverse entertainment needs of its subscribers. With over 200 channels available across different packages, viewers can enjoy a wide variety of programming, including local networks, sports, movies, news, and family-friendly content. The channel lineup is designed to provide something for everyone, ensuring that no matter your interests, there’s always something to watch.

Basic Cable Package

The basic cable package from WOW! Detroit includes a selection of essential channels that are perfect for those who want to stay connected to local news, weather, and community programming. Some of the key channels in this package include:

  • CBS (WWJ): Stay updated with local news, sports, and primetime shows.
  • FOX (WXMI): Enjoy popular shows like The Simpsons and live sports events.
  • NBC (WOOD): Watch hit series, news, and sports, including Detroit Lions games.
  • ABC (WZZM): Access to shows like Grey’s Anatomy and Good Morning America.
  • PBS (WKAR): Educational and family-friendly programming.
  • QVC: Shop from the comfort of your home.
  • ION (WZPX): A mix of drama, comedy, and reality TV.

Digital/HD Cable Package

For viewers who want a more immersive experience, WOW! Detroit’s Digital/HD Cable package offers crystal-clear high-definition channels. This package includes all the channels from the basic lineup, plus additional networks that cater to a wide range of interests. Some highlights of this package include:

  • ESPN: Live sports coverage, including Detroit Tigers, Red Wings, and Pistons games.
  • ESPN 2: Additional sports programming, including college games and tournaments.
  • FOX Sports Detroit: Exclusive coverage of Detroit’s local sports teams.
  • CNN: Breaking news and in-depth coverage of global events.
  • FOX News Channel: 24/7 news coverage and commentary.
  • CNBC: Business news, stock market updates, and financial insights.
  • FX: Popular shows like American Horror Story and The Walking Dead.
  • Disney Channel: Family-friendly entertainment, including cartoons and movies.
  • Cartoon Network: A variety of animated shows for kids and adults alike.

Premium Channels

WOW! Detroit also offers premium channels as add-ons to its packages, giving viewers the flexibility to customize their viewing experience. These premium channels include:

  • HBO: Access to award-winning series like Game of Thrones and Succession, as well as exclusive movies.
  • SHOWTIME: Popular series like Shameless and Billions, plus blockbuster films.
  • STARZ: Original series like Power and Outlander, along with a library of movies.
  • CINEMAX: Action-packed movies and original series.

International Channels

For viewers who enjoy international programming, WOW! Detroit offers a range of channels that cater to diverse cultural and linguistic preferences. These include:

  • Telemundo: Spanish-language programming, including telenovelas and news.
  • Univision: Spanish-language shows, sports, and entertainment.
  • ION: Multicultural programming with a focus on diverse audiences.

Family-Friendly and Educational Channels

Families with children will appreciate the variety of family-friendly and educational channels available through WOW! Detroit. Some notable options include:

  • Nickelodeon: Popular kids’ shows like SpongeBob SquarePants and Teenage Mutant Ninja Turtles.
  • Nick Jr.: Educational and entertaining shows for younger children, such as Blue’s Clues and Dora the Explorer.
  • Cartoon Network: A mix of classic and modern animated series.
  • Animal Planet: Documentaries and shows about wildlife and nature.
  • National Geographic: Educational programming focused on science, history, and the natural world.

Music and Lifestyle Channels

For music lovers and those who enjoy lifestyle programming, WOW! Detroit offers a variety of channels that cater to these interests. Some highlights include:

  • Music Choice: 24/7 music channels featuring different genres, from rock to hip-hop.
  • Jewelry TV: Shop for jewelry and learn about gemstones and craftsmanship.
  • HSN (Home Shopping Network): Shop for products ranging from electronics to home goods.

Nav

prot warrior leveling guide

Leveling as a Protection Warrior is a unique experience, blending tanking mechanics with efficient rage generation. This guide covers essential talents, rotations, and strategies to help you master the role while progressing through levels. Discover how to optimize your gameplay and prepare for endgame content as a formidable tank.

Overview of Protection Warrior as a Leveling Spec

Protection Warriors are robust tanks with strong defensive capabilities, making them ideal for leveling. They excel at generating rage through combat, enabling frequent use of abilities like Shield Slam and Revenge. Their durability and threat generation ensure smooth progression, while talents like Charge and Bloodrage enhance mobility and rage management, making them versatile for both solo and group play.

Importance of Defensive Talents for Leveling

Defensive talents are crucial for Protection Warriors, enhancing survivability and enabling effective rage generation. Abilities like Shield Block and Defensive Stance reduce damage intake, while Sunder Armor boosts threat generation. These talents ensure sustained combat efficiency, making them indispensable for both solo leveling and tanking in groups, while maintaining consistent damage output for smoother progression.

Best Talents for Protection Warrior Leveling

Key talents focus on survivability, rage generation, and threat production. Early talents like Shield Block and Defensive Stance enhance defense, while Sunder Armor improves tanking efficiency, ensuring smooth progression through levels.

Early Talents in the Protection Tree

Early talents like Shield Block and Defensive Stance provide foundational survivability and threat generation. These talents reduce damage taken and improve tanking efficiency, making them essential for smooth leveling. They form the core of a Protection Warrior’s toolkit without requiring deep specialization in the tree.

Useful Talents for Rage Generation

Talents such as Bloodrage and Charge are crucial for maintaining consistent rage generation. Bloodrage provides a temporary boost, while Charge enables instant combat engagement, ensuring steady ability usage. These talents help sustain aggressive rotations, making them indispensable for efficient leveling and maintaining offensive momentum as a Protection Warrior.

Key Defensive Talents for Survival

Shield Block and Revenge are vital for survival, reducing damage intake and enabling counterattacks. Defensive Stance lowers threat, while Sunder Armor weakens enemies. These talents enhance durability, allowing Warriors to maintain control and mitigate damage effectively during leveling, ensuring sustained tanking performance in challenging scenarios.

Optimal Rotation for Leveling

Start with Charge to initiate combat, then use Bloodrage to generate rage. Follow up with Shield Slam and Execute for maximum damage, especially when targets are below 20% health.

Basic Rotation for Protection Warriors

Begin with Charge to engage enemies, then activate Bloodrage for initial rage. Use Shield Block to boost defense and Sunder Armor to reduce enemy damage. Alternate between Shield Slam and Revenge to maintain threat and generate consistent rage for sustained combat effectiveness.

Using Charge and Bloodrage Effectively

Use Charge to initiate combat, generating immediate rage and closing the distance to enemies. Follow up with Bloodrage to gain a burst of rage, enabling early use of high-rage abilities like Shield Slam or Revenge. This combination ensures strong threat generation and sets up a smooth offensive flow from the start of each fight.

Incorporating Shield Slam and Execute

Shield Slam is your primary damage and threat generator, using rage efficiently. Use it after generating sufficient rage, often following a Charge or Bloodrage. Execute should be used below 20% enemy health for maximum damage. Combine these abilities to maintain high threat while dealing significant damage, balancing offense with defense effectively.

Spells to Buy While Leveling

Essential spells include Battle Shout, Shield Slam, and Demoralizing Shout. Upgrade Battle Shout and Demoralizing Shout for enhanced effectiveness. Revenge and Shield Block are crucial for threat generation and survivability, making them vital additions to your arsenal while leveling.

Essential Spells for Protection Warriors

Battle Shout, Shield Slam, and Demoralizing Shout are foundational for threat generation and survivability. Revenge provides consistent damage and rage, while Shield Block enhances defensive capabilities. Victory Rush offers healing, making these spells indispensable for a balanced tanking playstyle during leveling and beyond.

Upgrading Battle Shout and Demoralizing Shout

Battle Shout and Demoralizing Shout are crucial for threat generation and group support. Upgrading these shouts increases their effectiveness, enhancing your tanking capabilities and improving party performance. Prioritize acquiring higher ranks as you level to maintain optimal utility in both solo and group play scenarios.

Importance of Revenge and Shield Block

Revenge and Shield Block are vital for Protection Warriors, providing both offensive and defensive capabilities. Revenge delivers significant damage while generating rage, aiding in maintaining threat. Shield Block enhances survivability by increasing block chance, making it essential for managing incoming damage in intense combat situations.

Gear and Equipment for Leveling

Proper gear is essential for Protection Warriors. Prioritize upgrading shields and weapons to enhance defensive and offensive capabilities. Enchants and gems further boost effectiveness.

Best Gear Choices for Protection Warriors

Protection Warriors benefit from high-stamina shields, weapons with strong melee stats, and armor pieces offering balance between defense and mobility. Prioritize gear with block value, dodge, and parry to enhance defensive capabilities and rage generation, ensuring optimal tanking performance during leveling.

Importance of Shield and Weapon Upgrades

Upgrading your shield and weapon is crucial for Protection Warriors, as they directly impact defensive and offensive capabilities. A high-quality shield improves block value and stability, while a powerful weapon enhances sunder and shield slam effectiveness. Prioritize gear with block value, dodge, and parry to maximize survivability and rage generation during leveling.

Enhancing Gear with Enchants and Gems

Enhancing your gear with enchants and gems is vital for Protection Warriors, boosting defensive stats like Stamina and Dodge. Prioritize gems that increase block value and armor, while weapon enchants like Crusader or Icebreaker improve offensive capabilities. Properly enchanted and gemmed gear significantly enhances survivability and rage generation, making you a more formidable tank.

Stat Prioritization for Protection Warriors

Focus on Stamina for increased survivability, Strength for improved block value and attack power, and Dodge/Block for enhanced defensive capabilities. Balance these stats to optimize tanking performance while maintaining rage generation for consistent threat and damage output during leveling.

Primary Stats for Tanking

Stamina is crucial for increased health, enhancing survivability. Strength improves attack power and block value, while Agility boosts dodge chance, aiding evasion. These stats collectively fortify the warrior’s tanking capabilities, ensuring resilience and effective threat generation to maintain combat dominance.

Secondary Stats for Optimal Performance

Defense reduces critical strike risk, Dodge enhances avoidance, and Block improves mitigation. Additionally, Hit ensures consistent ability landings, and Expertise minimizes opponent’s dodge chance, collectively refining your warrior’s defensive and offensive efficiency for smoother progression during leveling.

Managing Rage Generation Through Stats

Focus on Strength to enhance attack power and Attack Power for increased damage. Critical Strike improves rage from critical hits, while Haste accelerates your attack speed. Balancing these stats ensures consistent rage generation, allowing for more frequent use of abilities like Shield Slam and Execute during leveling.

Grouping vs. Solo Play

Grouping enhances efficiency with healers and DPS, while solo play offers flexibility. Both playstyles are viable, allowing Warriors to adapt based on preference and leveling goals effectively.

Benefits of Grouping as a Tank

Grouping as a Protection Warrior offers enhanced leveling efficiency through shared responsibilities. Healers provide consistent support, reducing downtime, while DPS classes accelerate mob elimination. This setup allows Warriors to focus on maintaining threat and executing rotations effectively, making progression smoother and less resource-intensive.

Efficiency of Solo Leveling as a Warrior

Solo leveling as a Protection Warrior is viable due to high survivability and self-sustain through abilities like Victory Rush. Charge and Bloodrage initiate combat, while Shield Slam and Execute provide strong damage. This playstyle allows Warriors to handle multiple enemies without relying on group support, maintaining steady progression.

Optimal Playstyle for Both Scenarios

Adaptability is key for Protection Warriors, excelling in both group and solo play. In groups, focus on generating threat and managing aggro, while solo play emphasizes survivability and efficient rage use. Charge and Bloodrage initiate combat, and abilities like Shield Slam and Execute maximize damage output in any scenario, ensuring steady progression and adaptability.

Defensive Strategies for Leveling

Mastering threat management, using Shield Block for critical hits, and maintaining Defensive Stance ensures survivability. Sunder and tab rotation keep enemies focused on you, minimizing damage taken.

Managing Threat and Aggro

Effective threat management is crucial for maintaining aggro. Use taunts like Challenging Shout to gain enemy focus and abilities like Shield Slam to generate high threat. Ensure Sunder Armor is applied consistently and utilize Demoralizing Shout to reduce enemy damage output, making it easier to hold aggro throughout encounters.

Using Shield Block and Defensive Stance

Shield Block is a powerful tool to mitigate incoming damage, while Defensive Stance reduces damage taken and increases threat generation. Use Shield Block during high incoming damage phases and maintain Defensive Stance to improve survivability. Combine these with abilities like Sunder Armor and Shield Slam to enhance your tanking performance and maintain aggro effectively.

Mastering Sunder and Tab Rotation

Sunder Armor is crucial for generating threat and damage. Use it on each target, then tab between enemies to apply Sunder Armor, maintaining consistent damage and threat. This rotation ensures optimal aggro management and maximizes your tanking efficiency while leveling, making you a reliable asset in any group setting.

Rage Management Tips

Effective rage management is key for Protection Warriors. Use Charge and Bloodrage to initiate combat, then prioritize abilities like Sunder Armor and Shield Slam to sustain rage generation and maintain consistent threat output during leveling.

Generating Rage Efficiently

Generating rage efficiently is crucial for Protection Warriors. Use Charge to initiate combat, triggering Bloodrage for an early rage boost. Follow up with Sunder Armor and Shield Slam to maintain consistent rage flow. Tab between enemies to spread damage and ensure a steady supply of rage for critical abilities, optimizing your leveling progression and threat generation.

Optimizing Ability Usage for Rage

Optimizing ability usage ensures consistent rage generation. Alternate between Sunder Armor and Shield Slam to balance damage output and rage income. Use Victory Rush after kills to regain health and generate additional rage, maintaining a steady flow for high-frequency ability rotations during your leveling journey.

Maximizing Shield Slam Frequency

Shield Slam is your hardest-hitting ability, so maximizing its frequency is crucial. Maintain high rage income through consistent attacks like Sunder Armor and Shield Block. Use Revenge and Victory Rush to boost rage, ensuring frequent Shield Slam usage for increased damage and threat generation.

Execute and Victory Rush Usage

Execute deals maximum damage when enemies are below 20% health, while Victory Rush provides healing after defeating foes. Use both abilities strategically to enhance damage output and sustain in combat, ensuring optimal results during leveling.

When to Use Execute for Maximum Damage

Use Execute when enemies are below 20% health to unleash maximum damage. This ability shines in finishing off foes, especially after applying Sunder Armor with Shield Slam, ensuring optimal damage output during leveling. Timing Execute correctly enhances your combat efficiency and helps secure quick kills.

Utilizing Victory Rush for Healing

Victory Rush provides instant healing after killing an enemy, making it a valuable tool for self-sustain during solo leveling. Trigger it frequently to maintain health, especially when facing multiple mobs. While not a replacement for potions or bandages, it offers consistent, passive healing support, enhancing your survivability in combat scenarios.

Combining Abilities for Optimal Results

Combine Shield Slam and Execute for maximum damage output, while using Victory Rush for healing. Coordinate with Charge and Bloodrage to maintain rage flow. Use Defensive Stance for survivability and Shield Block during heavy attacks. This synergy ensures efficient leveling, balancing damage, healing, and defense seamlessly for optimal results.

Addons for Protection Warrior Leveling

Essential addons include Deadly Boss Mods for threat tracking and Recount for performance monitoring. These tools enhance your tanking efficiency and help optimize your leveling experience effectively.

Recommended Addons for Tanking

For optimal tanking performance, use Deadly Boss Mods to track enemy abilities and Omen for threat management. Tidy Plates enhances target frames, while Bartender streamlines action bars. These addons improve awareness and efficiency, ensuring smoother leveling and better survival as a Protection Warrior.

Setup for Optimal Performance

Organize your action bars for easy access to key abilities like Shield Block, Revenge, and Shield Slam. Set up Deadly Boss Mods alerts for enemy cooldowns and configure Omen to monitor threat. Ensure your UI displays essential info, such as rage and cooldown timers, to maintain peak performance while tanking.

Customizing Addons for Leveling

Customize addons like Deadly Boss Mods to track enemy cooldowns and Omen for threat management. Adjust settings to prioritize abilities like Shield Block and Revenge. Create custom bars for quick access to essential spells, ensuring seamless execution during combat. Tailor your UI to enhance situational awareness and improve leveling efficiency as a tank.

Mastering Protection Warrior leveling requires balance between offense and defense. With proper talent choices, efficient rotations, and optimized gear, you’ll excel as a tank. Stay adaptable, continuously improve your strategies, and prepare for the challenges of endgame content with confidence and skill.

Final Tips for Successful Leveling

Mastering rage management is crucial for sustained damage and ability usage. Prioritize gear upgrades, especially shields, to enhance survivability. Adapt your rotation based on enemy types and group dynamics. Use defensive cooldowns wisely to minimize damage spikes. Stay vigilant with threat management and maintain a consistent tab rotation for efficient tanking. Continuous practice and adjustment will refine your skills, ensuring smooth progression and preparedness for endgame challenges.

Preparing for Endgame Content

Optimize your talents and gear for maximum survivability and threat generation. Master defensive strategies like Shield Block and Sunder to handle high-level enemies. Practice managing rage and cooldowns to maintain consistent tanking performance. Focus on upgrading shields and weapons, and enhance gear with enchants and gems to ensure readiness for challenging endgame encounters and raids.

Continuous Improvement as a Tank

Refine your skills by analyzing combat logs and learning from mistakes. Adapt to new strategies and stay updated with meta changes. Seek feedback from experienced players to enhance your performance. Continuous improvement ensures you remain effective and resilient, ready to tackle challenging content and lead your group confidently.

tv guide murfreesboro tn

Murfreesboro, TN offers a diverse range of TV channels and programming. With network affiliates like ABC, CBS, NBC, and FOX, viewers can enjoy popular shows, local news, and sports. The TV guide provides detailed listings for broadcast channels, making it easy to plan your viewing schedule. Whether you prefer prime-time series, live sports, or community events, Murfreesboro’s TV guide has something for everyone. Additionally, streaming services and online platforms ensure access to a wide variety of content, catering to all preferences. Discover the best of local and national programming with Murfreesboro’s comprehensive TV guide.

Overview of TV Listings in Murfreesboro

Murfreesboro, TN offers a wide variety of TV listings, catering to diverse viewer preferences. From major network affiliates like ABC, CBS, NBC, and FOX to local and public access channels, residents can access a broad range of programming. Viewers can enjoy popular prime-time shows, live sports events, and local news broadcasts. Additionally, public access channels provide community-focused content, including local events and educational programs. The TV listings are updated regularly, ensuring viewers stay informed about schedules and special programming. With a mix of entertainment, news, and community-oriented content, Murfreesboro’s TV guide provides something for everyone, making it an essential resource for planning daily viewing schedules.

Importance of a TV Guide for Local Viewers

A TV guide is an essential tool for local viewers in Murfreesboro, TN, helping them navigate the vast array of available channels and programming. It provides a clear and organized schedule, allowing viewers to plan their daily entertainment and stay updated on their favorite shows. The guide also highlights local events and community-focused content, fostering a sense of connection among residents. Additionally, it helps viewers discover new programs and channels they might not have been aware of. By offering detailed information on broadcast times and channel lineups, the TV guide enhances the overall viewing experience, ensuring that audiences never miss out on the content they love.

Major Broadcast Channels in Murfreesboro, TN

Murfreesboro, TN, features major broadcast channels including ABC, CBS, NBC, and FOX. These networks offer a mix of entertainment, news, and local programming for residents.

Network Affiliates in Murfreesboro

Murfreesboro, TN, is served by several network affiliates, including ABC, CBS, NBC, and FOX. These affiliates provide a mix of national programming and local content tailored to the community. Viewers can enjoy popular shows like dramas, comedies, and news programs from these major networks. Additionally, PBS offers educational and cultural content. Local affiliates ensure access to live events, sports, and breaking news. With a variety of genres covered, Murfreesboro residents can stay entertained and informed. The presence of these network affiliates enhances the overall viewing experience, catering to diverse preferences and interests in the area.

Local and Public Access Channels

Murfreesboro, TN, features several local and public access channels that cater to community needs. Channels like Murfreesboro City TV and Rutherford County TV provide updates on local government meetings, community events, and educational programs. Public access channels offer platforms for residents to share content, fostering community engagement. These channels often broadcast local sports, school events, and cultural activities, ensuring viewers stay connected to local happenings. With a focus on hyper-local content, these channels are invaluable for residents seeking information and entertainment tailored to their community. They play a vital role in keeping Murfreesboro informed and engaged with its vibrant local culture.

Popular TV Shows and Programming in Murfreesboro

Murfreesboro viewers enjoy a variety of popular TV shows, including prime-time dramas, comedies, and reality series. Local programming highlights sports, news, and community events, catering to diverse interests.

Prime-Time TV Shows

Prime-time TV shows in Murfreesboro, TN, offer a diverse lineup of entertainment for viewers. Major networks like ABC, CBS, NBC, and FOX broadcast popular series such as The Voice, NCIS, and Grey’s Anatomy. These shows attract a wide audience with their engaging storylines and relatable characters. Additionally, Murfreesboro viewers can enjoy hit dramas like 9-1-1 and comedies like The Good Place, ensuring there’s something for every taste. With a mix of scripted and reality TV, prime-time programming provides endless options for entertainment. The TV guide helps residents plan their evenings, making it easy to catch favorite shows or discover new ones. Streaming services like Hulu and VIZIO SmartCast also offer on-demand access to these popular series, adding flexibility for viewers.

Local News and Weather Channels

Murfreesboro, TN, residents rely on local news and weather channels for updates on community events, traffic, and weather conditions. Channels like NewsChannel 5 (NBC) and FOX 17 provide comprehensive coverage of Middle Tennessee, including Murfreesboro. These stations offer breaking news, sports highlights, and in-depth reporting on local issues. Weather segments, such as StormTrack5, ensure viewers stay informed about severe weather alerts and daily forecasts. Local programming also includes community spotlights and events, making these channels essential for staying connected to the area. With both live broadcasts and streaming options, Murfreesboro’s local news and weather channels are accessible anytime, keeping residents well-informed and prepared.

How to Access the Murfreesboro TV Guide

Access the Murfreesboro TV guide through online platforms, mobile apps, or local newspapers. Websites like TVGuide.com and mobile apps provide detailed listings and schedules for local channels.

Online TV Guide Websites

Online TV guide websites provide convenient access to Murfreesboro’s channel listings. Platforms like TVGuide.com and TitanTV offer detailed schedules, allowing users to search by channel or time. Many sites feature filters to sort by genres, such as sports, movies, or local programming. Some providers, like Xfinity or Spectrum, offer personalized TV guides based on your subscription. These websites often include additional features like show descriptions, cast listings, and ratings. They also allow users to set reminders or share favorite shows. With real-time updates, online TV guides ensure viewers never miss their favorite programs. Accessing these sites is straightforward, requiring only an internet connection, making them a popular choice for planning viewing schedules.

Mobile Apps for TV Listings

Mobile apps like TV Guide and XFINITY offer convenient access to Murfreesboro’s TV listings. These apps provide real-time updates, allowing users to browse channels, set reminders, and track favorite shows. Many apps feature personalized listings based on your location and preferences. For instance, the TV Guide app enables users to create a watchlist and receive notifications for upcoming episodes. Additionally, apps like TitanTV and VIZIO SmartCast allow users to stream content directly or view detailed program descriptions. Mobile apps are ideal for on-the-go planning, ensuring you never miss your favorite shows. They are available for download on both iOS and Android devices, making them accessible to all viewers in Murfreesboro.

Streaming Services Available in Murfreesboro

Streaming services in Murfreesboro include Netflix, Hulu, Amazon Prime, and Disney+. Local options like VIZIO SmartCast and YouTube TV also offer live TV and on-demand content.

Popular Streaming Platforms

Popular streaming platforms in Murfreesboro include Netflix, Hulu, Amazon Prime Video, and Disney+. These services offer a wide range of movies, TV shows, and original content. Netflix is known for its exclusive series like Stranger Things and The Crown. Hulu provides both on-demand content and live TV options, making it a versatile choice. Amazon Prime Video includes additional benefits like free shipping for Prime members. Disney+ is ideal for families, featuring content from Marvel, Star Wars, and Pixar. These platforms allow viewers in Murfreesboro to stream their favorite shows and movies anytime, anywhere, with high-quality video and personalized recommendations.

Local Streaming Options

In Murfreesboro, local streaming options provide convenient access to community-focused content. Platforms like XFINITY Stream and AT&T TV offer live local channels, including ABC, CBS, and NBC affiliates. These services allow viewers to stream local news, sports, and events. Additionally, some local networks partner with streaming apps to deliver exclusive content, such as high school sports and community events. For instance, the Murfreesboro City TV channel streams local government meetings and public affairs programming; These options ensure residents can stay connected to local happenings without traditional cable. With user-friendly apps and flexible viewing options, local streaming services in Murfreesboro cater to diverse viewer preferences while emphasizing community engagement and accessibility.

Special Events and Sports Coverage

Murfreesboro’s TV guide highlights live sports and events, including local high school games, Middle Tennessee State University athletics, and regional competitions. Catch football, basketball, and more.

Live Sports Broadcasting

Live sports broadcasting in Murfreesboro offers thrilling coverage of regional and national events. Viewers can enjoy games from the NFL, NBA, MLB, and NHL through local network affiliates. College sports, including Middle Tennessee State University’s Blue Raiders, are also prominently featured. Additionally, high school football and basketball games are often broadcast, showcasing local talent. ESPN and FOX Sports provide extensive coverage of major sporting events, ensuring fans never miss a moment. With real-time updates and highlights, Murfreesboro’s TV guide ensures sports enthusiasts stay connected to their favorite teams and events throughout the season.

Special Event Listings

Murfreesboro’s TV guide highlights special event listings, ensuring viewers never miss unique programming. From holiday parades to music festivals, these events are often broadcast live on local channels. Community gatherings, cultural celebrations, and charity functions are also featured, showcasing the city’s vibrant spirit. The TV guide app and online platforms provide real-time updates, allowing users to set reminders for upcoming events. Additionally, streaming services like Hulu and Netflix occasionally offer exclusive access to special events. Whether it’s a local concert or a nationally televised event, Murfreesboro’s TV guide keeps audiences informed and entertained. Stay tuned for the latest updates on special event listings in Murfreesboro.

Planning Your Viewing Schedule

Plan your TV schedule with Murfreesboro’s TV guide. Use the app to set reminders, track favorite shows, and organize your viewing experience. Stay updated and never miss a show!

Creating a Personalized TV Schedule

Creating a personalized TV schedule in Murfreesboro, TN, allows viewers to tailor their entertainment experience. By using the TV guide, users can filter shows by genre, time, and channel preferences. Set reminders for favorite programs and organize episodes in a custom list. This feature ensures viewers never miss out on popular series or live events. Additionally, streaming platforms integrate seamlessly, offering a unified viewing plan. With a personalized schedule, audiences can maximize their leisure time and enjoy a curated selection of content. This tool is especially handy for busy individuals seeking to balance entertainment with daily routines. Customize your TV experience today and make the most of Murfreesboro’s diverse programming options.

Setting Reminders for Favorite Shows

Setting reminders for your favorite shows in Murfreesboro, TN, ensures you never miss an episode. The TV guide allows you to mark upcoming programs and receive notifications before they air. This feature is particularly useful for keeping track of series, live events, or special broadcasts. Digital platforms and mobile apps integrate seamlessly with your viewing schedule, sending alerts directly to your device. By setting reminders, you can plan your day effectively and make sure you’re ready to watch your preferred content. This tool enhances your viewing experience, ensuring you stay updated on all your favorite shows and events in Murfreesboro.

Murfreesboro’s TV guide offers a comprehensive viewing experience, combining local and national programming. With diverse channels and streaming options, it ensures endless entertainment for all audiences in Murfreesboro.

Final Thoughts on Murfreesboro TV Guide

The Murfreesboro TV guide is an essential tool for local viewers, providing detailed listings and diverse programming options. From network affiliates to streaming services, it caters to all preferences, ensuring a seamless entertainment experience. By offering real-time updates and personalized scheduling features, the guide helps viewers stay connected to their favorite shows and events. Whether you’re a fan of prime-time series, local news, or live sports, the Murfreesboro TV guide delivers comprehensive coverage. Its user-friendly access through websites and mobile apps makes it a convenient resource for planning your viewing schedule. This guide truly enhances the television experience for residents and visitors alike in Murfreesboro, Tennessee.

chauffeur license louisiana study guide

Overview of the Louisiana Chauffeur License

The Louisiana Chauffeur License, a Class D credential, allows operation of vehicles weighing 10,001–26,001 pounds for up to 15 passengers, excluding hazardous materials. Essential for commercial and non-commercial drivers, it ensures adherence to safety and regulatory standards, serving as a foundation for advanced licensure.

1.1. Definition and Purpose of the Chauffeur License

The Louisiana Chauffeur License, classified as a Class D credential, is designed for operating vehicles or vehicle combinations weighing between 10,001 and 26,001 pounds, excluding hazardous materials. Its primary purpose is to ensure drivers meet safety and regulatory standards, enabling them to operate such vehicles legally and safely for commercial or non-commercial purposes. This license is essential for individuals seeking to drive larger vehicles responsibly within Louisiana, adhering to state-specific traffic laws and safety guidelines.

1.2. Eligibility Criteria for Applying

To apply for a Louisiana Chauffeur License, applicants must meet specific criteria. They must be at least 17 years old and successfully complete a vision test and knowledge test. A learner’s permit is required before advancing to the license. Applicants must also provide necessary documentation, such as proof of identity and residency. Additional requirements may include completing a driver education course or meeting medical standards, ensuring applicants are fit to operate larger vehicles safely and responsibly.

1.3. Importance of the Chauffeur License in Louisiana

The Louisiana Chauffeur License is essential for legally operating vehicles weighing 10,001–26,001 pounds, ensuring safe and regulated transportation. It verifies that drivers meet vision, knowledge, and safety standards, reducing road risks. This license is crucial for employment in industries requiring commercial or passenger transport, supporting Louisiana’s economy. By obtaining the Chauffeur License, drivers demonstrate their commitment to adhering to traffic laws and maintaining public safety, making it a vital credential for both personal and professional driving responsibilities in the state.

Steps to Obtain a Chauffeur License in Louisiana

Obtaining a Louisiana Chauffeur License involves sequential steps: applying for a learner’s permit, passing vision and knowledge tests, completing a road test, and paying required fees.

2.1. Applying for a Learner’s Permit

Applying for a learner’s permit is the first step toward obtaining a Chauffeur License in Louisiana. Eligibility requires passing a vision test and an official knowledge test on driving theory. Applicants must be at least 17 years old and provide valid identification and proof of Social Security. The permit allows practice driving under supervision. A fee is required, and the permit is valid for a specific period. This step is crucial for demonstrating basic understanding of traffic laws and safe driving principles before advancing to the license.

2.2. Preparing for the Knowledge Test

Preparing for the knowledge test involves studying the official Louisiana Driver’s Handbook, which covers traffic laws, signs, and safe driving practices. Utilize online practice tests and quizzes to assess readiness. Focus on understanding Louisiana-specific rules, such as weight restrictions and passenger limits for Chauffeur Licenses. Review comprehensive study guides for detailed explanations of test topics. Consistent study ensures familiarity with test formats and boosts confidence for success on exam day.

2.3. Passing the Vision and Knowledge Tests

Passing the vision and knowledge tests is a critical step in obtaining the Chauffeur License. The vision test evaluates visual acuity, color recognition, and peripheral vision to ensure safe driving capabilities. The knowledge test assesses understanding of Louisiana traffic laws, road signs, and safe driving practices. Both tests must be passed to progress, demonstrating the applicant’s readiness to operate a vehicle safely and responsibly under Louisiana’s regulations and guidelines.

2.4. Completing the Road Test

The road test evaluates practical driving skills, ensuring applicants can safely operate a vehicle. It assesses vehicle control, navigation of various road types, and adherence to traffic laws. Applicants must use a properly insured and registered vehicle that meets safety standards. A certified examiner accompanies the applicant to observe and evaluate driving techniques, ensuring competence in real-world conditions. Successful completion of the road test is required to advance toward obtaining the Chauffeur License.

2.5. Paying Fees and Receiving the License

Upon passing all required tests, applicants must pay the designated fees for the Chauffeur License. The fees cover issuance and administrative costs. Once payment is processed, the Louisiana Office of Motor Vehicles issues the license, authorizing the holder to drive legally. The license is typically valid for a set period, after which renewal is required. Proper documentation, such as proof of identity and residency, must be submitted during the process to ensure compliance with state regulations.

Study Materials for the Chauffeur License Exam

Key study materials include the official Louisiana Driver’s Handbook, offering detailed traffic laws and regulations. Online practice tests provide real exam simulations, boosting confidence. Comprehensive study guides with practice questions and explanations are also available, ensuring thorough preparation;

3.1. Official Louisiana Driver’s Handbook

The official Louisiana Driver’s Handbook is a primary resource for exam preparation. It covers essential topics such as state-specific traffic laws, safe driving practices, and detailed license requirements. The handbook is regularly updated to reflect current regulations and provides clear, concise information. It serves as a foundational guide for understanding the rules of the road and is highly recommended for all applicants seeking a chauffeur license in Louisiana.

3.2. Online Practice Tests and Quizzes

Online practice tests and quizzes are invaluable tools for preparing for the Louisiana Chauffeur License exam. Featuring multiple-choice questions with detailed explanations, these resources help applicants assess their knowledge and identify areas for improvement. They mirror the actual test format, ensuring familiarity with timing and structure. Regularly using these tools enhances retention of key concepts, such as traffic laws and safe driving practices, boosting confidence and readiness for the exam.

3.3. Comprehensive Study Guides

Comprehensive study guides for the Louisiana Chauffeur License provide detailed insights into essential topics such as traffic laws, vehicle safety, and driving regulations. These guides are designed to be user-friendly, offering clear explanations and practical examples. They cover all necessary areas to ensure thorough preparation for the exam. Many guides include interactive elements, such as quizzes and real-life scenarios, making learning engaging and effective. These resources are indispensable for anyone seeking to master the material and excel on the Chauffeur License exam.

Key Topics Covered in the Knowledge Test

The Louisiana Chauffeur License knowledge test covers Louisiana traffic laws, safe driving practices, and vehicle inspection procedures. It also includes road signs, speed limits, and defensive driving techniques.

4.1. Louisiana Traffic Laws and Regulations

Understanding Louisiana traffic laws is crucial for the Chauffeur License exam. Key topics include speed limits, right-of-way rules, and DUI penalties. The state mandates seatbelt use for all passengers, and commercial drivers must adhere to specific regulations. Familiarity with traffic signs, signals, and pedestrian rights is essential. Additionally, knowledge of vehicle weight restrictions and required documentation for commercial vehicles is tested. These laws ensure safe and lawful operation of vehicles across Louisiana.

4.2. Safe Driving Practices

Safe driving practices are essential for Chauffeur License holders to ensure road safety. Key areas include maintaining a safe following distance, managing speed according to road conditions, and practicing defensive driving. Understanding how to handle emergencies, such as skidding or brake failure, is also critical. Additionally, being aware of blind spots, using mirrors effectively, and avoiding distractions like texting while driving are emphasized. These practices help prevent accidents and promote a culture of responsible driving in Louisiana.

4.3. Vehicle Inspection and Maintenance

Vehicle inspection and maintenance are crucial for ensuring safety and compliance. Chauffeurs must conduct regular checks of tires, brakes, lights, and fluid levels. Pre-trip and post-trip inspections are mandatory to identify issues early. Understanding proper maintenance routines, such as oil changes and tire rotations, extends vehicle lifespan. Familiarity with components like air compressors, brake drums, and hoses is also essential. Neglecting maintenance can lead to mechanical failures, accidents, and legal consequences, making it a key focus of the Chauffeur License exam.

Tips for Success on the Chauffeur License Exam

Utilize study guides, practice tests, and review Louisiana traffic laws. Stay calm, read questions carefully, and manage time effectively to ensure success on exam day.

5.1. Effective Study Strategies

Develop a structured study schedule, dedicating time to review the Louisiana Driver’s Handbook and practice tests. Focus on understanding traffic laws, safe driving practices, and vehicle inspection. Break down complex topics into smaller sections for easier retention. Engage in active learning by summarizing key points and discussing them with others. Utilize flashcards for memorizing regulations and signs. Regularly test your knowledge with online quizzes to identify weak areas. Simulate exam conditions to build confidence and reduce anxiety, ensuring a thorough grasp of all materials before test day.

5.2. Understanding Test Formats

Familiarize yourself with the test structure to ease exam nerves. The Louisiana Chauffeur License test includes multiple-choice questions assessing knowledge of traffic laws, safe driving practices, and vehicle inspection. Questions may vary in difficulty, focusing on critical driving principles. Practice tests mirror the actual exam format, helping you understand question types and timing. Reviewing the test layout ensures you navigate sections confidently, prioritizing high-weight topics like road signs and regulations. Understanding the format enhances your ability to manage time and focus on key areas effectively during the exam.

5.3. Managing Test-Day Anxiety

Managing test-day anxiety is crucial for optimal performance. Start by arriving early to avoid last-minute stress. Practice deep breathing exercises to calm your nerves. Review key topics beforehand to build confidence. Stay positive and remind yourself of your preparation. Avoid cramming, as it can heighten anxiety. Familiarize yourself with the test format to reduce uncertainty. Focus on answering questions methodically, skipping difficult ones initially. Remember, preparation is key—trust your knowledge and stay composed to achieve success.

Maintaining and Renewing the Chauffeur License

Maintaining the Chauffeur License requires periodic renewal, adherence to traffic laws, and completion of necessary medical exams to ensure ongoing eligibility and compliance with state regulations.

6.1. License Renewal Process

The Louisiana Chauffeur License renewal process typically occurs every four years. Applicants must submit required documents, including proof of identity and residency, and pay the renewal fee. A vision test may be required, and medical certification could be necessary for certain classifications. Renewal can often be completed online, by mail, or in person at a local DMV office. It is essential to check for any updated requirements or changes in state regulations before renewing the license to ensure compliance.

6.2. Continuing Education Requirements

Louisiana requires chauffeur license holders to complete periodic continuing education to maintain their credentials. These courses focus on updates to traffic laws, safe driving practices, and regulatory changes. Drivers must enroll in state-approved programs, ensuring they stay informed about industry standards and safety protocols. Completing these requirements is essential for license renewal and demonstrates a commitment to professional development and public safety. Regular updates help drivers adapt to new regulations and improve their skills on the road.

6.3. medical Exams and Vision Tests

6.3. Medical Exams and Vision Tests

Chauffeur license holders in Louisiana must undergo periodic medical exams to ensure fitness for driving. A certified medical examiner assesses vision, hearing, and physical health. Vision tests are mandatory to meet specific standards, ensuring drivers can operate vehicles safely. These exams are crucial for maintaining the license and are typically required during renewal or if a medical condition arises. The process helps ensure public safety by verifying that drivers are physically capable of operating their vehicles effectively and responsibly.

mig wire size guide

MIG welding is a versatile and widely used process for joining metals. Wire selection plays a crucial role in achieving high-quality welds. Common wire sizes range from 0.023″ to 0.045″, with 0.030″ and 0.035″ being popular choices for various applications. Proper wire size selection ensures optimal penetration, strength, and appearance of welds. Factors like material thickness, type, and weld position influence wire choice. Using the right wire size enhances efficiency and reduces waste in welding projects.

Overview of MIG Welding

MIG (Metal Inert Gas) welding is a highly versatile and efficient welding process using a continuous wire electrode. It is ideal for welding thin to thick materials due to its adaptability. The process uses an inert gas to shield the weld, ensuring clean and precise joints. Common wire sizes range from 0.023″ to 0.045″, with 0.030″ and 0.035″ being widely used. MIG welding is known for its high speed, minimal slag, and suitability for various metals, including steel, aluminum, and stainless steel. Its ease of use and consistent results make it a popular choice in automotive, manufacturing, and construction industries.

Importance of Choosing the Right Wire Size

Choosing the right MIG wire size is critical for achieving optimal weld quality and performance. The correct wire diameter ensures proper penetration, strength, and appearance of the weld. Using an inappropriate size can lead to issues like lack of fusion, porosity, or excessive heat input. Selecting the right wire size enhances weld consistency, reduces material waste, and improves overall efficiency. It also prevents common problems like wire feed issues and ensures compatibility with the welding machine and material being used.

Common MIG Wire Sizes and Their Uses

Common MIG wire sizes include 0.023″, 0.030″, 0.035″, and 0.045″. Thinner wires are ideal for delicate materials, while thicker wires suit heavier applications. These sizes offer versatility for various welding needs.

0.023″ and 0.030″ Wires for Thin Materials

0.023″ and 0.030″ MIG wires are ideal for thin materials, providing precise control and minimal heat input. These smaller diameters are perfect for welding thin-gauge steel, aluminum, or other non-ferrous metals. They ensure a clean, slag-free finish and are widely used in applications requiring high detail. The 0.030″ wire is particularly popular in home workshops and light fabrication, handling materials up to 1/4″ thickness efficiently. These wires are excellent for automotive repair and thin-sheet metal projects, offering consistent results.

0.035″ and 0.045″ Wires for Thicker Materials

0.035″ and 0.045″ MIG wires are designed for welding thicker materials, offering increased strength and penetration. The 0.035″ wire is suitable for materials up to 3/8″ thickness, while the 0.045″ wire handles thicker applications, up to 1/2″. These wires are commonly used in heavy-duty fabrication, construction, and automotive repair. They provide excellent durability and are ideal for joints requiring high load-bearing capacity, making them a preferred choice for industrial and structural welding projects.

Specialized Wire Sizes for Specific Applications

Specialized MIG wires cater to unique welding needs. Flux-cored wires, like E70T-4, offer high strength for thick steel. Silicon bronze wires are ideal for corrosion-resistant welds on copper or brass. Aluminum wires, such as ER5356, are designed for welding aluminum alloys, providing excellent conductivity. These specialized wires are tailored for specific materials and applications, ensuring optimal performance in industries like aerospace, marine, and artistic metalwork, where standard wires may not suffice.

Factors Influencing MIG Wire Size Selection

Material thickness, type, and weld joint design are key factors. Thicker materials require larger wires, while thinner materials need smaller diameters. Weld position and accessibility also matter.

Material Thickness and Its Impact on Wire Size

Material thickness significantly influences MIG wire size selection. Thinner materials typically require smaller diameter wires, such as 0.023″ or 0.030″, to prevent burn-through and ensure precise control. For thicker materials, larger wires like 0.035″ or 0.045″ are necessary to achieve adequate penetration and strength. Proper wire size selection based on material thickness ensures high-quality welds, avoiding issues like lack of fusion or excessive heat input. This balance is crucial for optimal welding outcomes.

Material Type (Steel, Aluminum, Stainless Steel)

Material type significantly impacts MIG wire selection. Steel typically uses ER70S-6 wire, while aluminum requires ER4043 or ER5356 due to its conductivity. Stainless steel often uses ER308 or ER316 for corrosion resistance. Wire composition must match the base material to ensure compatibility and desired weld properties. Proper material-specific wire selection prevents issues like porosity or lack of fusion, ensuring durable and high-quality welds across various applications.

Weld Joint Design and Accessibility

Weld joint design and accessibility influence wire size selection. Complex or tight joints may require smaller wires for better maneuverability. Larger wires are suitable for open, accessible joints where higher deposition rates are needed. The design’s geometry affects how easily the wire feeds and how consistently the arc is maintained. Ensuring proper wire size for the joint design enhances weld quality and reduces operational challenges, optimizing the welding process for efficiency and precision in various applications.

Understanding Weld Penetration and Wire Size

Wire size directly impacts weld penetration depth. Thicker wires produce deeper penetration, while thinner wires are better for surface coverage and precision. Proper size selection balances strength and quality in welds, ensuring desired results without excessive material waste.

How Wire Diameter Affects Penetration Depth

Wire diameter significantly influences weld penetration depth. Thicker wires, such as 0.035″ or 1.2mm, produce deeper penetration, making them suitable for thicker materials. Thinner wires, like 0.023″ or 0.6mm, offer less penetration but are ideal for thin materials to prevent burn-through. The right wire size balances penetration and surface coverage, ensuring strong, durable welds without excessive material waste. Proper wire selection is critical for achieving desired weld quality and structural integrity in various applications.

Achieving the Optimal Weld Profile

Achieving the Optimal Weld Profile

Achieving the optimal weld profile requires careful selection of wire size and welding parameters. Thicker wires produce deeper penetration but may sacrifice surface finish, while thinner wires offer better control on thin materials; Adjusting wire feed speed and voltage ensures consistent fusion and bead appearance. Proper wire size selection balances penetration and aesthetics, ensuring strong, visually appealing welds. Consulting a MIG wire selection chart helps tailor choices to specific materials and applications for professional-grade results.

Guide to Choosing the Right Wire Size

Selecting the right MIG wire size depends on material thickness, weld position, and machine compatibility. Thicker materials require larger wires for deeper penetration, while thinner materials need smaller wires for precision and control.

Matching Wire Size to Material Thickness

Material thickness is a critical factor in selecting the appropriate MIG wire size. For thin steel (up to 1/4″), a 0.023″ or 0.030″ wire is ideal, ensuring precise control and minimal distortion. Thicker materials (3/8″ or more) require larger wires, such as 0.035″ or 0.045″, to achieve deeper penetration and stronger welds. Properly matching wire size to material thickness ensures optimal weld quality, strength, and appearance, reducing the risk of defects or insufficient fusion.

Considering Weld Position and Accessibility

Weld position and accessibility significantly influence wire size selection. Horizontal and flat welds may require smaller wires like 0.023″ or 0.030″ for precision and control. Vertical and overhead welds often need slightly larger wires, such as 0.035″ or 0.045″, to maintain penetration and strength. Tight spaces or complex joints may necessitate smaller wires for better maneuverability. Always consider the weld’s accessibility to ensure proper wire feeding and consistent weld quality across varying positions and applications.

Adjusting Wire Size for Different Welding Machines

When selecting MIG wire size, consider the welding machine’s capabilities. Portable machines often use 0.030″ or 0.035″ wires for versatility, while industrial machines may handle 0.045″ or larger for heavy-duty applications. Wire feed speed and voltage settings must align with the wire size to maintain consistent arc characteristics. Always consult the machine’s specifications and manufacturer guidelines to ensure compatibility and optimal performance for the desired weld quality and material thickness.

MIG Wire Size Applications in Various Industries

MIG welding is essential in automotive repair, manufacturing, and industrial fabrication. Different wire sizes are chosen based on the industry’s specific needs for material thickness and strength.

Automotive Repair and Manufacturing

In automotive repair, MIG welding is widely used for body panels and structural components. Wire sizes like 0.030″ and 0.035″ are common for thin steel sheets and thicker frame parts. For high-strength applications, E70S-6 wire is preferred. In manufacturing, MIG welding ensures precision and durability in assembling vehicle chassis and engine parts. Proper wire selection is critical to achieve the required strength and appearance in automotive welds, ensuring safety and performance on the road.

Industrial Fabrication and Construction

MIG welding is essential in industrial fabrication for creating durable structures and machinery. Wire sizes like 0.035″ and 0.045″ are often used for thicker materials, ensuring strong welds. In construction, MIG welding is employed for steel frameworks and heavy-duty equipment. The right wire size ensures proper penetration and fusion, critical for load-bearing applications. E70S-6 wire is commonly chosen for its strength and reliability in industrial settings, making it a preferred choice for large-scale fabrication projects and construction workflows.

Best Practices for MIG Wire Maintenance

Proper storage of MIG wire in a dry, clean environment prevents moisture damage. Regularly clean the wire feeder and gun liner to ensure smooth wire feeding. Always handle wire carefully to avoid kinking or tangling, which can cause feed issues. Inspect wire for rust or damage before use and replace as needed. Proper maintenance extends wire life and ensures consistent welding performance, reducing downtime and improving overall efficiency in welding operations.

Proper Storage and Handling of MIG Wire

Store MIG wire in a dry, clean environment to prevent moisture absorption, which can cause rust. Keep the wire in its original packaging or a sealed container. Avoid exposing the wire to direct sunlight or extreme temperatures. Handle the wire carefully to prevent kinking or tangling, as this can disrupt the feeding process. Always re-spool loose wire neatly to maintain its integrity. Clean and inspect the wire before use to ensure optimal welding performance and reduce the risk of feed issues. Proper handling and storage extend the wire’s lifespan and maintain its quality, ensuring consistent welds and reducing waste. Regularly check for signs of damage or corrosion and replace the wire as needed. Proper care also prevents contamination, which can compromise weld quality. By following these practices, welders can maintain the reliability and efficiency of their MIG wire, leading to better overall results in their projects. This attention to detail is crucial for achieving professional-grade welds and prolonging equipment life, making it a key aspect of successful MIG welding operations; Additionally, proper storage and handling reduce the need for frequent wire replacements, saving both time and resources in the long run. Always prioritize the condition of the wire to ensure it performs as expected during welding tasks. This proactive approach minimizes downtime and ensures that the welding process remains smooth and efficient, contributing to higher productivity and satisfaction with the final outcomes. Regular maintenance of the wire and its storage area is essential for upholding these standards and achieving consistent results. Remember, the quality of the weld begins with the quality of the wire and how it is maintained, so investing time in proper storage and handling is a worthwhile effort that pays off in the quality of the work produced. Finally, by adhering to these best practices, welders can ensure that their MIG wire remains in optimal condition, ready to deliver reliable performance for every welding project.

Cleaning and Replacing Wire

Clean the MIG wire regularly to remove dirt, oil, or moisture, which can cause poor weld quality. Use compressed air or a clean cloth to wipe the wire. If the wire is damaged or corroded, replace the affected section to ensure smooth feeding. Inspect the wire frequently for signs of wear or contamination. Replacing the wire when necessary prevents weld defects and maintains consistent results. Proper cleaning and timely replacement are essential for achieving reliable, high-quality welds and extending the wire’s lifespan.

Safety Considerations When Working with MIG Wire

Always wear proper PPE, including gloves and eye protection, to prevent injuries from sparks or wire fragments. Ensure good ventilation to avoid inhaling fumes produced during welding. Handle the wire carefully to avoid cuts or abrasions. Keep loose clothing tied back and avoid jewelry that could catch fire. Regularly inspect equipment for damage to prevent electrical hazards. Proper safety practices ensure a secure and efficient welding environment.

Handling Wire Safely

Always wear protective gloves when handling MIG wire to prevent cuts from sharp edges. Avoid wearing loose clothing or jewelry that could catch on the wire. Keep the work area clean to prevent tripping over wire spools. Ensure the wire is free from tangles or kinks, as these can cause feeding issues; Handle the wire correctly to avoid abrasions or injuries; Proper lifting techniques for heavy wire spools are essential to prevent strains. Safe handling reduces hazards and ensures a secure working environment.

Preventing Wire Feed Issues

Regularly inspect and maintain the wire feeder to ensure smooth operation. Check for worn or damaged parts, such as the contact tip or liner, and replace them promptly. Keep the feeder and gun clean to prevent debris buildup. Always use the correct wire size and type for your application. Properly store the wire in a dry, clean environment to avoid rust or contamination. Ensure the wire feeds smoothly without tangles or kinks, as these can disrupt the welding process.

Selecting the correct MIG wire size is essential for achieving professional weld quality. By considering material thickness, type, and weld position, you ensure optimal results. Always maintain and store your wire properly to prevent issues. Regularly inspect equipment and replace worn parts. Proper wire selection enhances efficiency, reduces waste, and ensures safety. Follow guidelines and best practices for successful MIG welding projects. Effective wire management leads to consistent, high-quality welds every time. Keep learning and adapting to improve your welding skills.

MIG welding requires careful wire size selection to ensure optimal results. Common wire sizes range from 0.023″ to 0.045″, with 0.030″ and 0.035″ being widely used. Material thickness, type, and weld position are critical factors. Proper storage and handling of wire prevent contamination and feed issues. Regular maintenance, such as cleaning and replacing wire, ensures consistent weld quality. Safety practices, like handling wire cautiously, are essential. By following these guidelines, welders can achieve professional-grade welds efficiently and safely.

Final Tips for Effective MIG Welding

Always experiment with wire sizes to find the optimal fit for your project. Maintain equipment regularly, ensuring clean connections and proper wire feed. Keep the welding area clean to prevent contamination. Use the right shielding gas for your wire type. Practice consistent technique for uniform welds. Stay safe by wearing proper PPE and following safety guidelines. By combining these tips with proper wire selection, you can achieve professional-quality welds consistently.

wow cata blacksmithing guide

Blacksmithing is a primary profession in WoW Cataclysm Classic, enabling players to craft powerful Plate armor, weapons, and essential items․ With a skill cap of 525, it offers versatility for gear customization and endgame progression, making it a valuable profession for both crafting and earning gold․

Overview of Blacksmithing as a Profession

Blacksmithing is a primary profession in WoW Cataclysm Classic that focuses on crafting metal items, including weapons, armor, and tools․ It is particularly valuable for classes like Death Knights, Paladins, and Warriors, who rely on Plate armor․ With a skill cap of 525, the profession offers a wide range of crafting options, from basic items to epic gear․ Blacksmithing also complements Mining, as it requires ores and metals to craft items․ This profession is not only essential for equipping oneself but also for earning gold through the Auction House, making it a versatile and rewarding skill in the game․

Importance of Blacksmithing in Cataclysm Classic

Blacksmithing holds significant importance in WoW Cataclysm Classic due to its ability to craft high-quality Plate armor and weapons, essential for endgame content․ With the increased skill cap of 525, players can create epic gear, providing a competitive edge in raids and PvP․ Additionally, Blacksmithing supports other professions by crafting tools and materials, making it a valuable asset for any player․ The demand for crafted items drives a lucrative market, allowing Blacksmiths to earn substantial gold․ Thus, mastering this profession is crucial for both progression and profitability in the game․

Getting Started with Blacksmithing

Blacksmithing begins with finding a trainer and gathering essential materials․ Mining complements the profession, providing necessary ores to craft items and reduce costs effectively․

Finding a Blacksmithing Trainer

To begin your Blacksmithing journey, seek out a trainer in major cities․ For the Horde, trainers like Borgosh Corebender in Orgrimmar and Karn Stonehoof in Thunder Bluff are available․ Alliance players can find James Van Brunt in Stormwind and Thurston Xane in Ironforge․ These trainers teach the basics of smelting and crafting, allowing you to start your profession․ As you progress, higher-level trainers in these cities will unlock advanced recipes and techniques, ensuring you can continue leveling your Blacksmithing skill effectively․

Essential Tools and Materials

Blacksmithing in WoW Cataclysm requires specific tools and materials to craft items effectively․ The primary tools needed are an Anvil and a Forge, which are essential for crafting and smelting ores into bars․ Key materials include ores such as Copper, Tin, Iron, Cobalt, and Saronite, which are used to create metal bars․ Having a Mining profession is highly beneficial, as it provides a steady supply of ores, reducing costs and ensuring availability for crafting․ Additional materials like gems or leather may also be required for specific recipes, especially for high-end or specialized gear․

Choosing the Right Specialization

In WoW Cataclysm, Blacksmithing offers two specializations: Weaponsmith and Armorsmith․ Weaponsmiths focus on crafting powerful weapons like swords and axes, ideal for classes like Warriors and Paladins; Armorsmiths specialize in creating Plate armor, essential for tanking classes like Death Knights and Warriors․ Choosing a specialization depends on your playstyle and the needs of your character or guild․ Both paths offer unique benefits, such as access to exclusive recipes and enhanced crafting capabilities; Selecting the right specialization ensures you maximize your contribution to your class and improve your gear progression in the game․

Blacksmithing Leveling Guide (1-525)

This guide provides the fastest path to leveling Blacksmithing from 1 to 525 in WoW Cataclysm Classic, ensuring efficient progression and mastery of crafting essential items․

Leveling from 1-75: The Basics

Begin by smelting ores like Copper and Tin to craft basic items such as Copper Chain Belts and Tin Plate Helmets․ These early recipes provide essential skill points and familiarize you with the crafting interface․ As you progress, unlock higher-tier materials like Silver and Iron to create improved gear․ Focus on using readily available resources to minimize costs and maximize efficiency during the initial leveling phase․ This foundational stage sets the groundwork for more complex crafting later in the game․

Leveling from 75-200: Intermediate Crafting

At this stage, focus on crafting items like Mithril Bracers, Steel Plate Helms, and Ironfused Thickplates․ These recipes use ores such as Mithril, Steel, and Dark Iron, which are more abundant in higher-level zones․ Continue smelting to convert raw ores into usable bars, ensuring you have enough materials․ Recipes in this range start to offer better stats, making them useful for equipping your character or selling on the Auction House․ Keep an eye on your inventory and track which recipes provide the most skill points per craft to optimize your progression․

Leveling from 200-300: Advanced Techniques

Reaching 200-300 skill level introduces advanced recipes like Felsteel Helm and Enchanted Adamantite Belt․ Use materials such as Fel Iron, Adamantite, and Khorium to craft high-quality gear․ Focus on creating items with bonus stats, which are in demand for endgame content․ Smelting becomes crucial as you convert raw ores into bars efficiently․ Experiment with epic patterns like the Sunforged Breastplate for improved results․ Optimize your crafting by using the Auction House to acquire rare materials or sell surplus items for gold․ This phase refines your expertise, preparing you for master-level crafting․

Leveling from 300-425: Expert Recipes

At 300-425 skill, blacksmiths unlock expert recipes, crafting high-end gear like Legionnaire’s Armguards and Cobalt Platewear․ These items are in high demand for their bonus stats․ Use materials such as Cobalt, Saronite, and Titanium to craft these advanced pieces․ Smelting becomes more efficient, allowing for bulk crafting․ Focus on creating gear with meta gems slots for added value․ This phase emphasizes precision and resource management, as materials grow scarce․ Utilize the Auction House to sell surplus items or acquire rare ores․ Crafting at this level prepares you for the final push to mastery․

Leveling from 425-525: Mastering Blacksmithing

Reaching 425-525 skill in Cataclysm Classic Blacksmithing is the final stretch to mastery․ Craft epic items like Dragonbone Cleaver and Light Elementium Belt, using rare materials such as Obsidium, Elementium, and Pyrium․ These high-demand items are crucial for endgame gear․ Focus on refining techniques and experimenting with rare recipes to maximize efficiency․ This phase emphasizes crafting gear tailored to specific classes, enhancing their performance․ With mastery, blacksmiths become indispensable to raid teams and the Auction House market, making this the pinnacle of the profession․

Specializations in Blacksmithing

Blacksmithing specializations allow players to focus on crafting weapons or armor, enhancing efficiency for specific gear types and playstyles, such as raiding or PvP, through dedicated expertise․

Weaponsmith vs․ Armorsmith: Which to Choose

Choosing between Weaponsmith and Armorsmith depends on your playstyle and goals․ Weaponsmiths specialize in crafting powerful weapons, ideal for classes like Warriors and Paladins, while Armorsmiths focus on creating high-quality Plate armor for Death Knights, Paladins, and Warriors․ Weaponsmiths gain access to rare weapon recipes, enhancing DPS or tanking capabilities, while Armorsmiths can craft sets with unique stat bonuses․ Consider your class needs and endgame goals when deciding․ Both specializations offer advantages, so choose wisely to maximize your impact in raids or PvP․ Your decision will shape your crafting journey and in-game effectiveness․

Benefits of Each Specialization

Both Weaponsmith and Armorsmith specializations offer unique benefits tailored to specific playstyles․ Weaponsmiths gain access to rare weapon recipes, enhancing their ability to craft powerful weapons for melee classes like Warriors and Paladins․ This specialization is ideal for players focused on dealing damage or tanking effectively․ On the other hand, Armorsmiths can craft high-quality Plate armor sets, providing exceptional protection and stat bonuses for tanking or survivability-focused classes․ Each specialization unlocks exclusive recipes, allowing players to craft gear that aligns with their class needs and endgame goals, making them invaluable to their group or raid team․

Endgame Crafting and Gear

In WoW Cataclysm Classic, endgame crafting focuses on creating epic and rare items, such as powerful weapons and armor, essential for raiding and PvP․ Blacksmiths can craft gear with specific stats, optimizing it for particular classes, making it highly sought after by players seeking to enhance their performance in high-level content․

Crafting Epic and Rare Items

Crafting epic and rare items in WoW Cataclysm Classic is a hallmark of advanced blacksmithing, allowing players to create powerful gear for endgame content․ These items, such as epic weapons and armor, are highly sought after for their superior stats; To craft them, blacksmiths need rare materials and specific patterns, often obtained through high-level dungeons or raids․ Crafting these items not only enhances your character’s performance but also boosts your reputation as a skilled blacksmith․ Epic items like the Dragonmaw or Elementium pieces are particularly prized, offering unique bonuses that make them indispensable in raids and PvP․ The process can be challenging, requiring significant resources and time, but the rewards are substantial, making it a key part of endgame progression․

Optimizing Gear for Specific Classes

Blacksmithing in WoW Cataclysm Classic allows players to craft gear tailored to specific classes, enhancing their performance in raids and PvP․ For instance, Death Knights benefit from heavy Plate armor with high Stamina, while Paladins and Warriors prioritize Strength and critical strike ratings․ Crafting gear with class-specific stats ensures optimal performance․ Understanding each class’s mechanics and stat priorities is key to creating effective items․ This customization makes blacksmithing indispensable for players seeking to maximize their characters’ potential․ By focusing on class needs, blacksmiths can produce gear that stands out in both functionality and value․

Making Gold with Blacksmithing

Blacksmithing offers lucrative opportunities to earn gold by crafting high-demand items like epic weapons and rare armor․ Selling these on the Auction House yields significant profits consistently․

Profitable Recipes and Market Trends

In WoW Cataclysm Classic, blacksmithing offers several profitable recipes that cater to high demand․ Crafting epic weapons and rare armor for Plate-wearing classes like Paladins and Warriors is highly lucrative․ Items such as Pyrium Blades and Darkiron Sets are consistently in demand, especially during progression phases․ Monitoring market trends on the Auction House helps identify gaps in supply, allowing you to capitalize on shortages․ Focusing on high-margin recipes and timing sales during raid preparation or gear resets can significantly boost profits․ Additionally, crafting utility items like belt buckles and weapon chains provides steady income․ Plan your crafting schedule and material farming carefully to maximize gold earnings․

Setting Up a Successful Auction House Strategy

To dominate the Auction House with blacksmithing, analyze market demand and undercut competitors strategically․ Focus on high-demand items like epic weapons and rare armor, ensuring you post multiples to flood the market․ Use addons like Auctionator or TSM to track trends and set competitive prices․ Timing is crucial—post during peak hours or after resets to maximize visibility․ Diversify your listings to cater to different buyer needs, from raiders seeking upgrades to casual players looking for affordable gear․ Maintain a steady flow of listings to build a reputation as a reliable seller and consistently turn a profit․

Blacksmithing Trainers and Faction-Specific Info

In WoW Cataclysm Classic, Blacksmithing trainers are faction-specific․ Horde trainers include Borgosh Corebender in Orgrimmar and Karn Stonehoof in Thunder Bluff․ Alliance trainers are found in Stormwind and Ironforge․

Horde Trainers in Major Cities

Horde players can learn Blacksmithing from expert trainers in major cities․ In Orgrimmar, Borgosh Corebender is located near the Valley of Strength․ Thunder Bluff hosts Karn Stonehoof, who can be found in the central district․ Additionally, trainers are available in Undercity and Bilgewater Harbor, ensuring easy access for Horde characters across Kalimdor and the Eastern Kingdoms․ These trainers provide essential recipes and skill upgrades, making them indispensable for leveling up in the profession․

Alliance Trainers in Major Cities

Alliance players can access Blacksmithing trainers in key cities like Stormwind, where James Van Brunt is found in the Old Town district․ In Ironforge, the trainer is located near the entrance of the dwarven city․ Darnassus also offers a trainer, situated in the city’s crafting area․ These trainers provide the necessary skills and recipes to progress in Blacksmithing, ensuring Alliance characters can craft essential gear and items for both personal use and trade․

jockey bra size guide

Discover the Jockey Bra Size Guide‚ designed to help you find the perfect fit for ultimate comfort and support․ With a range of sizes and styles‚ Jockey ensures a customized fit for every body type‚ making it easier to navigate bra sizing and enjoy all-day comfort․

Understanding the Importance of Proper Bra Fit

A proper-fitting bra is essential for comfort‚ confidence‚ and overall well-being․ Ill-fitting bras can lead to discomfort‚ poor posture‚ and even health issues like back pain or skin irritation․ A well-fitting bra provides adequate support‚ reducing strain on shoulders and back muscles while ensuring optimal breast health․ Proper fit also enhances appearance‚ allowing clothes to drape smoothly and creating a more balanced silhouette․ Jockey’s size guide helps individuals determine their ideal bra size‚ ensuring a comfortable and supportive fit tailored to their body․ By prioritizing proper fit‚ women can enjoy better physical and mental well-being‚ making it a crucial aspect of daily life․

Overview of Jockey’s Bra Sizing System

Jockey’s bra sizing system is designed to offer a wide range of sizes to accommodate diverse body types․ The system typically includes band sizes from 32 to 44 inches and cup sizes from A to E‚ ensuring a comprehensive fit for various breast sizes and shapes․ This structured approach allows for accurate measurements and size matching‚ providing both comfort and support․ Jockey’s system also incorporates sister sizing‚ offering flexibility for individuals whose measurements fall between standard sizes․ By combining band and cup measurements‚ Jockey’s sizing system ensures a personalized fit‚ catering to different needs and preferences․ This detailed approach makes it easier for women to find a bra that feels tailor-made for them‚ enhancing their overall wearing experience․

Jockey Standard Bra Size Chart

The Jockey Standard Bra Size Chart offers a detailed guide with band sizes from 32 to 44 and cup sizes from A to E‚ ensuring a precise fit for various body types and preferences․

Band and Cup Size Measurements

Accurate band and cup measurements are crucial for determining your Jockey bra size․ To measure your band size‚ wrap a tape around your ribcage‚ under your bust‚ ensuring it’s snug and level․ Exhale and record the measurement; round up if odd․ For cup size‚ measure around the fullest part of your bust while wearing a non-padded bra․ Subtract the band measurement from this to find your cup size․ Use Jockey’s size chart to match these measurements to your ideal fit‚ ensuring comfort and support․ Regular remeasurements are recommended due to body changes‚ such as weight fluctuations or pregnancy‚ which can alter your size․

How to Use the Jockey Bra Size Chart

To use the Jockey Bra Size Chart‚ start by measuring your underbust (band size) and overbust (bust size)․ Wrap a tape snugly around your ribcage for the band measurement and around the fullest part of your bust for the bust measurement․ Match these measurements to the chart‚ which typically includes band sizes from 32 to 44 and cup sizes from A to E․ The chart correlates your measurements to a specific band and cup combination․ Remember‚ this is a general guide‚ and fit may vary by style․ If your size falls between two options‚ consider trying sister sizes for a better fit․ Regularly update your measurements to ensure optimal comfort and support․

Understanding Sister Sizes in Jockey Bras

Sister sizes in Jockey bras offer flexibility when your usual size doesn’t provide the perfect fit․ They maintain the same cup volume by adjusting the band and cup sizes․ For example‚ if a 34C feels too tight in the band‚ try a 36B‚ which offers a looser band but the same cup volume․ Conversely‚ if the band is too loose‚ opt for a 32D․ This system is especially useful when standard sizes don’t fit perfectly or between styles․ Jockey provides charts that include sister sizes‚ making it easier to experiment․ By adjusting band and cup combinations‚ you can achieve a more comfortable and secure fit without compromising support or coverage․

Jockey Plus-Size Bra Size Chart

Jockey’s Plus-Size Bra Size Chart caters to women needing larger band and cup sizes‚ typically from 38 to 48 bands and D to G cups․ It ensures enhanced support and comfort for fuller figures with features like wider bands and reinforced straps; Measure underbust and overbust to find your size‚ as fit may vary by style․ This chart is a tailored guide to help you find the perfect fit for optimal support and confidence․

How Plus-Size Charts Differ from Standard Charts

Jockey’s plus-size bra charts differ from standard charts by offering larger band sizes‚ typically starting at 38 and extending to 48 or more‚ and cup sizes ranging from D to G or beyond․ These charts are designed to accommodate fuller figures with enhanced support features such as wider bands‚ stronger side panels‚ and reinforced straps․ While standard charts focus on smaller band and cup sizes‚ plus-size charts prioritize comfort and security for larger busts․ They also account for varying body shapes‚ ensuring a more tailored fit․ The extended size range and specialized design elements make plus-size charts a more comprehensive option for women needing extra support and coverage․

Features of Jockey Plus-Size Bras

Jockey plus-size bras are crafted with enhanced support and comfort in mind․ Key features include wider‚ adjustable straps and reinforced side panels for added stability․ They also often incorporate breathable‚ moisture-wicking fabrics to keep you cool throughout the day․ Additionally‚ these bras are designed with a focus on a secure fit‚ ensuring the band stays in place without digging․ Many styles offer full coverage cups to provide maximum support and minimize spillage․ These thoughtful details ensure that Jockey plus-size bras offer both functionality and comfort‚ catering specifically to the needs of fuller figures․ By combining practicality with style‚ Jockey delivers bras that empower confidence and ease of movement for all-day wear․

Factors Affecting Bra Fit

Body changes‚ such as weight fluctuations and hormonal shifts‚ can alter bra fit․ Additionally‚ different bra styles and activities impact how a bra fits and performs‚ requiring adjustments for optimal comfort and support․

Body Changes and Their Impact on Bra Size

Body changes significantly influence bra size and fit․ Weight fluctuations‚ pregnancy‚ and hormonal shifts during menstruation or menopause can cause breast size variations․ Muscle gain from exercise may also affect chest measurements‚ altering both band and cup sizes․ Regularly monitoring these changes ensures proper support and comfort․ Professional fittings are recommended during significant body transitions‚ such as pregnancy or weight loss/gain‚ to adjust bra sizes accurately․ Jockey’s flexible sizing options accommodate these changes‚ offering a range of styles to maintain optimal fit and comfort throughout life’s variations․

How Different Bra Styles Affect Fit

Different bra styles significantly impact fit and comfort․ Sports bras offer snug compression‚ ideal for active lifestyles‚ while T-shirt bras provide a seamless look under clothing․ Bralettes‚ often wire-free‚ allow for a relaxed fit‚ perfect for casual wear․ Full-coverage bras maximize support and modesty‚ whereas balconette bras create a lifted silhouette․ Plunge bras accommodate low-cut tops with their deep neckline․ Each style’s design‚ materials‚ and features influence how it fits‚ catering to specific needs․ For instance‚ sports bras prioritize support during motion‚ while full-coverage bras ensure security for fuller busts․ Understanding these differences helps in selecting a bra that aligns with your lifestyle and preferences for optimal comfort and support․

Measuring for Your Jockey Bra Size

Accurate measurements are key to finding your ideal Jockey bra size․ Measure your underbust snugly and your overbust at the fullest point for a perfect fit․

Tools and Tips for Accurate Measurements

Accurate measurements are essential for finding your perfect Jockey bra size․ Use a flexible dressmaker’s tape measure for reliability․ Wear a non-padded bra for the most precise results․ Measure your underbust by wrapping the tape snugly around your ribcage‚ directly under your bust‚ ensuring it’s level and not too tight․ For your overbust‚ measure around the fullest part of your breasts‚ keeping the tape parallel to the floor․ Stand straight with arms relaxed for accurate readings․ If your underbust measurement is odd‚ round up to the nearest even number․ These steps ensure a comfortable and supportive fit‚ helping you choose the right Jockey bra size effortlessly․

Step-by-Step Guide to Measuring Your Band and Cup Size

Measure your band size by wrapping a tape measure snugly around your ribcage‚ directly under your bust․ Ensure the tape is level and not too tight․ Exhale and note the measurement․ If it’s an odd number‚ round up to the nearest even number․ For your cup size‚ measure around the fullest part of your bust while wearing a non-padded bra․ Keep the tape parallel to the floor and your arms relaxed․ Subtract your band size from this measurement to determine your cup size․ Use Jockey’s size chart to match these measurements to your perfect fit‚ ensuring optimal comfort and support with every Jockey bra style․

Troubleshooting Common Fit Issues

Identify and resolve fit problems with Jockey bras․ Check if the band is snug‚ cups cover fully‚ and straps adjust properly․ Ensure optimal comfort and support always․

Identifying and Solving Band Fit Problems

Ensuring a proper band fit is essential for comfort and support․ The band should sit snugly around your ribcage without digging in or riding up․ If the band feels too tight‚ it can cause discomfort and restrict breathing․ On the other hand‚ a band that is too loose may lead to inadequate support and a lack of stability․ To address band fit issues‚ start by fastening the bra on the loosest hook․ You should be able to slide two fingers comfortably under the band․ If it’s too tight‚ consider a larger band size․ If it’s too loose‚ opt for a smaller size․ Additionally‚ ensure the band lies flat and level‚ both at the front and back․ If the band rides up‚ it may indicate the need for a different style or size․ Regularly checking the band fit ensures optimal support and prevents discomfort throughout the day․ By adjusting the band size or style‚ you can achieve a secure and comfortable fit tailored to your needs․

Ensuring Proper Cup Fit and Coverage

Achieving proper cup fit is crucial for both comfort and support․ The cups should fully encapsulate your breasts without any spillage or gapping․ Ensure your breasts are centered within the cups‚ and the underwire (if present) sits comfortably against your ribcage‚ following the natural crease of your breast․ If the cups gape‚ it may indicate a need for a smaller cup size․ Conversely‚ if the cups feel too tight or cause overflow‚ consider a larger size․ Adjust the straps to ensure the cups lie smoothly against your skin․ Proper cup fit ensures optimal support‚ prevents discomfort‚ and maintains a flattering appearance․ Regularly check the fit to accommodate any body changes and ensure continued comfort and confidence․

what is a valve guide

A valve guide is a cylindrical component that guides valve stems, ensuring proper alignment and reducing wear in internal combustion engines, crucial for optimal performance and longevity.

1.1 Definition of a Valve Guide

A valve guide is a cylindrical component in an internal combustion engine that serves as a bushing for the valve stem, ensuring proper alignment and movement. Typically made from materials like bronze or iron, it is press-fit into the engine block or cylinder head, providing a smooth surface for the valve stem to reciprocate. The valve guide plays a critical role in maintaining the engine’s efficiency by preventing excessive wear on the valve stem and ensuring precise operation. Over time, wear on the valve guide can lead to issues such as oil consumption and reduced engine performance, emphasizing its importance in overall engine functionality and longevity.

1.2 Importance of Valve Guides in Engines

Valve guides play a crucial role in ensuring engine performance, efficiency, and longevity. They minimize wear on valve stems and engine blocks, prevent oil leakage, and maintain proper valve operation. By guiding the valves accurately, they reduce mechanical stress and heat buildup, which can lead to premature wear. This ensures consistent engine performance and fuel efficiency. Additionally, valve guides help prevent contamination of engine oil by preventing debris from entering the valve area. Their proper function is essential for maintaining optimal engine health, reducing emissions, and preventing costly repairs. Over time, worn guides can lead to poor engine performance, making regular inspection and maintenance critical for sustained reliability.

Functions of a Valve Guide

Valve guides ensure proper valve stem alignment, reduce wear, and provide a smooth surface for valve operation, maintaining engine efficiency and preventing damage to critical components.

2.1 Providing a Liner Between Engine Block and Valve Stems

Valve guides serve as a critical interface, creating a smooth, wear-resistant path for valve stems to move within the engine block. By acting as a liner, they prevent direct contact between the valve stem and the engine block, which could lead to excessive wear and potential engine damage. The guide ensures proper alignment and reduces friction, allowing the valve to operate smoothly; This function is essential for maintaining engine efficiency and preventing premature wear on both the valve and engine block. Properly installed guides also help maintain consistent valve operation, which is vital for optimal engine performance and longevity. Regular inspection and maintenance are recommended to ensure the guides remain in good condition.

2.2 Maintaining Valve Orientation and Alignment

Valve guides play a critical role in maintaining the proper orientation and alignment of valve stems within the engine. By providing a precise, consistent path for the valves to move in, they prevent wobbling or misalignment, which could lead to excessive wear on engine components. Proper alignment ensures that the valves seat correctly, maintaining compression and efficient combustion. Misaligned valves can result in reduced performance, increased fuel consumption, and potential engine damage. The guide’s stability ensures smooth operation, even at high engine speeds, making it essential for durability and optimal engine function. Regular inspection and maintenance of valve guides are vital to uphold this critical alignment and overall engine health.

Structure and Design of Valve Guides

Valve guides are cylindrical components made from durable materials like bronze or cast iron, designed to ensure precise fitment and withstand engine heat and stress effectively.

3.1 Materials Used for Valve Guides

Valve guides are typically made from durable materials like bronze, cast iron, or specialized alloys. Bronze is preferred for racing engines due to its excellent wear resistance and heat dissipation properties. Cast iron is commonly used in standard applications because it offers strength and cost-effectiveness. Some manufacturers also use advanced materials, such as chrome-plated steel, for enhanced durability. The choice of material depends on the engine’s intended use, with high-performance engines often requiring more robust options. Proper material selection ensures optimal performance, longevity, and minimal maintenance.

3.2 Manufacturing Process of Valve Guides

The manufacturing process of valve guides involves precise machining to ensure durability and performance. Guides are typically made from materials like bronze or cast iron, which are cast into cylindrical shapes. The raw materials are first cast using methods like sand casting or investment casting. Once cast, the guides undergo machining processes such as turning, drilling, and reaming to achieve the exact dimensions. Heat treatment may be applied to enhance strength and wear resistance. Finally, the guides are ground and honed to achieve a smooth surface finish, ensuring proper fitment and minimal friction. Quality control checks are performed to guarantee precision and reliability.

Types of Valve Guides

Valve guides are categorized into bronze, iron, and specialized racing types, each offering unique durability, strength, and performance tailored to specific engine requirements and operating conditions.

4.1 Bronze Valve Guides

Bronze valve guides are a popular choice for high-performance engines, particularly in racing applications. Made from durable bronze alloys, they offer excellent wear resistance and heat dissipation. Bronze guides are preferred in racing due to their ability to withstand high temperatures and maintain proper valve stem alignment. They provide a balance of strength and lubricity, reducing friction and ensuring smooth engine operation. Their durability makes them a cost-effective option for engines subjected to extreme conditions. Bronze valve guides are often recommended for applications where reliability and performance are critical, as they minimize the risk of premature wear and failure. This makes them ideal for racing engines and other high-stress environments.

4.2 Iron Valve Guides

Iron valve guides are a popular choice due to their durability and cost-effectiveness. They are commonly used in road engines and offer excellent resistance to wear and tear. Unlike bronze guides, iron guides are harder and more rigid, making them suitable for high-stress applications. However, they can be heavier and may not dissipate heat as efficiently as bronze. Iron guides are often preferred for their strength and affordability, making them a practical option for everyday vehicles. They are also easier to machine and install, which reduces production costs. While they may not be ideal for racing engines, iron valve guides remain a reliable choice for standard engine operations, providing long-term performance and reliability. Their simplicity and effectiveness make them a staple in many modern engines.

4.3 Specialized Valve Guides for Racing Engines

Specialized valve guides for racing engines are designed to withstand extreme conditions, such as high RPMs and intense heat. These guides are typically made from high-performance materials like bronze or advanced alloys, offering superior durability and resistance to wear. Unlike standard guides, racing-specific ones often feature precision machining and coatings to reduce friction and improve thermal stability. They are engineered to maintain precise valve alignment under stress, ensuring optimal engine performance. Racing valve guides also minimize oil consumption and prevent premature wear, which is critical in competitive environments. Their design reflects the need for reliability and peak efficiency, making them a vital component in high-performance engines.

Installation and Machining of Valve Guides

Installation involves precise machining to ensure accurate alignment and fitment, requiring skilled expertise to maintain engine performance and durability, with proper tools and techniques essential for success.

5.1 Machining Processes for Valve Guide Installation

Machining processes for valve guide installation involve precise techniques to ensure proper fitment and alignment. The process typically starts with inspecting the engine block to identify worn or damaged guides. A piloted reamer is often used to enlarge the guide bore to the correct diameter, ensuring accuracy. Once the bore is prepared, the new valve guide is pressed or installed using specialized tools. The guide must be perfectly aligned to prevent valve stem wear. Finally, the area is inspected to ensure proper seating and alignment. Using high-quality materials, like Meehanite, ensures durability. Proper machining is critical for optimal engine performance and longevity.

5.2 Tips for Selecting the Right Machine Shop

When selecting a machine shop for valve guide installation, prioritize experience with similar engine types and valve guide machining. Ask for references or examples of their previous work to ensure quality. Check for certifications or affiliations with professional organizations, which indicate adherence to industry standards. Observing the shop’s cleanliness and organization can also reflect their attention to detail. Clear communication about the process, materials, and timelines is crucial. Additionally, inquire about their approach to precision measurements and tooling to ensure accuracy. A reputable shop will provide transparent pricing and warranties, giving you confidence in their workmanship and reliability.

Maintenance and Inspection of Valve Guides

Regular inspection helps identify wear, such as excessive stem movement or scoring, ensuring timely replacements to prevent engine damage or performance loss.

Inspect valve guides for wear, and replace them when clearance exceeds manufacturer limits. Proper maintenance ensures optimal engine performance and longevity.

6.1 Signs of Worn-Out Valve Guides

Worn-out valve guides often exhibit noticeable symptoms that affect engine performance. Common signs include decreased power output, reduced fuel efficiency, and increased oil consumption due to leakage. Additionally, excessive smoke from the exhaust, particularly blue smoke, indicates oil is entering the combustion chamber. Noisy valve trains, such as clattering or tapping sounds, may also occur. Over time, worn guides can lead to misaligned valves, causing poor engine operation. If left unchecked, these issues can escalate, requiring costly repairs. Regular inspections are crucial to identify and address worn valve guides early, ensuring optimal engine functionality and preventing further damage.

6.2 Regular Inspection and Replacement Recommendations

Regular inspection of valve guides is essential to prevent engine damage. Signs of wear, such as excessive oil consumption or stem damage, indicate the need for replacement. Inspect every 50,000 to 100,000 miles. Replace guides if clearance exceeds manufacturer limits or if stems show significant wear. Use precision tools to measure guide bore wear. Always consult a professional for accurate assessments and to ensure proper installation. Neglecting inspections can lead to costly repairs, such as head replacement. Proper maintenance ensures optimal engine performance and longevity, preventing premature wear on related components. Regular checks are a cost-effective way to avoid major engine issues.

Common Issues Related to Valve Guides

Worn valve guides can cause oil consumption, increased emissions, and poor engine performance. Misalignment may lead to valve train damage and inefficient combustion processes over time.

7.1 Effects of Improperly Aligned Valve Guides

Improperly aligned valve guides can lead to excessive wear on valve stems and engine block surfaces, reducing engine efficiency. Misalignment disrupts the valve train’s operation, causing poor combustion and reduced performance. Over time, this can result in increased oil consumption due to worn seals and guides. Additionally, improper alignment may cause uneven stress distribution, leading to premature wear of related components. In severe cases, it can cause valves to bind or seize, potentially damaging the engine. Regular inspection and proper alignment are crucial to prevent these issues and ensure smooth engine operation. Addressing alignment problems early can save costly repairs and maintain optimal engine functionality.

7.2 Consequences of Using Low-Quality Materials

Using low-quality materials for valve guides can lead to premature wear, increased engine noise, and reduced performance. These materials may fail to withstand high temperatures and stresses, causing the guides to degrade faster. This can result in oil leakage, reduced fuel efficiency, and potential engine damage. Additionally, low-quality materials may not provide proper alignment for valve stems, leading to misalignment issues and further wear on engine components. In racing engines, where performance is critical, using substandard materials can significantly impact power output and reliability. Regular inspections and replacing worn or damaged guides with high-quality materials are essential to maintain engine health and longevity.