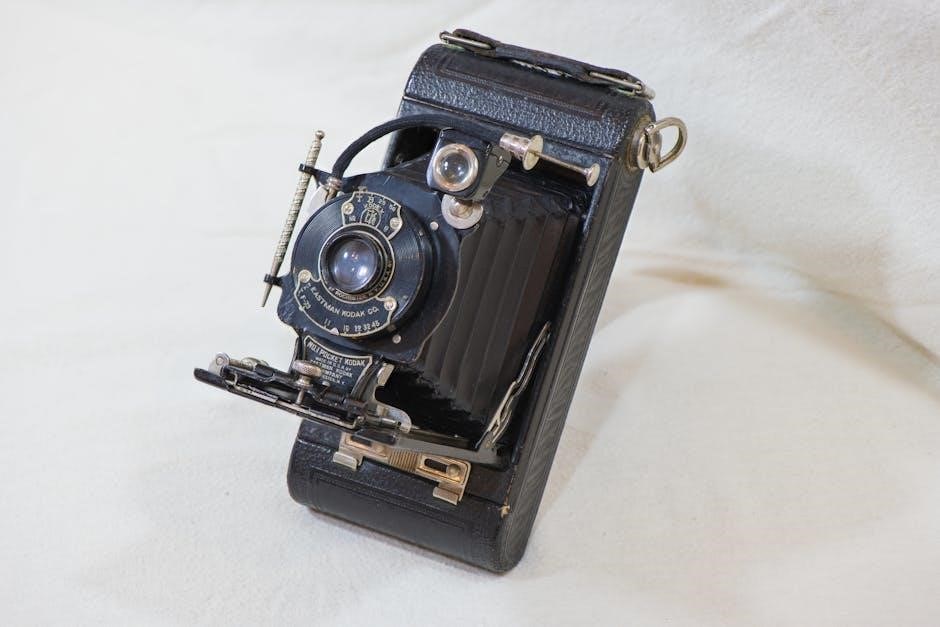
Pruveeo offers premium dash cams, known for reliability and creativity. Their models provide high-quality video, multi-camera channels, and advanced features for optimal performance and user satisfaction;
1.1 Overview of the Pruveeo Dash Cam Series
The Pruveeo Dash Cam Series offers a range of models designed to meet diverse needs, from basic to advanced recording requirements. The D90-4CH model, for instance, supports four-channel recording, capturing front, rear, left, and right views simultaneously. It features 4K, FHD, and HD video quality, ensuring crystal-clear footage. The series also includes models like the D700, which combines a dash cam with a 7-inch anti-dazzling rearview mirror for convenience. Pruveeo dash cams are equipped with loop recording, G-sensor, and night vision, enhancing safety and reliability. With a focus on user-centric design, Pruveeo has established itself as a global leader in dash cam technology since 2008.
1.2 Importance of Reading the Manual
Reading the Pruveeo Dash Cam manual is crucial for optimal use and safety. It provides essential guidance on installation, operation, and troubleshooting, ensuring users understand all features and settings. The manual details proper mounting techniques, hardwiring procedures, and how to navigate menu settings effectively. It also outlines safety precautions, such as avoiding wet handling and improper disconnections, to prevent hazards. By following the manual, users can maximize their dash cam’s performance, avoid potential damages, and ensure compliance with legal and safety standards. Pruveeo emphasizes the importance of carefully reviewing the manual before first use to enhance functionality and user experience.

Key Features of the Pruveeo Dash Cam
The Pruveeo Dash Cam offers multiple camera channels, high-resolution recording, built-in G-sensor, night vision, and loop recording. These features ensure comprehensive coverage and safety on the road.
2.1 Multiple Camera Channels (Front, Rear, Left, Right)
The Pruveeo Dash Cam supports multiple camera channels, capturing front, rear, left, and right views simultaneously. This feature ensures full vehicle coverage, enhancing safety and evidence recording.
2.2 High-Resolution Video Recording (4K, FHD, HD)
The Pruveeo Dash Cam offers high-resolution video recording in 4K, FHD, and HD, ensuring crisp and clear footage. With 4K resolution, capture every detail on the road for superior clarity. The front camera features three lenses with adjustable angles, allowing for a wider field of view. The Pruveeo D700 model includes a 7-inch rearview mirror with anti-dazzling technology, enhancing visibility. Its D90-4CH variant provides 1080p resolution with four FHD cameras, enabling simultaneous recording from multiple angles. These high-resolution options ensure that every moment is captured vividly, making it ideal for evidence or scenic drives. The adjustable lenses and anti-dazzling mirror further enhance the overall recording experience, providing users with reliable and high-quality video capture. This feature is essential for drivers seeking detailed and accurate recordings. Pruveeo dash cams deliver exceptional video quality, catering to various user needs. Regular updates ensure optimal performance, making them a top choice for drivers worldwide. By offering multiple resolution options, Pruveeo dash cams provide flexibility and customization, ensuring users can choose the best setting for their specific requirements. This adaptability, combined with high-resolution capabilities, makes Pruveeo dash cams a trusted and versatile option for vehicle owners. With advanced features like loop recording and emergency recording, users can rely on their dash cams to capture essential moments without interruption. Pruveeo’s commitment to quality and innovation ensures that their dash cams remain at the forefront of the market, offering users peace of mind and exceptional performance. Whether for safety, insurance purposes, or personal use, Pruveeo dash cams deliver unparalleled video clarity and functionality. Their high-resolution recording capabilities make them an indispensable tool for any driver. By integrating cutting-edge technology, Pruveeo continues to set new standards in the dash cam industry, ensuring that users have access to the best possible recording solutions. With models like the D90-4CH and D700, Pruveeo caters to a wide range of needs, from basic to advanced, providing users with the flexibility to choose the perfect dash cam for their vehicle.
2.3 Built-in G-Sensor and Night Vision
The Pruveeo Dash Cam features a built-in G-Sensor and Night Vision, enhancing safety and visibility. The G-Sensor detects sudden movements, automatically recording and saving emergency footage. This ensures crucial moments are captured during accidents or shocks. Night Vision technology improves low-light recording, providing clear images even in dark conditions. The combination of these features ensures detailed and reliable recordings, whether during the day or night. Users can rely on these advanced sensors for improved safety on the road. The G-Sensor’s sensitivity can be adjusted to minimize false triggers, ensuring only important events are recorded. Night Vision enhances visibility, reducing glare and capturing clear images in low-light environments. This makes the Pruveeo Dash Cam a reliable choice for drivers seeking enhanced safety features and superior video quality in all conditions.
2.4 Loop Recording and Emergency Recording
The Pruveeo Dash Cam offers Loop Recording, which continuously records footage by overwriting the oldest files when storage is full, ensuring the device never runs out of space. Emergency Recording is activated by the G-Sensor when an accident or sudden movement is detected, automatically saving a short clip that cannot be overwritten. These features work together to provide peace of mind, ensuring critical moments are captured and preserved. Loop Recording is ideal for long drives, while Emergency Recording ensures evidence is saved in case of an incident. Both functions enhance the dash cam’s reliability and functionality, making it a robust choice for driver safety and evidence collection.

Technical Specifications
The Pruveeo Dash Cam features a high-resolution display, wide-angle lens, and supports storage capacities up to 256GB; It records in MP4 format and operates between 15°F to 150°F (-9°C to 65°C) with 10-80% humidity.
3.1 Display and Lens Details
The Pruveeo Dash Cam features a high-resolution display, typically ranging from 2 to 4 inches, ensuring clear video playback and menu navigation. The lens is designed with a wide-angle view, capturing more of the road and surroundings. The front camera often includes a focal length of around 120 degrees, while additional cameras may vary. The lens is constructed from high-quality glass, offering sharp images and minimal distortion. Some models include anti-glare coatings to reduce reflections. The display screen is touch-sensitive in select models, allowing for intuitive control and easy access to settings. Proper calibration ensures optimal image clarity and performance.
3.2 Storage Capacity and File Formats
The Pruveeo Dash Cam supports microSD cards with a recommended storage capacity of 8GB to 128GB, ensuring ample space for recording. It is essential to use a Class 10 or higher card for optimal performance. The device records video in MP4 format, which is widely compatible and offers efficient compression. For images, it uses JPEG format, ensuring clarity and ease of sharing. The dash cam automatically organizes files by date and time, making it easy to locate specific recordings. Regularly formatting the SD card via the menu settings is recommended to maintain performance and prevent data corruption. Always use a high-quality card to avoid recording interruptions.
3.4 Operating Temperature and Humidity
The Pruveeo Dash Cam operates effectively within a temperature range of 15°F to 150°F (-9°C to 65°C) and a humidity range of 10% to 80%. Extreme temperatures or humidity can affect performance or damage the device. Avoid placing the dash cam in direct sunlight for extended periods, as it may cause overheating. Similarly, ensure the camera is not exposed to excessive moisture, which could lead to fogging or internal damage. For optimal functionality, store the dash cam in a cool, dry place when not in use. Proper environmental conditions ensure longevity and reliable performance of your Pruveeo Dash Cam.

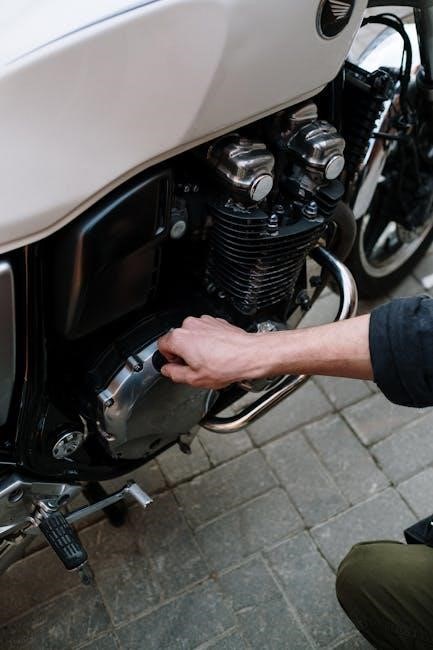
Installation and Mounting
Proper installation ensures optimal performance. Mount the dash cam securely on the windshield using the provided suction cup or adhesive mount. Ensure the camera is level and positioned for clear road visibility. Avoid obstructing the driver’s view. For a more permanent solution, consider hardwiring the dash cam to your car’s battery. Refer to the manual for detailed mounting instructions and wiring guidelines to ensure a safe and stable setup. Proper installation enhances safety and ensures your Pruveeo Dash Cam functions reliably in all driving conditions.
4.1 Mounting the Dash Cam on the Windshield
Mount the Pruveeo Dash Cam on your windshield using the provided suction cup or adhesive mount. Ensure the area is clean and dry for a secure fit. Peel the backing from the mount and press it firmly onto the windshield. Adjust the camera for a clear view of the road, ensuring it doesn’t obstruct your driving visibility. Once positioned, secure the dash cam to the mount and test its operation to confirm proper installation. Proper mounting ensures reliability and safety while driving.
4.2 Hardwiring the Dash Cam to the Car Battery
Hardwiring your Pruveeo Dash Cam ensures continuous power and automatic recording. Use the provided hardwire kit to connect the dash cam directly to your car’s battery. Locate the fuse box and identify the constant power and ignition wires. Connect the red wire to the constant power source and the yellow wire to the ignition-switched power source. Secure the black wire to a grounding point. After installation, test the dash cam to ensure it powers on and records automatically. Always disconnect the car battery before starting work to avoid electrical shock or damage. Refer to the user manual for specific wiring diagrams and safety guidelines.
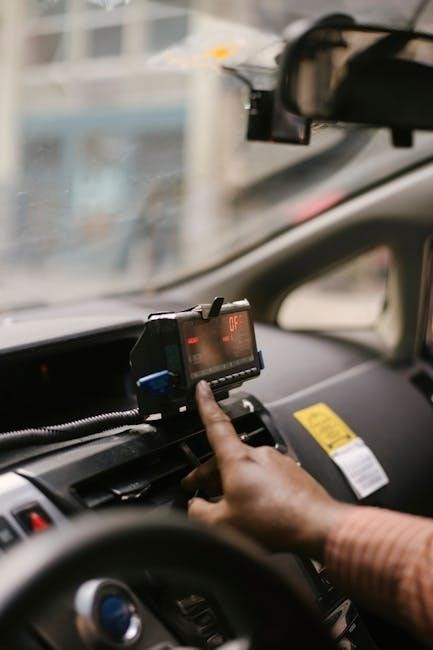
Basic Operations and Controls
The Pruveeo Dash Cam features simple controls for power, recording, and menu navigation. Use the power button to turn it on/off and start/stop recording.
5.1 Powering On/Off and Basic Functions
To power on the Pruveeo Dash Cam, connect it to your car’s charger or hardwire it. The device starts recording automatically upon ignition. Use the power button to turn it off manually. Basic functions include starting and stopping recording, which can be controlled via the power button or through the app. The camera also features automatic shutdown to prevent battery drain. Ensure all connections are secure to avoid malfunctions. Always refer to the manual for specific instructions tailored to your model. Proper handling ensures optimal performance and longevity of the device.
5.2 Navigating the Menu Settings
Navigating the menu settings on your Pruveeo Dash Cam is straightforward. Use the touchscreen or buttons to access the main menu. Key options include adjusting video resolution, enabling/disabling features like the G-sensor and night vision, and setting the date and time. You can also format the memory card or reset to default settings. The menu is user-friendly, allowing quick access to customization. For detailed guidance, refer to the manual or use the Pruveeo app to manage settings via your smartphone. This ensures optimal performance and personalization of your dash cam experience.

Customizing Settings
Customize your Pruveeo Dash Cam settings to enhance functionality. Adjust video quality, enable/disable features like G-Sensor and night vision, and set date/time for personalized use. Refer to the manual for details.
6.1 Adjusting Video Quality and Resolution
Adjusting video quality and resolution on your Pruveeo Dash Cam ensures optimal recording performance. Access the menu to select from 4K, FHD, or HD resolution, balancing storage capacity and clarity. Lower resolutions save storage but may reduce detail. The manual provides step-by-step guidance for these adjustments, ensuring you can customize settings to meet your specific needs. Proper configuration helps in capturing clear footage, essential for evidence or memory purposes. Regularly review and adjust these settings to maintain video quality and storage efficiency. This feature is crucial for user satisfaction and effective performance of the dash cam. Always refer to the manual for precise instructions.
6.2 Enabling/Disabling Features (G-Sensor, Night Vision)
The Pruveeo Dash Cam allows you to enable or disable features like the G-Sensor and Night Vision to customize your recording experience. The G-Sensor detects sudden impacts and automatically saves footage, while Night Vision enhances low-light recording. To toggle these features, navigate to the menu settings and select the desired option. Disabling features like Night Vision can help reduce battery consumption, while disabling the G-Sensor may be useful for smoother driving conditions. Refer to the manual for detailed steps to adjust these settings based on your preferences. Proper customization ensures optimal performance and meets your specific needs while driving. Always ensure these features are configured correctly for reliable operation.
6.3 Setting Up Date and Time
Accurately setting the date and time on your Pruveeo Dash Cam is essential for proper functionality. Start by powering on the device and navigating to the menu settings. Select the “Date and Time” option and adjust the values using the on-screen controls or buttons. Ensure the time zone is correctly set to match your location. After making changes, save the settings to ensure they are applied. Correct date and time settings are crucial for timestamping recordings, which can be important for evidence or organizational purposes. Refer to the manual for detailed steps, as improper setup may affect video accuracy and functionality. Always verify the settings after adjustment to confirm they are correct. This ensures your dash cam operates reliably and provides precise information when needed. Proper configuration is vital for optimal performance and legal compliance.

Using the Pruveeo Dash Cam App
Connect your Pruveeo Dash Cam to the app for easy video management; Follow steps for iPhone and Android to pair the device and access features seamlessly.
7.1 Connecting the Dash Cam to Your Smartphone
To connect your Pruveeo Dash Cam to your smartphone, follow these steps:
Download and install the Pruveeo Dash Cam app from the Google Play Store (Android) or Apple App Store (iOS).
Ensure both the dash cam and your smartphone have Wi-Fi enabled.
Open the app and select your dash cam model from the available devices list.
Enter the dash cam’s Wi-Fi password, typically found in the manual or on the device.
Once connected, you can view live footage, manage recordings, and adjust settings directly through the app.
7.2 Managing and Transferring Videos via the App
Using the Pruveeo Dash Cam app, you can easily manage and transfer videos to your smartphone. Open the app and connect to your dash cam to access recorded footage. Select the videos you wish to transfer and choose the “Download” option to save them to your device. Once transferred, videos can be organized, viewed, or shared directly from the app. The app also allows you to delete unnecessary recordings from the dash cam to free up storage space. Ensure a stable Wi-Fi connection for smooth video transfer. This feature enhances convenience and ensures your important recordings are safely backed up on your smartphone.

Troubleshooting Common Issues
Resolve common issues like the dash cam not turning on, video distortion, or no recording. Check connections, ensure proper SD card formatting, and restart the device. Consult the manual or contact support for further assistance.
8.1 Device Not Turning On or Charging
If your Pruveeo dash cam fails to turn on or charge, first check the power source and connections. Ensure the USB cable is securely connected to both the device and the power source. Verify that the outlet or USB port is functioning properly. If using a car charger, try a different port or switch to a wall adapter. Inspect the charging cable for damage or wear. If the issue persists, reset the device by pressing and holding the power button for 10-15 seconds. If problems continue, contact Pruveeo customer support for further assistance or potential repair options.
8.2 Video Distortion or No Recording
If your Pruveeo dash cam displays distorted video or fails to record, start by checking the SD card for corruption or insufficient space. Format the card using the device or a computer. Ensure all connections, including the lens and USB cable, are secure. Restart the dash cam and test recording functionality. If issues persist, check the video settings in the menu to ensure proper resolution and quality are selected. Verify that loop recording is enabled and emergency recording is functioning. If the problem remains, update the firmware or contact Pruveeo customer support for assistance. Avoid using damaged cables to prevent electrical issues.

Maintenance and Care Tips
Regularly clean the lens and screen with a soft cloth to ensure clear video quality. Update firmware for optimal performance and check SD card connections to prevent issues. Avoid touching the lens with wet hands to prevent damage. Store the dash cam in a dry, cool place to maintain functionality. Ensure proper ventilation to prevent overheating during extended use. Follow these tips to extend the life and reliability of your Pruveeo dash cam, ensuring uninterrupted recording and clear footage capture.
9.1 Cleaning the Lens and Screen
Regular cleaning of the lens and screen is essential for maintaining clear video quality. Use a soft, dry cloth to gently wipe away dirt, smudges, or fingerprints. Avoid using harsh chemicals, abrasive materials, or wet cloths, as they may damage the lens coating or screen. For stubborn smudges, lightly dampen the cloth with water, but ensure it is not soaking wet. Clean the lens in a circular motion to prevent streaks. The screen can be cleaned with a microfiber cloth, gently removing any dust or fingerprints. Regular cleaning ensures optimal visibility and recording clarity. Store the dash cam in a protective case when not in use to prevent scratches or dust buildup.
9.2 Updating Firmware and Software
Regular firmware and software updates are crucial for ensuring your Pruveeo dash cam functions optimally. To update, visit the official Pruveeo website or use the Pruveeo App. Download the latest firmware file and follow the on-screen instructions. Connect your dash cam to a computer or smartphone via USB or Wi-Fi, depending on the model. Ensure a stable internet connection and avoid interrupting the update process. Once complete, restart the device to apply changes. Updates often include bug fixes, feature improvements, and performance enhancements. Always refer to the user manual or Pruveeo support for specific guidance tailored to your model.

Warranty and Customer Support
Pruveeo offers a comprehensive warranty and dedicated customer support. For inquiries or issues, contact their support team via email or visit their official website for assistance.
10.1 Warranty Terms and Conditions
The Pruveeo dash cam warranty covers manufacturing defects for a specified period. Warranty terms vary by model, typically covering 1-2 years. Proof of purchase is required for claims. Damage from misuse, improper installation, or accidents is excluded. Users must adhere to usage guidelines outlined in the manual. For detailed warranty terms, visit the Pruveeo website or contact their customer support. Proper registration and adherence to care instructions ensure warranty validity, providing peace of mind for users.
10.2 Contacting Pruveeo Customer Service
For inquiries or support, contact Pruveeo customer service via email at service@pruveeo.store. Their team is available to assist with questions about installation, troubleshooting, or app usage. Visit the official Pruveeo website for additional resources, including a Help Center with FAQs and setup guides. Customers can also reach out for warranty-related inquiries or technical support. Pruveeo aims to provide timely and helpful responses to ensure a positive user experience. For detailed assistance, include your device model and a clear description of the issue when contacting support.