Welcome to the Rc Plus Thermostat user guide. This manual is designed to help you understand and optimize your thermostat’s features for enhanced comfort and energy efficiency.
What is the Rc Plus Thermostat?
The Rc Plus Thermostat is an advanced, user-friendly smart thermostat designed to regulate your home’s heating and cooling systems efficiently. It combines modern technology with intuitive controls to provide seamless temperature management. With a sleek, touchscreen interface and remote access capabilities, the Rc Plus Thermostat allows users to adjust settings from anywhere using a smartphone app or voice commands through smart home systems like Alexa or Google Assistant.
Engineered for compatibility with most HVAC systems, this thermostat offers features like geofencing, energy-saving modes, and adaptive learning to optimize comfort and energy usage. It also supports multi-zone control, enabling precise temperature adjustments in different areas of your home. The Rc Plus Thermostat is an ideal solution for homeowners seeking a balance between convenience, energy efficiency, and advanced smart home integration.
Key Features of the Rc Plus Thermostat
The Rc Plus Thermostat offers a range of innovative features designed to enhance your home comfort and energy efficiency; Its high-resolution touchscreen display provides an intuitive interface for easy navigation and adjustments. The thermostat is compatible with most HVAC systems and supports both heating and cooling configurations. Remote access is available through a smartphone app, allowing users to adjust settings from anywhere. Voice control integration with popular smart home systems like Amazon Alexa and Google Assistant adds convenience. Additional features include geofencing, which automatically adjusts temperatures based on your location, and energy-saving modes that optimize usage. The thermostat also supports multi-zone control, enabling precise temperature adjustments in different areas of your home. With adaptive learning capabilities, the Rc Plus Thermostat can analyze your preferences and adjust settings accordingly, ensuring a personalized experience.
Benefits of Using the Rc Plus Thermostat
The Rc Plus Thermostat offers numerous benefits that enhance your home comfort and reduce energy consumption. Its advanced features allow for precise temperature control, ensuring consistent comfort while minimizing energy waste. The thermostat’s smart learning capabilities adapt to your schedule and preferences, automatically optimizing heating and cooling usage. This leads to significant energy savings, lowering your utility bills over time. Additionally, the thermostat’s remote access and voice control features provide unparalleled convenience, allowing you to adjust settings from anywhere. The integration with smart home systems further enhances its functionality, making it a seamless addition to your connected lifestyle; By reducing unnecessary energy usage, the Rc Plus Thermostat also supports eco-friendly practices, helping you reduce your carbon footprint. Overall, it combines efficiency, convenience, and customization to create a superior home climate control experience.

Installation and Setup
Installing the Rc Plus Thermostat is straightforward with compatibility checks and step-by-step guides. Ensure proper wiring connections and follow safety precautions for a smooth setup process.
Compatibility Check for the Rc Plus Thermostat
Before installing the Rc Plus Thermostat, ensure it is compatible with your HVAC system. Verify that it supports your system type, such as gas, electric, or heat pump configurations. Check the voltage requirements to match your home’s electrical setup. Additionally, review the wiring diagram to confirm compatibility with your existing thermostat wires. If you have a C-wire, ensure it is properly connected for continuous power. If not, check if the Rc Plus Thermostat supports battery-powered operation or includes an adapter. Consult the user manual or manufacturer’s website for a detailed compatibility list. This step is crucial to avoid installation issues and ensure optimal performance. If unsure, consider consulting a professional to verify compatibility and provide guidance tailored to your system.
Step-by-Step Installation Guide

Begin by turning off the power to your HVAC system at the circuit breaker or fuse box. Remove the old thermostat and take note of the wiring configuration. Compare it with the Rc Plus Thermostat’s wiring diagram to ensure proper connections. Mount the new base plate to the wall, ensuring it is level and secure. Connect the wires to the corresponding terminals, double-checking for accuracy. If your system requires a C-wire and one isn’t present, use the included adapter or consult a professional. Reattach the thermostat faceplate and restore power. Complete the initial setup by selecting your language, location, and preferences. Test the system by running a heating and cooling cycle to ensure proper operation. For detailed visual guidance, refer to the wiring diagrams provided in the manual or online resources.
Wiring Diagrams and Connections
Understanding the wiring diagrams is crucial for a successful installation. Locate the wiring diagram specific to your Rc Plus Thermostat model, typically found in the manual or online. Identify the terminals (R, W, Y, G, C, etc.) and their functions. Turn off the power to your HVAC system before starting. Compare your existing wiring with the diagram to ensure compatibility. Connect each wire to the corresponding terminal on the Rc Plus base plate, securing them firmly. If your system lacks a C-wire, use the provided adapter or consult a professional. Double-check all connections to avoid errors. Once wired, restore power and test the system by running a heating and cooling cycle. For complex setups, refer to the detailed diagrams or seek assistance from a certified technician. Proper wiring ensures optimal performance and safety, so take your time to verify each connection accurately.
Initial Configuration and Setup

After installation, power on the Rc Plus Thermostat and follow the on-screen instructions for initial setup. Begin by setting the date, time, and preferred temperature range. Choose your unit of measurement (°F or °C) and select your HVAC system type from the menu. Configure basic settings such as temperature swing, cycle rate, and adaptive recovery. If your thermostat is smart-enabled, connect it to your Wi-Fi network and link it to your smartphone or voice assistant. Download and install the companion app to access remote controls and advanced features. Test your system by running a heating and cooling cycle to ensure proper operation. Refer to the manual for specific instructions tailored to your model. Proper initial configuration ensures optimal performance and compatibility with your home’s HVAC system. If you encounter issues, restart the thermostat or consult the troubleshooting section for guidance.

Operating the Rc Plus Thermostat
The Rc Plus Thermostat operates via a user-friendly touchscreen interface, allowing easy temperature adjustments, scheduling, and smart home integrations for seamless control and energy efficiency.
Basic Usage and Navigation
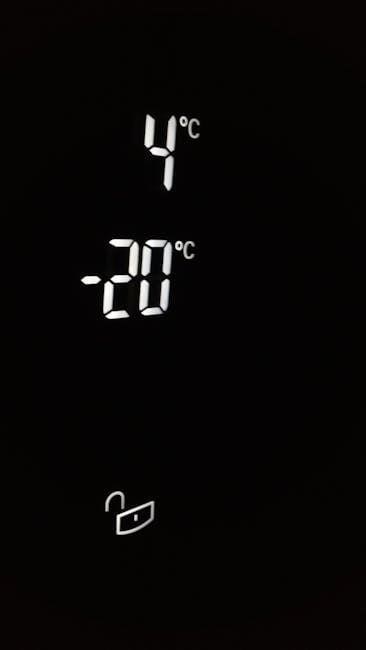
Operating the Rc Plus Thermostat is straightforward, with an intuitive interface designed for ease of use. To begin, ensure the device is powered on and properly connected to your HVAC system. The touchscreen display provides clear visibility of the current temperature, setpoint, and system status. Adjusting the temperature is simple: tap the arrows to increase or decrease the setpoint, or use the slide bar for precise control. Navigation is seamless, with menu options accessible via the touchscreen. The home screen displays essential information, while additional settings can be accessed through the menu icon. Basic operations include switching between heating and cooling modes, enabling fan operation, and viewing system status. The thermostat also supports basic scheduling, allowing you to set temperature preferences for different times of the day. This user-friendly design ensures that even first-time users can navigate and operate the Rc Plus Thermostat with minimal effort, optimizing comfort and energy efficiency.
Setting Up a Schedule
Scheduling your Rc Plus Thermostat is a convenient way to optimize comfort and energy efficiency. To create a schedule, navigate to the menu and select the “Schedules” option. From there, you can choose to create a new schedule or edit an existing one. The interface allows you to set specific temperature preferences for different times of the day, such as when you wake up, leave for work, return home, or go to bed. You can customize the schedule for weekdays and weekends separately, ensuring your home is always at the right temperature when you need it most. Once your schedule is set, the thermostat will automatically adjust the temperature according to your preferences. This feature helps reduce energy consumption by avoiding unnecessary heating or cooling when no one is home. Regularly reviewing and updating your schedule ensures it remains tailored to your lifestyle and preferences.
Manual Override and Temporary Adjustments
The Rc Plus Thermostat allows users to make manual adjustments or temporary overrides to the set temperature without altering the programmed schedule. This feature is particularly useful for occasions when you need immediate comfort changes. To override the temperature, simply touch the screen and adjust the digital dial to your desired setting. Temporary adjustments can be made for a specific duration, such as a few hours, after which the thermostat will automatically revert to the scheduled program. For example, if you’re leaving the house earlier than usual, you can manually lower the temperature to save energy until your scheduled departure time. The thermostat also provides an “Hold” option, which pauses the current schedule and maintains the manual temperature indefinitely until the hold is canceled. This flexibility ensures you can balance energy efficiency with personal comfort, even when your routine changes unexpectedly.
Using Smart Features and Voice Control
The Rc Plus Thermostat offers seamless integration with smart home systems, allowing users to control their heating and cooling systems remotely via the thermostat’s dedicated app. This app is compatible with both iOS and Android devices, enabling users to adjust temperatures, monitor energy usage, and receive notifications from anywhere. Additionally, the thermostat supports voice control through popular platforms like Amazon Alexa and Google Assistant. Users can issue voice commands to raise or lower the temperature, switch between modes, or inquire about the current settings. For example, you can say, “Set the living room to 72 degrees,” or “Turn off the AC,” and the thermostat will respond accordingly. This hands-free control enhances convenience and accessibility, especially for busy households. The smart features also include geofencing, which adjusts the temperature based on your location, and energy usage reports to help optimize your settings. These advanced capabilities make the Rc Plus Thermostat a modern and efficient solution for home comfort.

Advanced Features and Customization
The Rc Plus Thermostat offers geofencing, energy-saving modes, and customizable temperature zones. Users can tailor settings to their preferences and integrate with smart home systems for enhanced control and efficiency.
Geofencing and Location-Based Control
The Rc Plus Thermostat offers advanced geofencing capabilities, allowing users to control their heating and cooling systems based on their location. By enabling location services on their smartphone, users can set up a virtual “geofence” around their home. When the user leaves or enters this predefined area, the thermostat automatically adjusts the temperature to optimize energy usage and comfort. This feature is particularly useful for busy households, as it eliminates the need to manually adjust settings when leaving or arriving home.
- Enable location services on your smartphone.
- Set up the geofence radius in the app.
- Customize temperature settings for when you’re away or returning home.
Geofencing ensures your home is always at the right temperature while saving energy when no one is present. This feature seamlessly integrates with your daily routine, providing unparalleled convenience and efficiency.

Energy-Saving Modes and Settings
The Rc Plus Thermostat is designed with energy efficiency in mind, offering multiple modes and settings to help reduce energy consumption. One of the key features is the Eco Mode, which adjusts temperatures slightly to minimize energy use while maintaining comfort. Additionally, the thermostat includes a Smart Recovery feature, which learns your schedule and preferences to preheat or cool your home only when necessary. Users can also enable Energy-Saving Hours, allowing the system to adjust temperatures during off-peak times or when energy rates are higher.
- Enable Eco Mode for subtle temperature adjustments.
- Customize Smart Recovery to align with your daily routine.
- Set Energy-Saving Hours to optimize energy usage.
These settings work together to reduce your energy consumption without compromising comfort, helping you save on utility bills while supporting eco-friendly practices.
Customizing Temperature Zones
Customizing temperature zones with the Rc Plus Thermostat allows you to create a personalized heating and cooling experience for different areas of your home. This feature is particularly useful in multi-zone systems, where you can set unique temperature preferences for each zone. To customize zones, start by identifying the areas of your home that require distinct temperature settings. Use the thermostat’s interface or mobile app to assign names and preferences to each zone.
- Assign unique names to each zone for easy identification.
- Set temperature ranges for energy efficiency and comfort.
- Enable zoned scheduling to adjust temperatures based on occupancy.
By customizing temperature zones, you can avoid heating or cooling unused spaces, reducing energy waste and lowering utility bills. Regularly review and adjust your zones to ensure they align with your lifestyle and seasonal needs for optimal performance.
Integrating with Smart Home Systems
Integrating the Rc Plus Thermostat with smart home systems enhances your ability to control and monitor your home’s temperature seamlessly. Compatibility with popular platforms like Amazon Alexa and Google Assistant allows for voice command functionality, enabling you to adjust settings hands-free. Additionally, the thermostat can integrate with other smart devices, such as lights and security systems, to create a unified smart home experience.
- Enable voice control through smart speakers for effortless temperature adjustments.
- Sync the thermostat with other smart devices for coordinated automation.
- Use smart home hubs to centralize control of all connected devices.
Integration ensures that your Rc Plus Thermostat works in harmony with your existing smart home setup, providing enhanced convenience and energy efficiency. Always check compatibility with your specific smart home system for a smooth and hassle-free experience.

Troubleshooting and Maintenance
Regular maintenance ensures optimal performance of the Rc Plus Thermostat. Address common issues promptly, such as display malfunctions or connectivity problems, to prevent system downtime. Always refer to the user manual for specific troubleshooting steps.
- Check for firmware updates to resolve software-related issues.
- Clean the thermostat’s sensors to maintain accuracy.
- Inspect wiring connections for any loose or damaged components.
Maintenance routines, like resetting the thermostat or replacing batteries, can restore functionality and extend lifespan. Troubleshooting guidelines help users identify and fix problems efficiently, ensuring consistent heating and cooling performance.
Common Issues and Solutions
The Rc Plus Thermostat may encounter issues like blank screens, inconsistent temperature readings, or connectivity problems. These can often be resolved with simple troubleshooting steps. Below are some common issues and their solutions:
- Blank or Unresponsive Screen: Restart the thermostat by disconnecting and reconnecting the power supply. Ensure all wiring connections are secure.
- Inaccurate Temperature Readings: Check if the thermostat is placed away from direct sunlight or drafts. Clean the sensor to ensure accurate measurements.
- Wi-Fi Connectivity Issues: Restart your router and ensure the thermostat is within range. Reset the thermostat’s network settings if necessary.
- Temperature Mismatch: Verify the setpoint and current temperature readings. Ensure the HVAC system is functioning properly.
Addressing these issues promptly can prevent system downtime and ensure optimal performance. Always refer to the user manual for detailed troubleshooting procedures.
Resetting the Rc Plus Thermostat
Resetting the Rc Plus Thermostat restores it to factory settings, which can resolve persistent issues or prepare it for a new installation. To reset, press and hold the menu button until the screen displays “Reset,” then use a pin or small object to press the reset button located on the back or bottom of the thermostat. Release the menu button and wait for the device to reboot.
Important Notes:
- All custom settings, schedules, and smart integrations will be erased.
- The thermostat will revert to default temperature settings and modes.
- After resetting, you’ll need to reconfigure the device, including reconnecting to Wi-Fi and setting up preferences.
Resetting is a useful troubleshooting step if the thermostat malfunctions or if you’re transferring ownership. Always perform a reset before reinstalling or gifting the device. For detailed instructions, consult the official user manual or manufacturer support.
Updating Firmware and Software
Keeping the Rc Plus Thermostat’s firmware and software up to date ensures optimal performance, security, and access to new features. Updates are typically released to improve functionality, fix bugs, or enhance compatibility with smart home systems. To update, navigate to the settings menu on the thermostat or through the companion app.
Steps to Update:
- Ensure the thermostat is connected to Wi-Fi for automatic updates.
- Go to the settings menu and select “System” or “About.”
- Choose “Check for Updates” and follow on-screen instructions.
- Allow the thermostat to download and install the update; this may take a few minutes.
- The device will reboot automatically after the update completes.
Regularly updating your Rc Plus Thermostat guarantees you have the latest features and security patches. Always ensure the device has a stable internet connection before starting an update. For manual updates or troubleshooting, refer to the official user guide or contact customer support.
Cleaning and Maintaining the Thermostat
Regular cleaning and maintenance are essential to ensure the Rc Plus Thermostat operates efficiently and accurately. Dust buildup can interfere with temperature sensing and overall performance. Use a soft, dry cloth to gently wipe the thermostat’s exterior and screen. Avoid harsh chemicals or abrasive cleaners, as they may damage the display or housing.
For internal components, turn off power to the thermostat at the circuit breaker before cleaning. Use compressed air to carefully remove dust from vents or sensors. Avoid spraying liquids directly on the device to prevent damage. Clean the thermostat every 2-3 months or as needed, especially in dusty environments.
- Avoid exposing the thermostat to direct sunlight or drafts.
- Ensure proper airflow around the device for accurate temperature readings.
- Clean the device during seasonal changes to maintain optimal performance.
Regular maintenance ensures the Rc Plus Thermostat remains reliable and efficient, providing accurate temperature control and energy savings.
The Rc Plus Thermostat offers enhanced comfort, energy efficiency, and smart home integration. By following this guide, users can maximize its features and enjoy a seamless, personalized experience while saving energy.
Final Tips for Optimal Use
For the best experience with the Rc Plus Thermostat, regularly update your firmware to access new features and improvements. Schedule your temperature settings in advance to maintain consistent comfort and energy efficiency. Utilize geofencing to automatically adjust temperatures based on your location, saving energy when you’re away. Monitor your energy usage through the app to identify patterns and optimize your settings. Take advantage of voice control for hands-free adjustments, and clean the thermostat occasionally to ensure accurate readings. Experiment with custom temperature zones if your home supports zoned systems. Finally, explore all smart features and adjust settings to align with your lifestyle for maximum comfort and savings.
Resources for Further Assistance
For additional support with your Rc Plus Thermostat, refer to the official user manual, which provides detailed instructions and troubleshooting tips. Visit the manufacturer’s website for downloadable guides, FAQs, and software updates. Contact customer support directly via phone, email, or live chat for personalized assistance. Explore online forums and communities where users share experiences and solutions. Watch video tutorials on platforms like YouTube or the official website for visual guidance. If issues persist, consult authorized service centers for professional help. Regularly check the manufacturer’s blog for tips on optimizing your thermostat’s performance. By leveraging these resources, you can ensure a seamless and efficient experience with your Rc Plus Thermostat.