Welcome to the JVC Car Stereo User Manual. This guide provides essential information for safe and effective use of your car stereo system. Explore installation‚ operation‚ and maintenance tips to enhance your driving experience.
1.1 Purpose and Scope of the Manual
This manual is designed to guide users in understanding and operating their JVC car stereo system safely and effectively. Its purpose is to provide clear instructions‚ safety precautions‚ and troubleshooting tips to ensure optimal performance. The scope includes installation steps‚ basic operations‚ advanced features‚ and maintenance tips. It covers essential functions like volume adjustments‚ radio tuning‚ Bluetooth connectivity‚ and USB inputs. Additionally‚ it addresses common issues and solutions‚ ensuring users can resolve problems independently. The manual is structured to cater to both novice and experienced users‚ offering comprehensive guidance for every aspect of the stereo system.
1.2 Important Safety Precautions
Before using your JVC car stereo‚ ensure safe operation by following these precautions. Avoid high volume levels that may distract you while driving. Always adjust the volume to a level where you can hear external sounds clearly. Never operate the stereo while driving if it causes distraction. Ensure proper installation to prevent electrical interference or damage. Avoid exposing the unit to extreme temperatures‚ moisture‚ or direct sunlight. Use only authorized accessories to maintain compatibility and safety. Keep the stereo away from children to prevent accidental damage or improper use. Follow all local regulations regarding in-car electronics to ensure safe and legal operation.
Installation and Connections
This section guides you through installing your JVC car stereo‚ including pre-installation checks‚ step-by-step instructions‚ and wiring diagrams to ensure a smooth setup and proper system testing.

2.1 Pre-Installation Checklist
Before installing your JVC car stereo‚ ensure the following steps are completed to guarantee a safe and successful installation process. First‚ disconnect the car battery to prevent electrical shocks or damage. Gather all necessary tools and components‚ including wiring harnesses‚ mounting brackets‚ and screws. Adjust the volume to a low setting before reconnecting power to avoid sudden loud noises. Park the vehicle in a well-ventilated area and ensure all safety precautions are followed. Review the manual for specific model requirements and compatibility checks; Failure to follow these guidelines may result in system malfunction or safety hazards.
2.2 Step-by-Step Installation Guide
Start by parking your vehicle in a well-ventilated area and disconnecting the battery to ensure safety. Remove the old stereo by gently prying the trim panel and disconnecting the wiring harness. Mount the new JVC stereo using the provided brackets‚ ensuring it fits securely. Connect the wiring harness to the car’s electrical system‚ matching the color-coded wires carefully. Reconnect the battery and test the stereo to confirm proper function. Finally‚ adjust the settings and ensure all features operate smoothly. Follow the manual for specific model instructions and consult a professional if unsure. Proper installation ensures optimal performance and safety.
2.3 Wiring and Connection Diagrams
Refer to the wiring diagrams provided in the manual to ensure correct connections. Match the color-coded wires from the JVC stereo to your car’s wiring harness. The diagrams detail power‚ ground‚ speaker‚ and accessory connections. Ensure all wires are securely connected to avoid short circuits. Use the provided connectors or solder joints for reliability. Consult the diagram for specific functions like Bluetooth or USB ports. If unsure‚ seek professional assistance to avoid damage. Proper wiring ensures safe and optimal stereo performance. Always follow the manufacturer’s guidelines for a hassle-free installation experience. Double-check connections before powering on the system.

Basic Operations
Master essential functions like volume control‚ radio tuning‚ and playback settings. Adjust volume to hear external sounds safely. Use buttons or touchscreen for easy navigation and operation.
3.1 Volume Settings and Adjustments
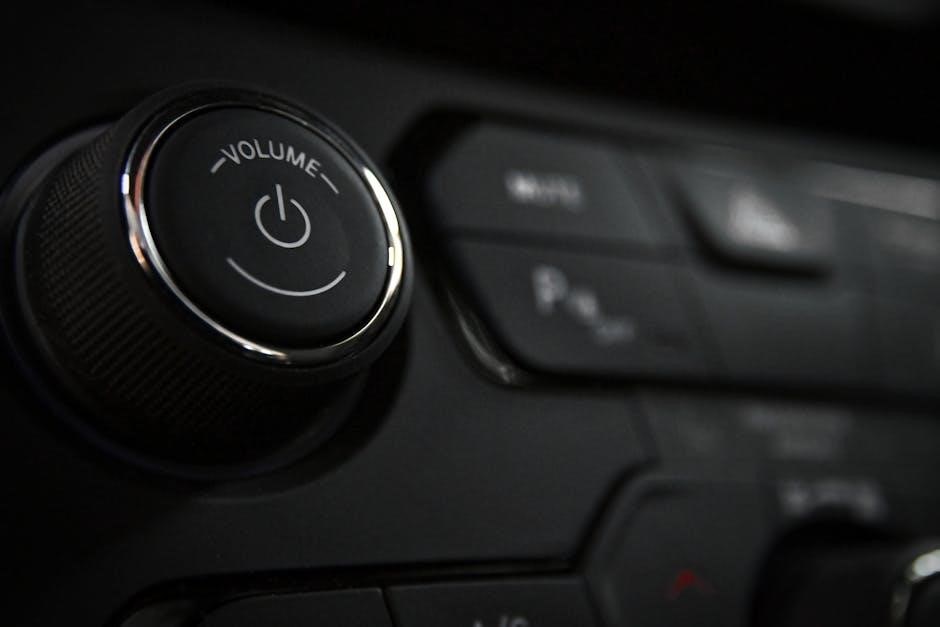
Adjusting the volume on your JVC car stereo ensures a safe and enjoyable listening experience. Use the volume knob or touchscreen controls to set the desired level. For safety‚ keep the volume low enough to hear external sounds‚ such as car horns or sirens. Avoid sudden loud noises by lowering the volume before playing digital files or switching sources. Some models allow custom volume settings‚ like balance and fader adjustments‚ to optimize sound quality. Refer to the manual for specific buttons or menu options to fine-tune your audio preferences; Proper volume adjustment enhances both safety and audio enjoyment while driving.
3.2 Radio Tuning and Preset Stations
Tuning your JVC car stereo allows you to enjoy your favorite radio stations on the go. Use the tuner to manually or automatically search for available stations. For convenience‚ save up to 18 FM and 6 AM preset stations for quick access. To set a preset‚ tune to the desired station‚ press and hold the preset button until it beeps. This feature ensures easy navigation between your favorite stations. Adjust the tuner sensitivity for clearer reception‚ especially in areas with weak signals. Properly tuned stations enhance your listening experience while driving. Always keep the volume at a safe level to hear external sounds for safety.
Advanced Features
Explore advanced features like Bluetooth connectivity‚ USB/Aux inputs‚ and customizable sound settings. These enhance your entertainment experience‚ offering seamless integration with modern devices and personalized audio preferences.
4.1 Bluetooth Connectivity Setup
To set up Bluetooth connectivity on your JVC car stereo‚ ensure your device is in pairing mode. Access the stereo’s menu‚ select Bluetooth settings‚ and search for available devices. Once your device appears‚ confirm the pairing process. The stereo will connect automatically once paired. For troubleshooting‚ reset the Bluetooth connection or re-pair the device if issues arise. Ensure your device is compatible with the stereo’s Bluetooth version for optimal performance. This feature allows hands-free calls and wireless music streaming‚ enhancing your driving experience with convenience and safety.

4.2 USB and Auxiliary Input Functions
Your JVC car stereo supports USB and auxiliary inputs‚ enabling seamless connectivity with external devices. Locate the USB port and auxiliary input jack‚ typically found on the front panel. Connect your smartphone‚ MP3 player‚ or USB drive to access stored music. The USB function also charges compatible devices while playing audio. For auxiliary inputs‚ use a 3.5mm cable to link devices without Bluetooth or USB capabilities. The stereo automatically switches to the connected input‚ allowing you to enjoy your music library. Supported formats include MP3‚ WMA‚ and WAV. Use the stereo controls to adjust playback settings‚ ensuring optimal sound quality during your drive.

Troubleshooting Common Issues
This chapter helps you identify and resolve common issues with your JVC car stereo. Learn to diagnose power problems‚ audio issues‚ and connectivity troubles. Refer to the manual for detailed solutions.
5.1 Diagnosing Power and Sound Problems
Identify power issues by checking the stereo’s fuse‚ wiring connections‚ and battery links. Ensure the ignition is on and all cables are securely connected. For sound problems‚ verify speaker connections and settings. Consult the manual for model-specific troubleshooting steps. If no sound is present‚ check volume levels‚ equalizer settings‚ and input sources. Distortion may indicate faulty wiring or blown speakers. Refer to the wiring diagram for proper connections. Resetting the stereo to factory settings can often resolve software-related issues. Always follow safety guidelines when diagnosing electrical components to avoid further damage or risk of injury.
5.2 Resetting the Stereo to Factory Settings
To reset your JVC car stereo to factory settings‚ press and hold the “MENU” and “VOLUME DOWN” buttons simultaneously for 5-10 seconds. This will restore default settings‚ erasing all custom configurations. Ensure all cables are connected securely before resetting. After resetting‚ the stereo will turn off. Turn it back on and reprogram your preferred settings‚ such as radio stations or equalizer adjustments. If issues persist‚ consult the manual for model-specific reset procedures or contact JVC support for assistance. Resetting is a useful troubleshooting step for unresolved software or connectivity problems‚ ensuring optimal performance and functionality.
Maintenance and Updates
Regularly update your JVC car stereo’s firmware to ensure optimal performance and compatibility. Clean the exterior with a soft cloth and avoid harsh chemicals. Check for software updates periodically to maintain functionality and enhance features. Proper maintenance ensures longevity and seamless operation of your car stereo system.

6.1 Firmware Updates and Software Compatibility
Regular firmware updates are crucial for maintaining optimal performance of your JVC car stereo. Visit the official JVC website to check for the latest software versions. Ensure your stereo is compatible with your smartphone or other devices for seamless connectivity. Use JVC-recommended apps‚ such as My Sound EQ‚ to customize settings. Updating firmware may require a USB connection or over-the-air updates‚ depending on the model. Always follow the instructions provided in the update guide to avoid system malfunctions. Keeping your stereo updated ensures compatibility with new devices and enhances overall functionality and sound quality. Regular checks help maintain a smooth and enjoyable driving experience.
6.2 Cleaning and Care Tips

Regular maintenance ensures your JVC car stereo performs optimally and lasts longer. Use a soft‚ dry cloth to wipe the display and controls‚ avoiding harsh chemicals that may damage surfaces. For stubborn stains‚ lightly dampen the cloth with water‚ but avoid moisture seeping into openings. Clean buttons and knobs gently to prevent damage. Avoid exposing the stereo to extreme temperatures or direct sunlight‚ as this can affect performance. Store the remote control in a dry place to maintain functionality. For screen protection‚ apply a high-quality screen protector to prevent scratches. Regular cleaning and proper care will keep your JVC car stereo in excellent condition‚ ensuring a crisp sound and smooth operation.